Knowing how to remove acne in photo guarantees that your pictures are always beautiful, whether you’re taking them for personal or business purposes. This provides great benefit since we’re in the era where communication is heavily influenced by images, presenting your best self through photos has never been more important. Having acne is natural but it can sometimes affect your confidence in taking and sharing photos. It may lead to hesitation in posting on social media or sharing memories with loved ones. For many, seeing acne in photos can feel like an amplified reminder of insecurities, even when those imperfections are part of being human. Thankfully, there are available photo editing tools that can remove acne from pictures easily. This article explores the importance of having acne-free photos, online tools to help you remove them, and tips to achieve flawless results.
How to Remove Acne in Photo
- Why Remove Acne from Photos?
- Online Tools to Remove Acne from Photos
- Tips on How to Remove Acne in Photo Effectively
Why Remove Acne from Photos?
Acne in your photos can be distracting and might ruin the showcase of your true beauty. Taking photos on special occasions or just taking a casual selfie, having clear skin in your pictures can make an impression. Learning how to remove acne in photo can:
- Boost Confidence: You can proudly share your photos on social media, dating apps, or professional platforms without having second thoughts.
- Create a Polished Look: It is ideal for important celebrations like weddings, graduations, birthdays, or for business headshots.
- Enhance Your Features: It draws attention to your eyes, smile, and other defining traits instead of acne.
- Improve Photo Quality: Flawless skin can elevate the overall appeal of the image, making it frame-worthy.
Remember, editing out acne is not about changing who you are. It’s about presenting your best self in the moments that matter.
Online Tools to Remove Acne from Photos
PicWish
PicWish is perfect for anyone who wants a fast and effective way on how to remove acne in photo. It is easy to navigate, and its AI-driven Photo Retouch feature erases acne in seconds while preserving the natural texture of your skin. The app’s simplicity makes it accessible for beginners, yet it’s powerful enough for advanced users who want high quality results. Regardless if you’re polishing a selfie or editing formal portraits, PicWish ensures your photos look polished and natural. Plus, it supports batch editing, making it ideal for those with multiple photos to refine. It’s your go-to for flawless, quick fixes with ease.
Here are the following steps to remove acne from pictures using PicWish:
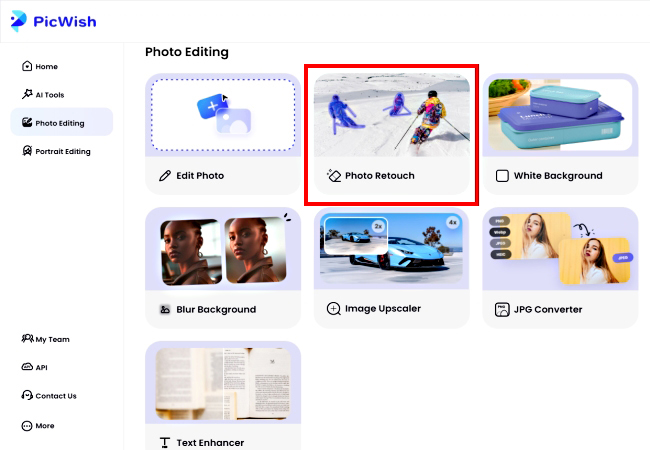
- First, search and visit the PicWish website on your online browser. Then select “Photo Retouch” under Photo Editing.
- Next, click “Upload Image” to choose and select the image that you want to edit.

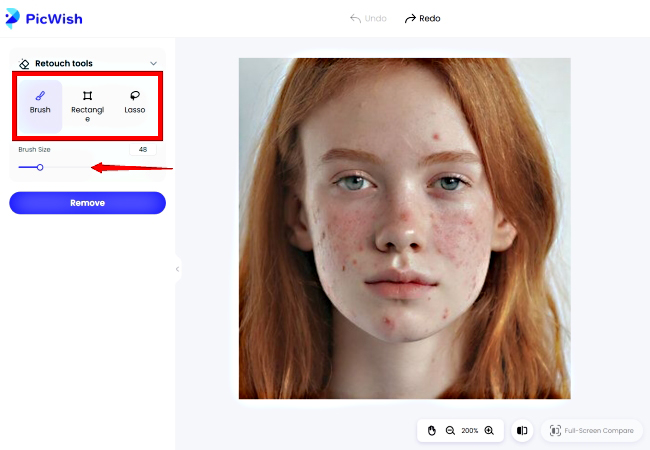
- Once your image is uploaded, you can now choose among the Retouch tools and use it to remove the acne on your picture. If you choose Brush, you can adjust its size according to your preference.
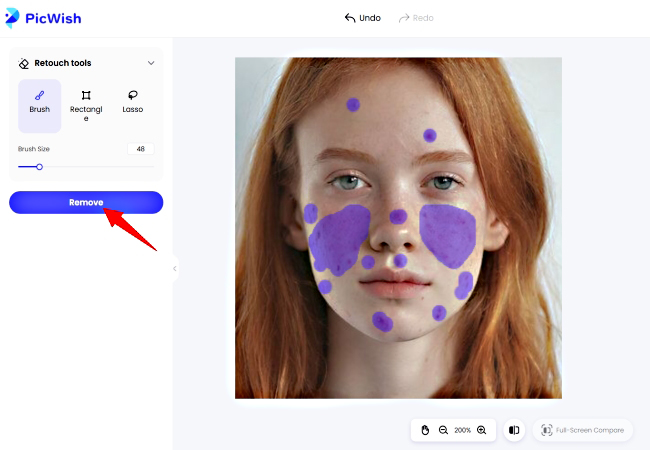
- After that, glide it on the acne spot of your photo then click “Remove”.
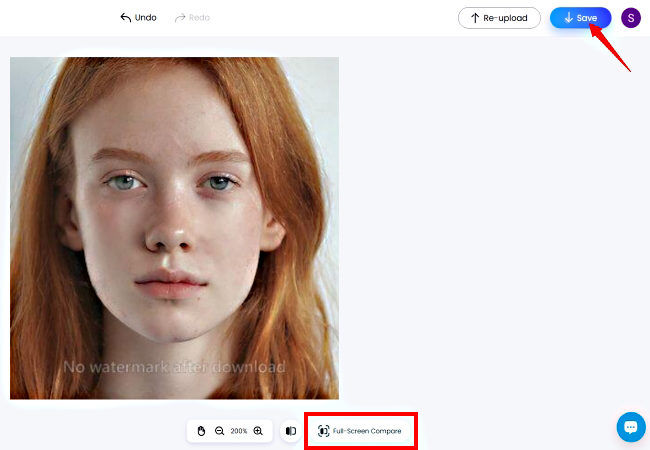
- To compare the before and after results, click the “Full-Screen Compare” button. Lastly, click “Save” to download your image.
Fotor
If you’re considering ways on how to remove acne in photos, Fotor offers strong and flexible features to get clear, clean photos. With its Magic Erase feature, this multifunctional app effectively gets rid of acne while keeping the texture and color of your skin. It also gives users the choice to adjust lighting, apply special filters, and refine other aspects of the image. Additionally, Fotor guarantees a user-friendly editing experience that caters all users, from beginners to expert photo editors. Its regular updates and innovative features make it a trusted choice for those who demand high-quality photo enhancement.
Here are the following steps to remove acne from pictures using Fotor:
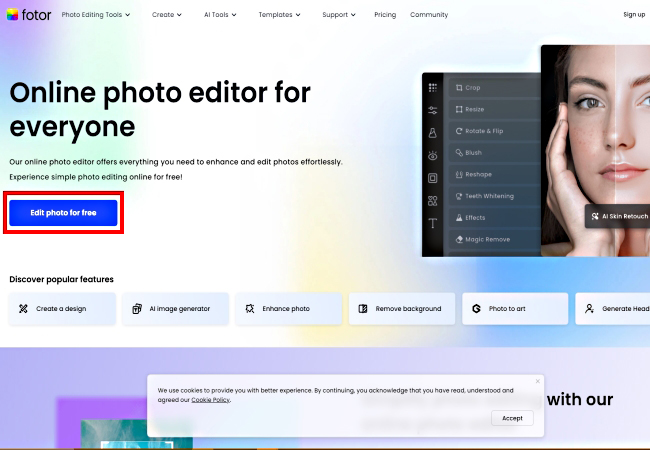
- First, go to the Fotor website and click “Edit photo for free”.
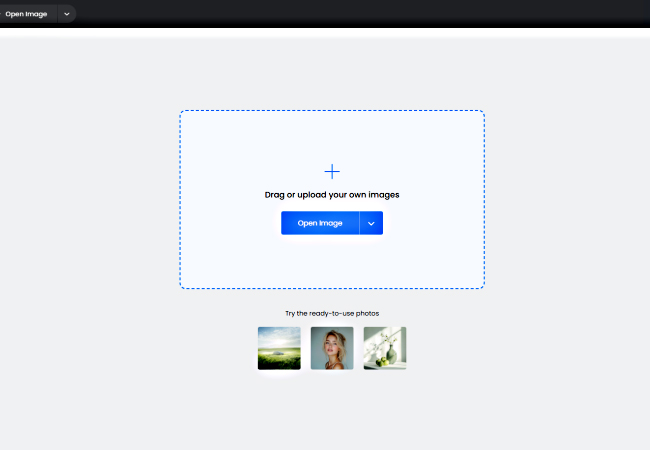
- Next, upload your image by dragging it to the panel or by clicking the “Open Image”.
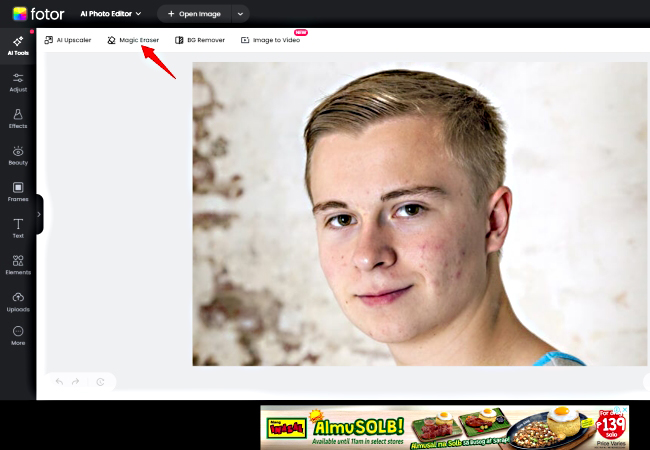
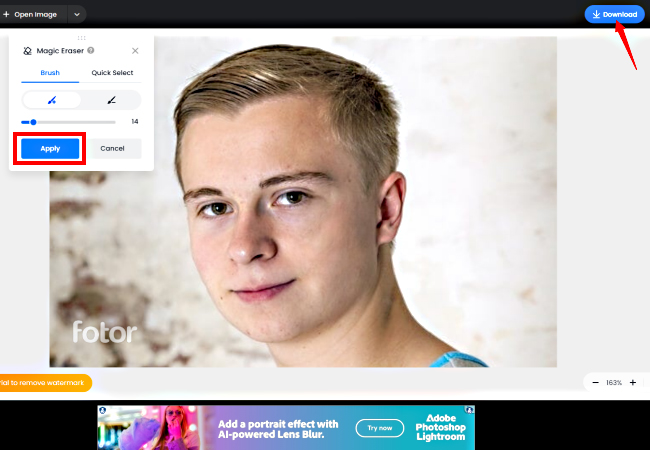
- Once your image is uploaded, select the “Magic Eraser” feature on the upper left side of your screen.
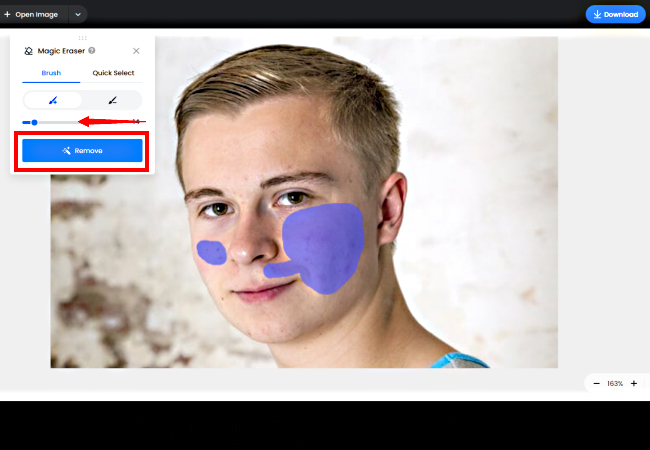
- Adjust the size of the brush according to your preference and glide it on the acne spots of your picture. Then click the “Remove” button.
- After that click the “Apply” button. Then, to save, click the “Download” button on the upper right portion of your screen.
Pixelcut
Pixelcut’s Magic Eraser is an effective tool on how to remove acne in photo quickly and effectively. Using advanced AI technology, it allows you to easily erase acne or other skin imperfections with precision. After editing, the Pixelcut ensures a clean and natural appearance by blending in with the surrounding areas. With just a few easy steps, its Magic Eraser makes it effortless to get smooth, flawless skin, whether you’re enhancing a selfie or portrait. Even beginners can quickly produce high quality edits thanks to its user-friendly interface.
Here are the following steps to remove acne from pictures using Pixelcut:
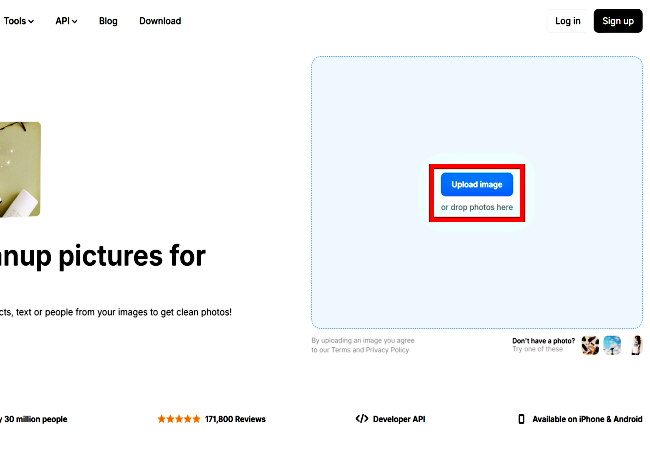
- On your online browser, loof for the Pixelcut website and select “Magic Eraser”.

- Next, click “Upload Image” or drop your photo in the upload panel.
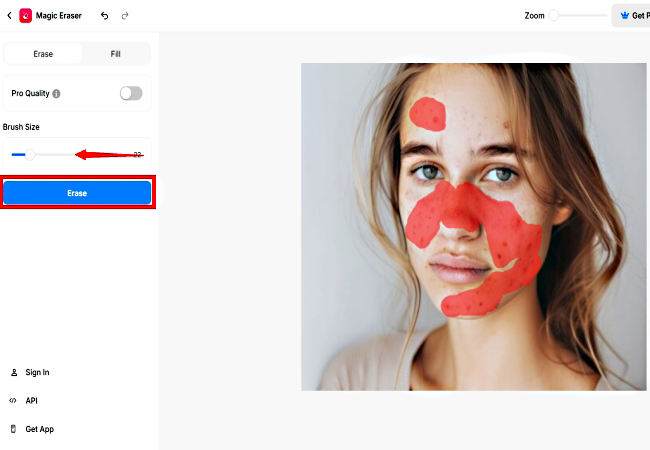
- Once your image is uploaded, adjust the size of your brush and glide it on the acne spots of your image. Then click “Erase”.
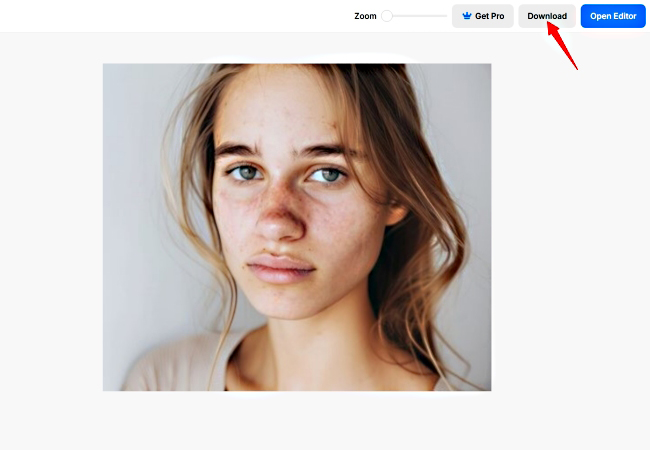
- Lastly, click the “Download” button to save your image.
Tips on How to Remove Acne in Photo Effectively
Achieving natural and high quality edits when learning how to remove acne in photo is easier with these helpful tips:
- Keep It Subtle: Photos that were actually over-edited may appear unnatural and strange. Always do slight adjustments.
- Preserve Skin Texture: Choose the correct online photo editing tool that can keep the true tone and texture of your skin.
- Work with Good Lighting: Clear photos that have good lighting enhance editing results.
- Experiment and Refine: Try several tools to find the one that aligns with your style and needs.
Conclusion
The days when having acne makes a photo useless are long gone. You can now try how to remove acne in photo with tools like PicWish, Fotor, and Pixelcut. These solutions not only make your images look better, but they also give you the confidence to share them. Consider the helpful tips in this article to get edits that seem natural and reveal your actual beauty. Create images you’ll be proud to share by experimenting with these tools now!


Leave a Comment