

Make Passport Size Photo Online Free
- Average Cost of a Professional Passport Photo
- How to Take Passport Photo at Home
- PicWish Passport ID Maker
- Enhance Passport Photo at Home
Average Cost of a Professional Passport Photo
The average cost of it includes the fee charged by a photography studio or a passport photo service. This varies depending on various factors such as the reputation of the studio, additional services, and the number of copies requested. In general, the cost can range anywhere from $10 to $30 per set of photos. Some studios may offer discounts for multiple copies. Meanwhile, getting passport photos taken professionally can provide high-quality results. Additionally, it also ensures to meet strict requirements of passport authorities. However, given the availability of technology for taking your own passport photo, many people choose the DIY approach to save money and time.
How to Take Passport Photo at Home
Taking a good passport photo at home requires attention to detail. You also need to follow specific guidelines to ensure that the photo meets the requirements. Here’s a step-by-step guide to help you capture a professional-quality passport photo in your home.
Research the Requirements: Before you begin, familiarize yourself with the passport photo requirements of the country where you’re applying for a passport. These requirements typically include specifications for dimensions, background color, facial expression, and other details.
Set Up Your Space: Choose a well-lit area in your home with a plain background. Ideally, use a white or off-white wall as your background to meet the background color requirements. Ensure that the lighting is even and avoids harsh shadows on your face.

Camera Setup: Use a digital camera or smartphone with a high-resolution camera to capture the photo. Make sure the camera is stable, either by using a tripod or resting it on a steady surface, to avoid blurry images.
Take Multiple Shots: Capture several photos to increase your chances of getting a good shot. Experiment with different poses and expressions while ensuring that you still meet the requirements for facial expression and composition.
Review and Select: Once you’ve taken multiple shots, review them on your camera or smartphone. Look for photos where your face is clear, well-lit, and meets all the necessary requirements. Choose the best photo to use for your passport application.
Edit if Necessary: If needed, use photo editing software to crop the image to the required dimensions and adjust the brightness or contrast. Avoid excessive editing that alters your appearance, as passport authorities may reject overly manipulated photos.
Print the Photo: Print the selected photo on high-quality photo paper at the appropriate size. Ensure that the printout matches the dimensions specified by passport authorities.
Submit with Your Application: Attach the printed passport photo to your passport application or submit it electronically, following the instructions provided by the passport issuing authority.
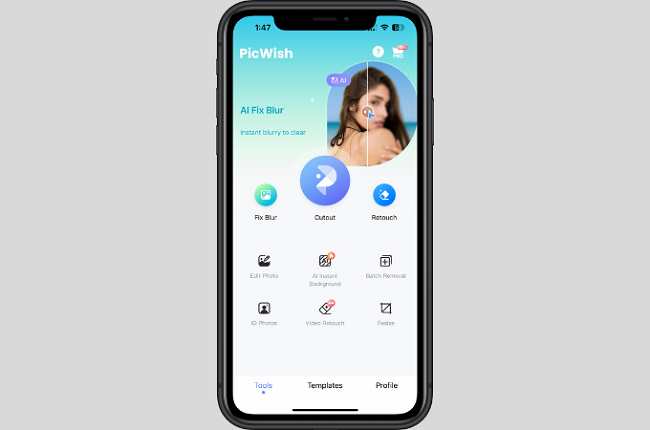
PicWish Passport ID Maker
Now, let’s move on and talk about a more cost effective method to make passport size photo online free. With PicWish, you can edit the picture to make sure it complies with the requirement. Furthermore, you don’t have to worry if your background is bad. PicWish can automatically remove the background and replace it with white, which is the usual background color requirement. Also, it provides several preset size fit for the usual standard of passport photo from different location. In fact, you can even customize the size according to your needs.
Follow the steps to edit your passport photo at home:
- Access your browser and visit the Free Passport Photo Maker of PicWish. Click Start Now to begin.
![access picwish website]()
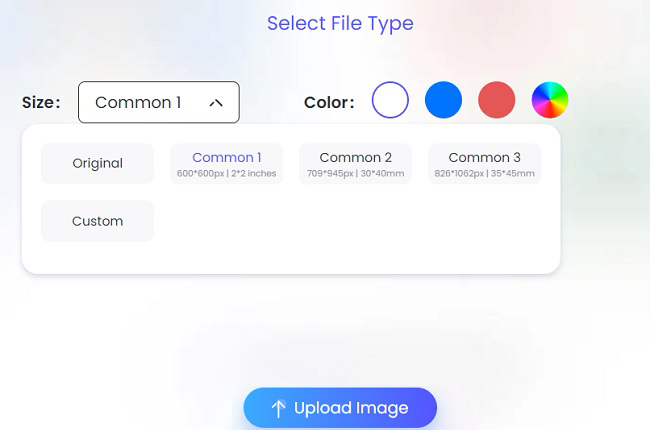
- Next, customize the size according to the requirement and select White as the background color. Upload the photo afterward.
![set up the passport photo]()
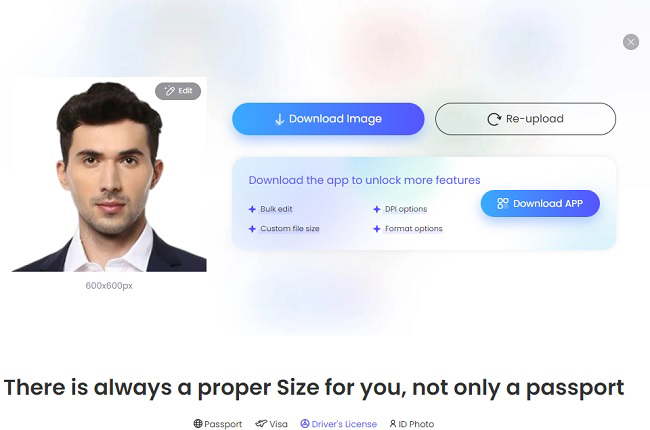
- Wait for a few seconds to process the picture. Once done, download the passport ID photo.
![take passport photo at home using picwish]()
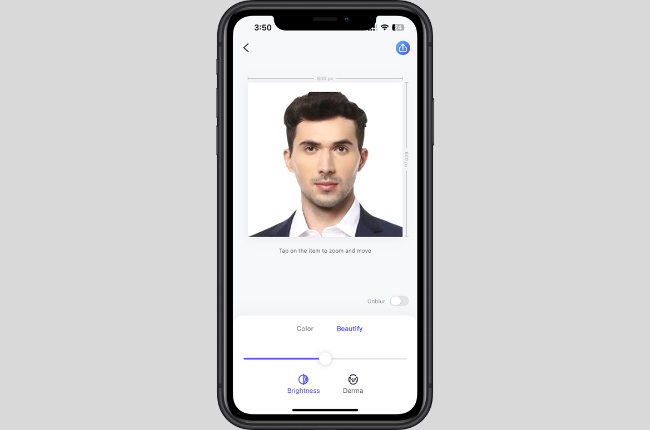
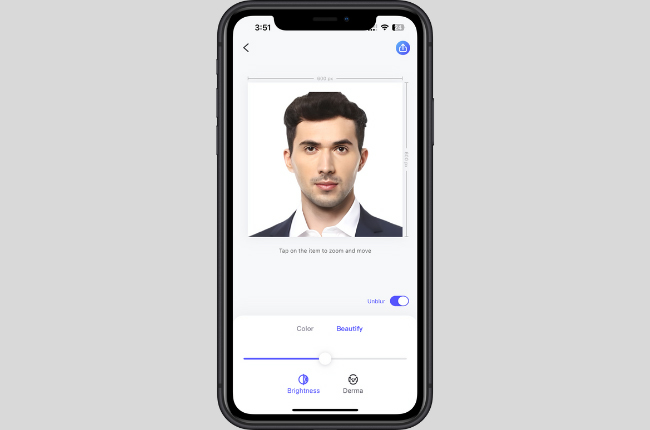
Enhance Passport Photo at Home
In case you’re taking your own passport photo and it appears blurry, there is still a fix for that. The PicWish app has a tool that can unblur the image and make your portrait perfect. Additionally, this app is available for both Android and iOS smartphones. The app boasts its AI face enhancement technology that retouches the picture automatically. Here, expect a clearer, crisper, and more precise result.
Check here to enhance blurry passport photos:
- Download and install the app on your mobile phone.
- Launch it and select the ID Photos tool and select the size or type of document you prefer.
![upload the picture]()
- Upload the photo and turn on the Unblur option to enhance the passport photo.
![select the unblur tool]()
- Finally, download the enhanced passport ID picture.
![download the enhanced passport photo]()
Conclusion
Taking your own passport photo at home is not only convenient but also cost-effective. Follow the step-by-step guide to ensure that your passport photo meets all the necessary requirements. Additionally, with the availability of online tools like PicWish, you can further enhance your passport photo or even create one for free. Say goodbye to long waits and expensive fees, and hello to hassle-free passport photo solutions.


Leave a Comment