Switching HEIC to JPG Mac Online for Free
HEIC, or High-Efficiency Image Container, is an amazing file format when it comes to image quality. This format occupies less storage space on your phone than JPG format, while guaranteeing high-quality photos. However, HEIC is only compatible with Apple devices and cannot be viewed on Windows PC or Android phones. Therefore, it’s essential to learn how to convert HEIC to JPG on Mac.
You might be wondering why we keep mentioning JPG in this article. Well, JPG is a universal image file type that’s compatible with all devices, including Mac. It also supports all types of browsers. By learning how to convert HEIC to JPG on Mac, you can create shareable photos that can be viewed by anyone. More than that, it is also quick to send due to its smaller file size. And to help you out, below are the different solutions you can try to convert HEIC to JPG Mac.
PicWish – Switch HEIC to JPG Mac Online Converter
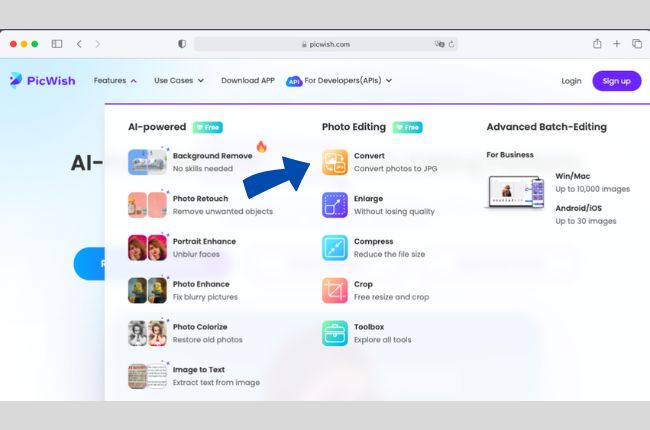
One of the tools to convert HEIC image to JPG is by using PicWish Image converter. This app is an online tool that gives you the easiest way of image format conversion including helping you on how to change from HEIC to JPG on Mac. It has a promising image converting technology as it does not harm the quality of the image converted. Besides HEIC, it also can also save Webp as JPG and PNG as JPG quickly.
See the steps below on how to use this online HEIC to JPG Mac:
- Visit the official website of Picwish and go to Convert tab.

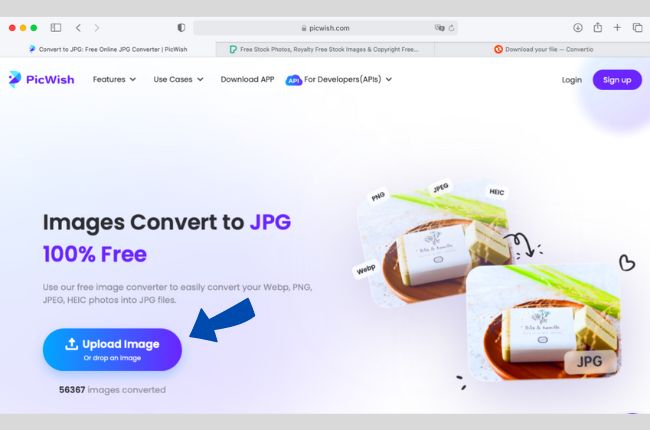
- Upload the photo you would like to convert.

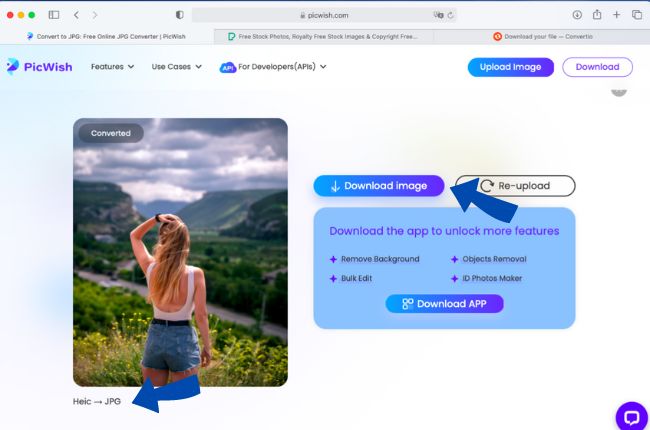
- Wait shortly for the instant result. Save your photos once done.

Preview App – Built-in HEIC to JPG Mac Converter
You can also use the built-in media viewer on Mac – the Preview App. It is one of the straightforward ways you can do it. However, this is only if you want to save all your future photos to JPG by default. And also, just to remind you, JPGs will take a lot of space on your storage as your output is not compressed yet.
Steps on how to change from HEIC to JPG on Mac:
- Go to your Preview App and open your HEIC photos.
- Then, go to the File tab and hit Export.
![heic jpg preview export]()
- Next, select JPG from the drop-down menu under Format tab.
![heic jpg preview change]()
- Rename your file and click Save once done.
Automator – Advanced HEIC to JPG Mac Converter
Automator can also help you on how to change from HEIC to JPGg on Mac easily. This app is also a built-in tool on Mac that lets you do manual tasks quickly including the conversion of photos saved in HEIC to JPG. Interestingly, this method is best if you are about to change the formats of multiple photos simultaneously. Just bear with this method as it has too many steps to do.
Follow the steps below on how to convert HEIC to JPG on Mac:
- Launch Automator and open New Document and click Quick Action.
![heic jpg automator quickaction]()
- Double-click the Copy Finder Items action to select the folder where you want to save your JPG images.
![heic jpg automator copyfinder]()
- After that, navigate to Change Type of Images and select JPG from the drop-down menu.
![heic jpg automator changetypes]()
- Consequently click File and Save to name Your Quick Action.
![heic jpg automator jpg]()
Conclusion
After learning how to convert HEIC to JPG on Mac, you no longer have to worry about image compatibility issues. Choose among the methods we offer and start sharing your photos without limitations.


Leave a Comment