Rotate Image on iPhone
- Rotate images on iPhone using the Photos App
- Rotate images on iPhone using the Camera App
- Rotate images on iPhone using Third-Party Apps
- Troubleshooting Common Issues
Rotate images on iPhone using the Photos App
A. Accessing the Photos App
The Photos app is a default application on all iPhones and is often the first choice for basic photo editing tasks such as to rotate image on iPhone.
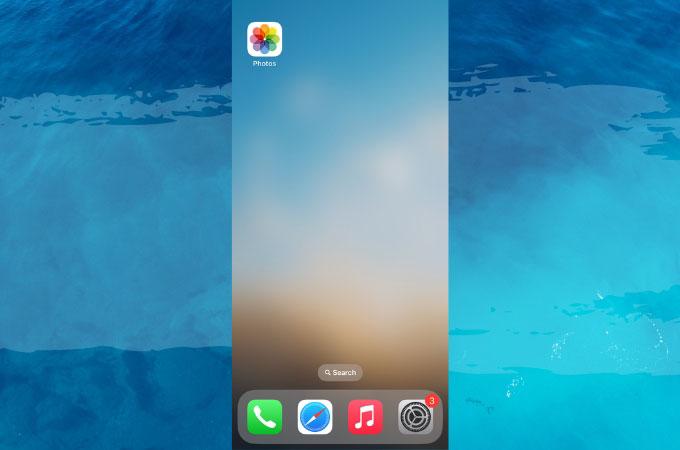
- Open the Photos app: Locate and tap on the Photos app icon on your home screen.

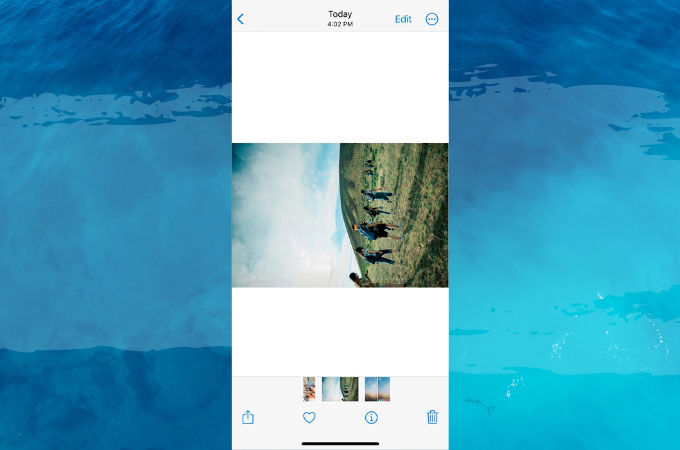
- Navigate to the image: Scroll through your library or use the search function to find the image you want to rotate.

B. Rotating the Image
Once you have the image open, follow these steps to rotate it:
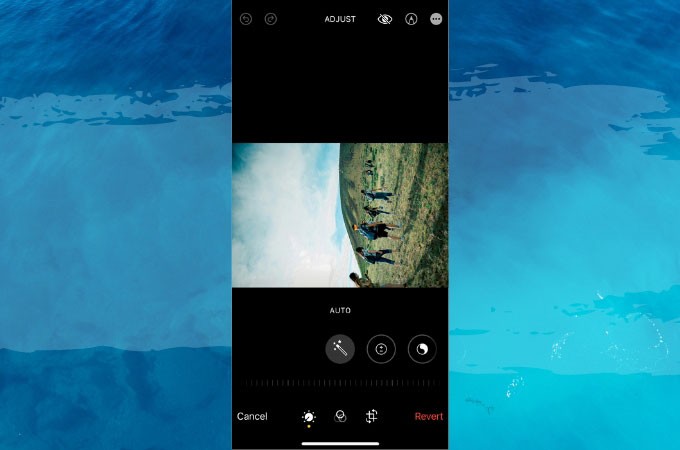
- Tap on the image: Open the image to view it in full screen. Then tap the “Edit” button: Located at the top right corner of the screen.

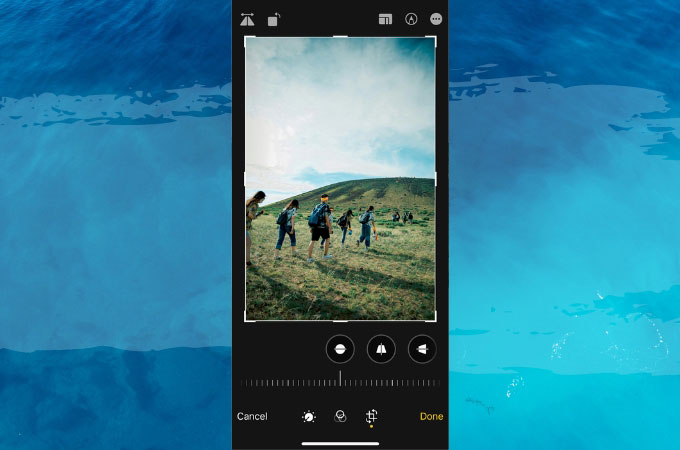
- Select the “Crop and Rotate” icon: This icon looks like a square with arrows around it.

- Use the rotation tool: Rotate the image in 90-degree increments by tapping the rotation icon. Save the changes by tapping “Done” at the bottom right corner of the screen.

Rotate images on iPhone using the Camera App
A. Taking Photos with the Correct Orientation
Preventing the need for rotation starts with taking photos correctly:
- Hold the iPhone correctly: Ensure you hold your iPhone in the intended orientation (portrait or landscape).
- Let the iPhone auto-detect orientation: The iPhone typically detects the orientation of the camera automatically.
B. Editing Directly from the Camera App
You can edit photos directly after taking them:
- Access the recently taken photo: Tap on the thumbnail of the image in the bottom left corner of the Camera app.
- Follow the same steps as in the Photos app: Tap “Edit,” select the “Crop and Rotate” icon, and rotate the image.
Rotate images on iPhone using Third-Party Apps
Overview of Popular Apps
For more advanced editing features, you might consider third-party apps on how to rotate image on iPhone such as Snapseed, Adobe Lightroom, and VSCO. These apps offer additional tools and functionality that can enhance your photo editing experience.
Troubleshooting Common Issues
A. Image Appears Upside Down or Sideways
If your image appears upside down or sideways, follow these steps:
- Open the Photos app and locate the image.

- Edit and rotate: Tap “Edit,” use the rotation tool to correct the orientation, and tap “Done” to save.

B. Image Quality After Rotation
Rotating images should not affect their quality, but here are some tips to ensure the best results:
- Avoid excessive editing: Limit the number of edits to preserve the original quality of the image.
Conclusion
iPhone photo rotation is a straightforward process thanks to the intuitive design of the Photos app and the availability of powerful third-party apps. Whether you are making a quick adjustment or exploring creative edits, these tools provide the flexibility and convenience needed to perfect your photos. Experiment with different apps to find the one that best suits your needs and enjoy the ease of editing images directly on your iPhone.


Leave a Comment