

Quick Answer
To remove background in GIMP, open your image and use a selection tool like the Foreground Select Tool, Fuzzy Select Tool, or Paths Tool to isolate your subject. Then, delete the background and export the image as a PNG to preserve transparency. If you prefer a faster solution, AI-powered tools like PicWish can automatically remove backgrounds in just a few clicks.
Why Use GIMP to Remove Backgrounds?
GIMP is a free, open-source image editor available for Windows, macOS, and Linux. It offers a wide range of photo editing tools, including several selection tools that allow users to remove background in GIMP with precision. Because it’s free and feature-rich, GIMP is a popular alternative to paid software like Adobe Photoshop.
Many users choose GIMP for background removal because it gives them complete control over the editing process. Tools such as the Foreground Select Tool, Fuzzy Select Tool, and Paths Tool make it possible to isolate subjects and create transparent backgrounds without purchasing premium software.
GIMP is a great choice if you’re working with detailed images, want precise manual edits, or prefer using desktop software. However, since background removal is done manually, it can take longer to achieve clean results, especially for beginners or images with complex edges like hair or fur.
How to Remove Background in GIMP
Before you remove background in GIMP, keep the following in mind:
- Make sure you’re using the latest version of the software to access the newest features and performance improvements.
- Choose a high-resolution image for the best results.
- Ensure there is good contrast between the subject and the background, as this makes it easier to create accurate selections and achieve cleaner cutouts.
Method 1: Remove Background in GIMP Using the Foreground Select Tool (Recommended)
This method is powerful, but it can feel confusing the first time. The key is: you must complete all 3 stages (outline → mark subject → confirm selection). If you skip one, it won’t work properly.
Step 1. Open Your Image + Enable Transparency (Important)
- Go to File > Open and select your image.
- In the Layers panel (right side), right-click your image layer.
- Click Add Alpha Channel.
This step is required. Without it, the background will turn white instead of transparent.
Step 2. Roughly Outline Your Subject (Don’t be precise)
- Select the Foreground Select Tool (under Free Select tools).
- Draw a loose outline around your subject.
- Include the whole subject
- Don’t worry about edges or accuracy
- Press Enter
After pressing Enter, the background will look darkened—this is normal.
Step 3. Mark the Subject (This is the step most people miss)
- Now your cursor becomes a brush.
- Paint over ONLY the subject (not the background).
- Cover the main body of the subject
- You don’t need perfect strokes, just stay inside the subject
- Make sure you cover all important areas (hair, clothes, etc.)
If nothing changes, it usually means you didn’t paint enough of the subject.
Step 4. Confirm the Selection
- Press Enter again
Now you should see a “marching ants” selection around your subject.
If you don’t see it:
- Go back and paint more of the subject
- Make sure you pressed Enter twice (outline + final confirm)
Step 5. Invert and Remove Background
- Go to Select > Invert
- This selects the background instead of the subject
- Press Delete
You should now see a checkerboard pattern (transparent background).
Step 6. Export Correctly
- Go to File > Export As
- Choose PNG format
- Save your image
Method 2: Remove Background in GIMP Using the Fuzzy Select Tool
The Fuzzy Select Tool works best for images with plain or solid-colored backgrounds.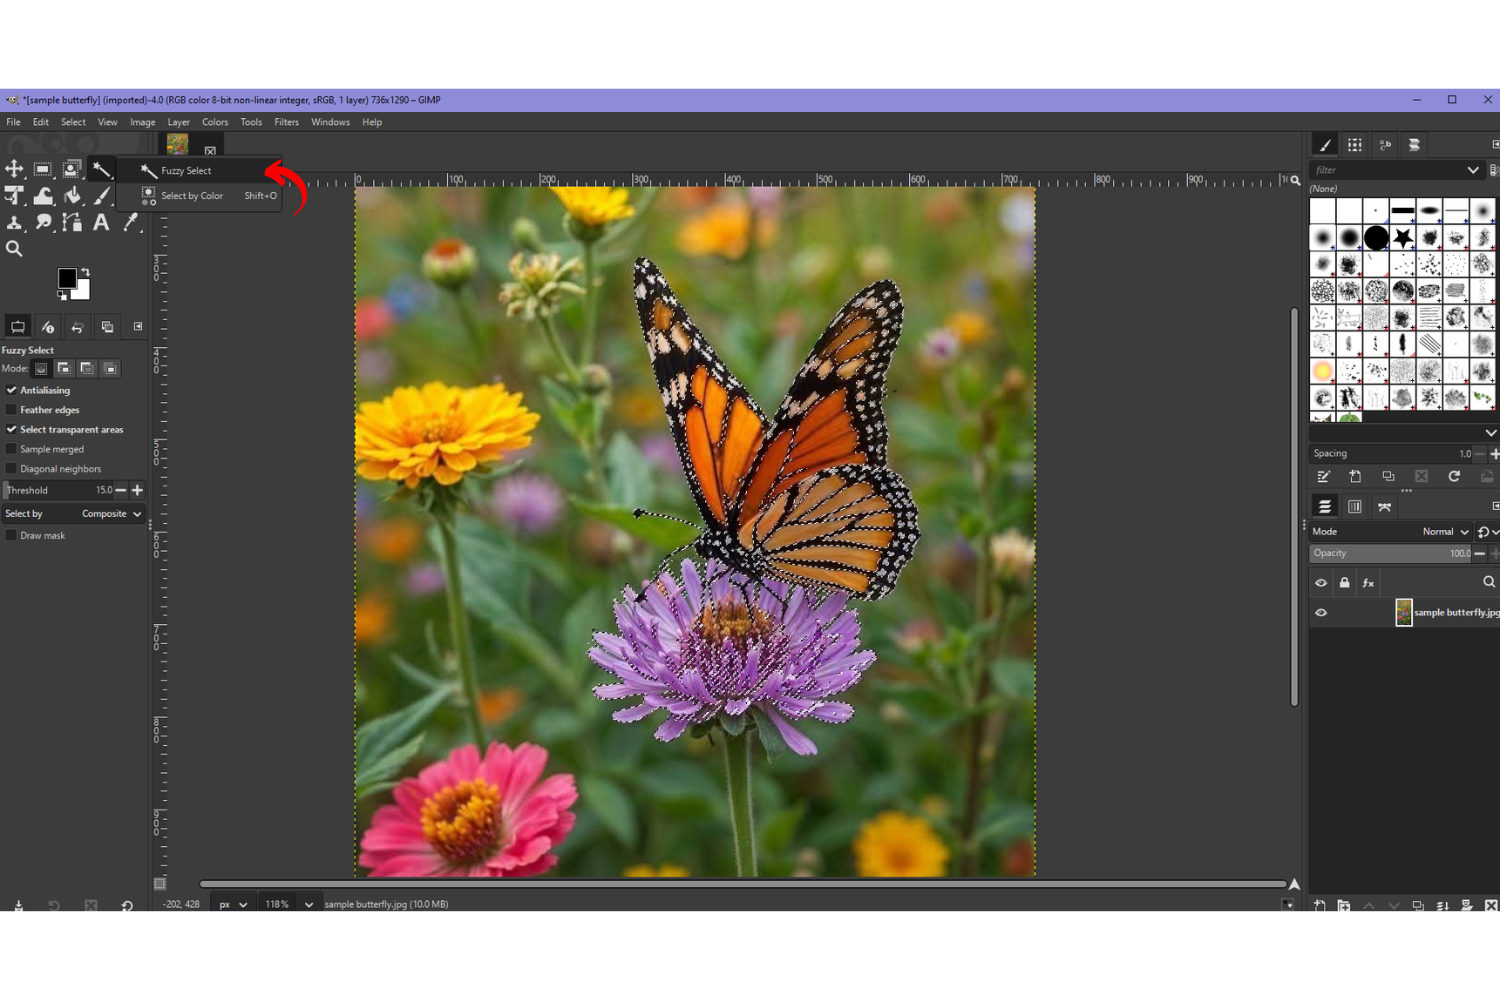
Step 1. Select the Background
Click the Fuzzy Select Tool, then click the background.
Step 2. Adjust Threshold
- Increase threshold → selects more area
- Decrease threshold → more precise selection
Step 3. Delete Background
Press Delete.
Step 4. Clean Edges
Use:
- Eraser Tool, or
- Select > Grow/Shrink for refinement
Method 3: Remove Background in GIMP Using the Paths Tool
Best for detailed or complex subjects. This method is more precise but also more challenging, so take your time when placing points.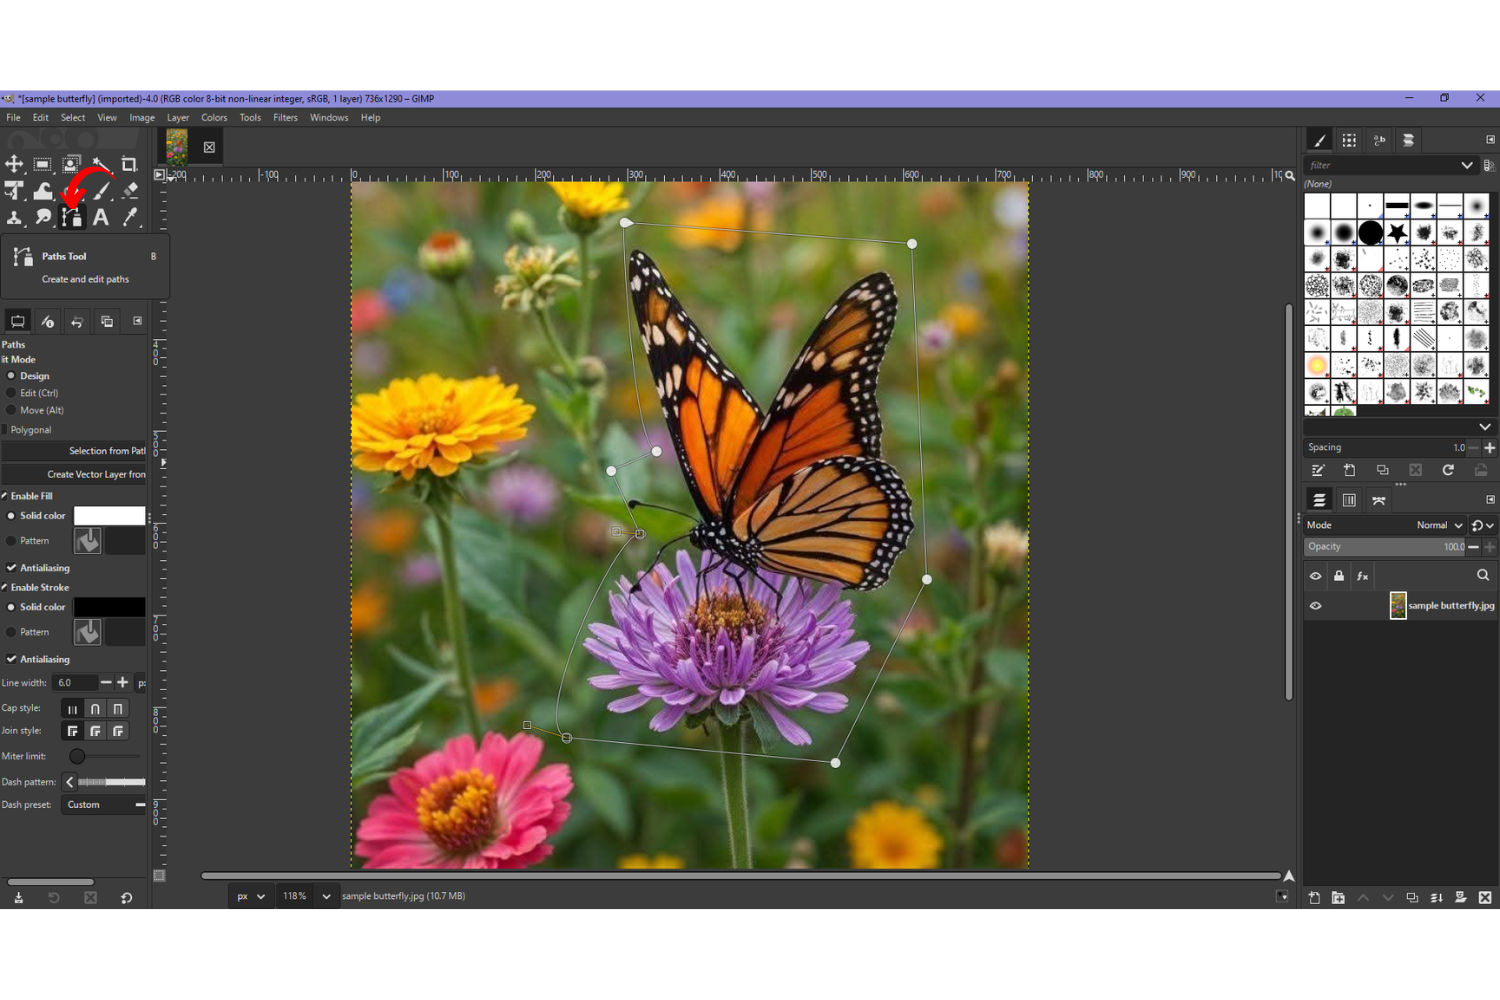
Step 1. Trace the Subject
Use the Paths Tool and click around the subject to create an outline.
- Click to add anchor points along the edge of the object.
- For curves, click and drag to adjust the handles for smoother lines.
- Try to place points close together in detailed areas for better accuracy.
- If you make a mistake, press Backspace to remove the last point.
Step 2. Refine and Convert to Selection
Once the outline is complete, carefully check the path for gaps or rough edges.
- You can move individual points to improve accuracy before finalizing.
- Press Enter or click Select from Path to turn the outline into a selection.
Step 3. Remove Background
Go to Select > Invert, then press Delete to remove the background.
- If the background doesn’t disappear cleanly, undo and refine your path for better results.
Step 4. Export as PNG
Save your image using File > Export As > PNG to preserve transparency.
Common Problems and Fixes
Even when you carefully remove background in GIMP, you may encounter a few common issues. Here are some quick solutions to help you achieve cleaner, more professional results.
Jagged Edges
Jagged or rough edges often occur when the selection isn’t refined enough. Zoom in on the image and use Select > Feather or manually clean up the edges with the Eraser Tool or Paths Tool for a smoother cutout.
Hair Not Selected Properly
Fine details like hair can be difficult to isolate using automatic selection tools. Try the Foreground Select Tool and carefully refine the selection around the hair. For best results, start with a high-resolution image that has good contrast between the subject and the background.
Background Isn’t Fully Removed
If small portions of the background remain, increase the selection accuracy or manually erase the leftover areas. You can also zoom in and switch between different selection tools to capture missed spots more precisely.
Transparent Background Shows White
If your transparent background appears white after exporting, make sure you’ve added an Alpha Channel before deleting the background. When exporting, save the image as a PNG file, as formats like JPG do not support transparency.
Easier Alternative: Remove Background with AI
If you find GIMP too time-consuming or prefer a quicker workflow, PicWish offers an AI-powered alternative that removes backgrounds in just a few clicks.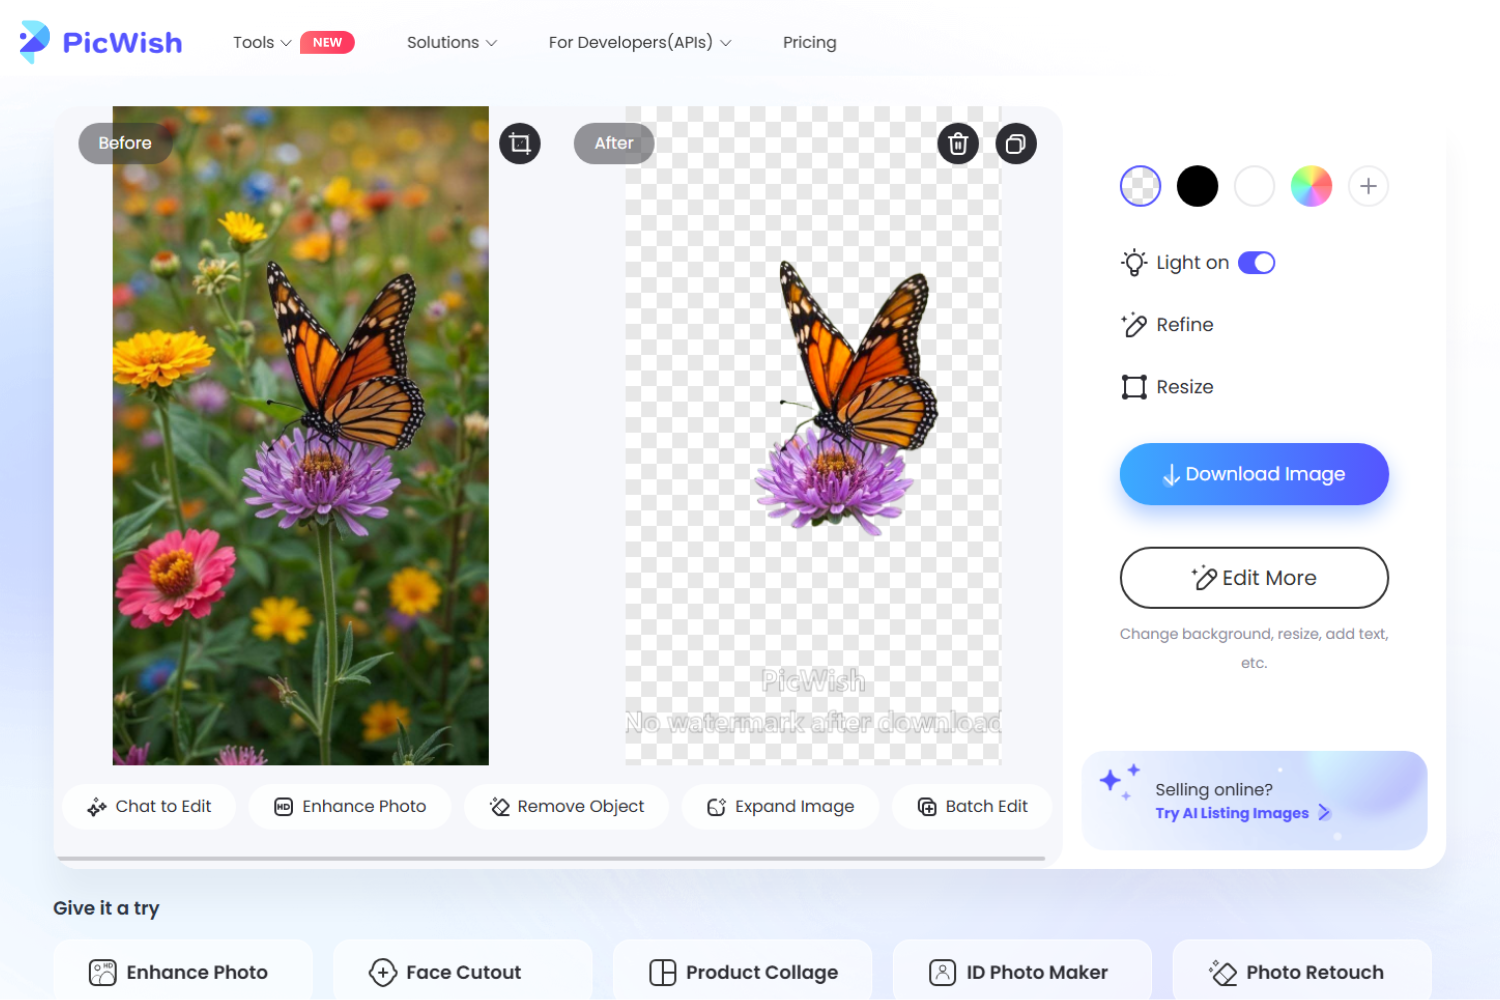
Why Choose PicWish?
- One-click background removal – Automatically detect and remove image backgrounds without making manual selections.
- Batch processing – Remove backgrounds from multiple images at once, making it ideal for eCommerce, marketing, and bulk editing.
- High-resolution exports – Download transparent PNGs in high quality for product photos, social media, presentations, and more.
- Works across devices – Use PicWish on the web, Windows, Android, or iPhone to edit images wherever you are.
- Beginner-friendly – Get clean, professional-looking results without the learning curve of manual editing.
If speed and simplicity are your priorities, PicWish is a great alternative to GIMP for removing backgrounds.
Tips for Better Background Removal
After you remove background in GIMP, use a few simple techniques to improve the result. These tips help create cleaner cutouts and maintain transparency:
- Use high-resolution images.
- Zoom in when refining edges.
- Add an alpha channel before deleting the background.
- Save your work as an XCF file before exporting.
- Export as PNG to keep transparency.
FAQs
📌 Does GIMP support batch background removal?
GIMP doesn’t have built-in batch background removal. You can use scripts or plugins, but they can be tricky. For multiple images, tools like PicWish offer easy batch processing.
📌 Can I change the background after removing it in GIMP?
Yes. You can add a new layer, import an image, or fill the transparent area with a color or gradient.
📌 Why does my exported image lose its transparent background?
This happens when exporting as JPG/JPEG, which doesn’t support transparency. Use PNG instead.
📌 Which GIMP tool should I use for complex subjects like hair?
The Foreground Select Tool works best for hair or fur. You can refine details further with the Paths Tool.
📌 Is there a faster alternative to GIMP for removing backgrounds?
Yes. AI tools like PicWish can remove backgrounds automatically in seconds, making them ideal for quick or bulk edits.
Conclusion
Learning how to remove background in GIMP helps you create transparent images using tools like Foreground Select, Fuzzy Select, or Paths. For a quicker option, you can also use AI tools like PicWish to remove backgrounds automatically in seconds.