

Fashion Product Photography Ideas for Better Listings
A strong product gallery does more than make fashion items look appealing. It helps shoppers understand what they’re buying, from the shape of a handbag to the details of a necklace or the fit of a jacket. Using different photography approaches can give customers a clearer view of each product without making your listings feel repetitive.
Here are 20 fashion product shoot ideas to try for your online store.
1. Clean Studio Product Shoot
A clean studio setup keeps attention on the product by removing distracting backgrounds. It’s a practical choice for sneakers, handbags, hats, jewelry, and other fashion items that need clear, consistent product images.
 Use a plain white or neutral background, balanced lighting, and a well-centered composition. Keep shadows subtle and make sure the product’s color and shape remain accurate. This style also works well as the main image in an online listing.
2. Multi-Angle Product Shoot
One image rarely shows everything a shopper needs to know. A multi-angle shoot presents the same item from several perspectives, helping customers understand its overall design and construction.
 For example, photograph sneakers from the front, side, and back. For handbags, include the front, rear, side, and interior when reference images are available. Keep the lighting and framing consistent across views so shoppers can compare details easily.
3. Three-Quarter Angle Shoot
A three-quarter angle adds depth by showing the front and one side of a product in the same image. This approach works particularly well for structured handbags, shoes, watches, and sunglasses.
 Position the product at a slight angle against a simple background. Use soft directional lighting to reveal its shape without creating harsh reflections or hiding important features. The result feels more dimensional than a straight-on product shot while remaining suitable for an online catalog.
4. On-Model Fashion Shoot
Some fashion products are easier to understand when shoppers can see them being worn. On-model photography provides context for clothing, shoes, hats, sunglasses, scarves, and jewelry.
 Choose a natural pose that keeps the featured item visible. For accessories, frame the image closely enough to highlight how the product sits or fits. Keep styling complementary and avoid letting other garments or accessories compete with the item being sold.
5. Dynamic Movement Shoot
Movement can communicate qualities that a static product image cannot fully convey. It can show how a scarf drapes, how a skirt flows, or how a model moves in a pair of sneakers.
 Capture a natural walking pose, a gentle turn, or a fabric movement that suits the product. Use a simple setting and keep the featured item sharp enough to inspect. This concept is especially useful for fashion brands that want their product galleries to feel more lively.
6. Complete Outfit Styling Shoot
Show shoppers how a fashion item can fit into a complete look. This approach combines a featured product with complementary pieces, such as pairing a handbag with a coordinated outfit or styling sneakers with casual clothing.
 Keep the featured item prominent and choose supporting pieces that match its intended style. For online listings, consider using this as a secondary image alongside a clean product shot so shoppers can see both the item itself and how it might be worn.
7. Fit and Wearability Shoot
For products worn on the body, fit and proportions can influence a shopper’s decision. A wearability-focused shoot shows how an item looks in use rather than relying entirely on isolated product images.
 Use a natural pose and a clear camera angle to showcase the relevant features. For clothing, this may mean showing the silhouette or garment length. For shoes, it could be a side view while worn. Avoid misleading angles or exaggerated proportions that could give shoppers an inaccurate impression.
8. Editorial Fashion Shoot
An editorial fashion shoot gives products a more distinctive visual identity through creative composition, lighting, styling, and setting. It’s suitable for statement handbags, designer-inspired accessories, sunglasses, shoes, and fashion collections.
 Choose a visual concept that complements the product, such as bold architectural lines, dramatic shadows, or a refined minimalist setting. Keep the item recognizable and clearly visible. Editorial images are especially useful for campaign pages, collection launches, and supporting gallery images.
9. Flat-Lay Styling Shoot
Flat-lay photography arranges products on a horizontal surface and captures them from above. It’s a versatile way to showcase accessories, jewelry, belts, scarves, wallets, and coordinated fashion sets.
 Arrange the products with enough space to distinguish each item. Add a few complementary props if they support the concept, but avoid cluttering the frame. For smaller items, use a close composition that reveals the product’s shape, finish, and visible details.
For more tips on arranging products and creating clean overhead compositions, explore our guide to flat lay product photography.
10. Hanger or Display Shoot
Not every fashion product needs a model. Hanging or display photography offers a simple way to present scarves, hats, clothing, and certain accessories against a clean backdrop.
 Choose a suitable hanger, stand, or display support that doesn’t distract from the item. Keep the product straight and fully visible, with soft lighting that preserves its natural colors. This approach can help stores create a consistent catalog even without a full studio setup.
11. Mannequin Display Shoot
Mannequins provide structure and shape without requiring a live model. They’re especially useful for clothing, hats, and wearable accessories that look different when displayed flat.
 Position the item naturally and check that its silhouette is easy to understand. Use a neutral background and lighting that reveals its shape without drawing attention to the mannequin. For accessories, select a display form that suits the product’s size and intended use.
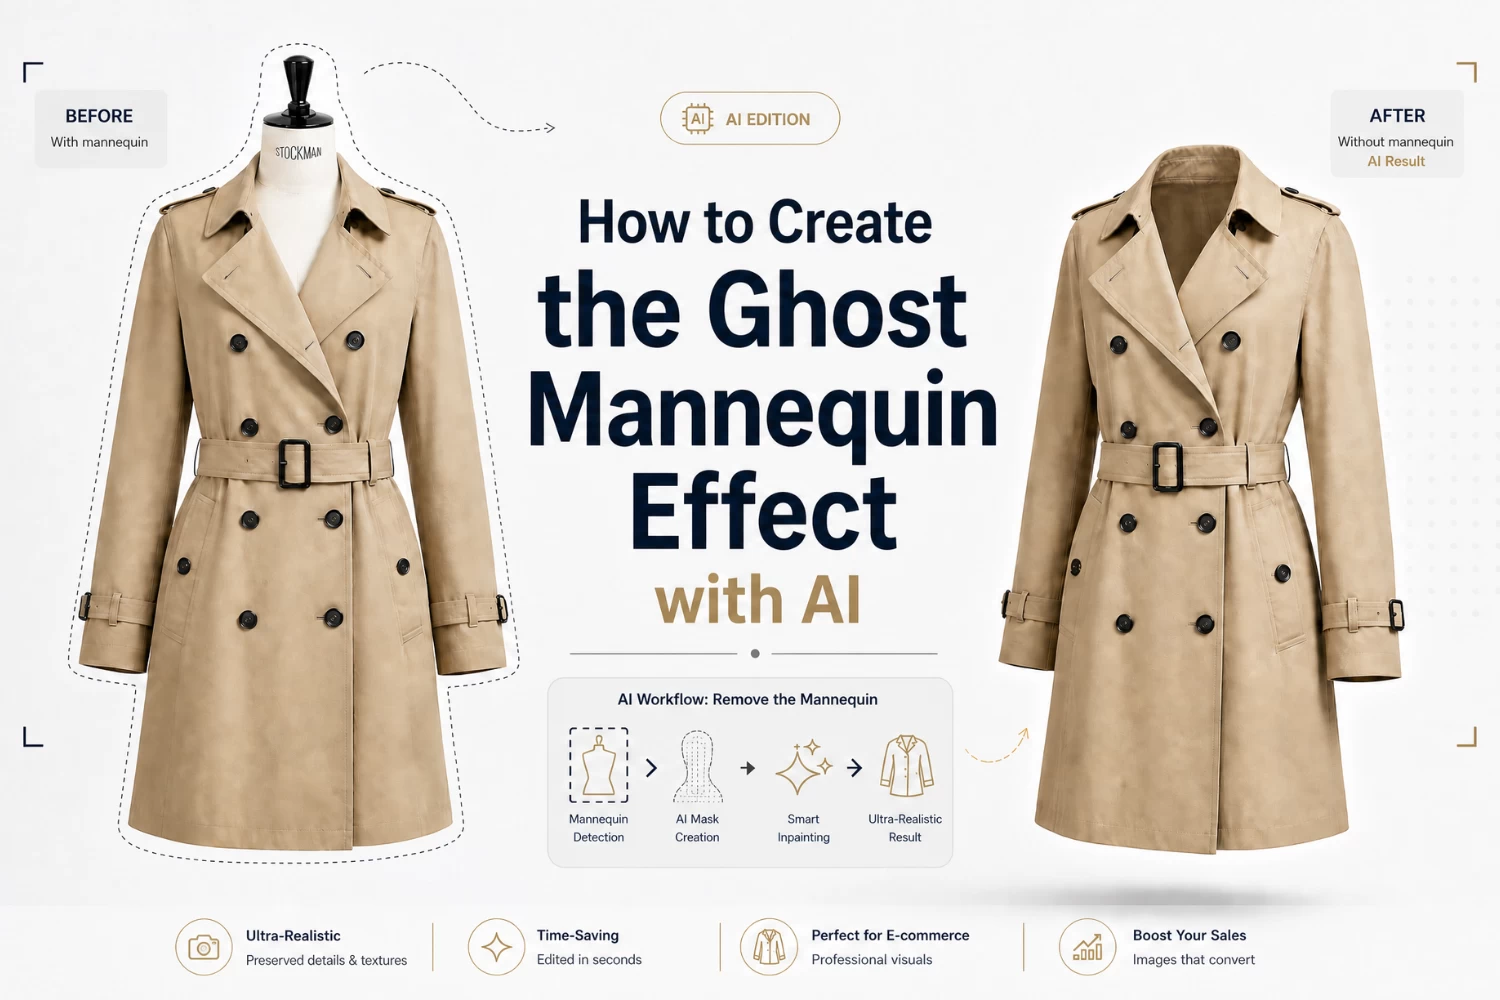
12. Ghost Mannequin Shoot
Ghost mannequin photography makes clothing appear three-dimensional without showing a mannequin or model. It is commonly used for jackets, shirts, dresses, and other garments where shoppers need to see the item’s structure.
 The technique typically combines carefully captured views to create an invisible-mannequin effect. Keep the garment’s neckline, sleeves, seams, and overall shape visible. This concept is more specific to apparel than to accessories, so use it when the product benefits from a hollow, structured presentation.
For a closer look at this technique, read our guide to ghost mannequin photography for fashion e-commerce.
13. Lifestyle Location Shoot
A lifestyle shoot places a fashion product in a setting that reflects how customers might use or wear it. For example, sneakers might be photographed in an urban environment, a tote bag in a café, or sunglasses outdoors in natural light.
 Choose a location that fits the product’s intended use and target audience. Make sure the item remains the main focus rather than blending into the background. Lifestyle images can help shoppers imagine the product in context, while clean catalog photos provide the details they need to evaluate it.
14. Material Texture Shoot
Close-up photography helps shoppers inspect the visible texture and finish of a fashion item. This is useful for leather bags, woven accessories, knitwear, fabric scarves, and textured shoes.
 Use soft directional lighting and a close crop to reveal the surface without making it look unnatural. Preserve the material’s actual appearance and color. Avoid adding texture or implying material qualities that cannot be verified from the product itself.
15. Craftsmanship Detail Shoot
Small design features can help distinguish one fashion product from another. A craftsmanship-focused shoot highlights details such as stitching, buckles, zippers, clasps, decorative hardware, and visible seams.
 Frame one or two important details clearly, using controlled lighting and a simple background. For jewelry, focus on the setting or clasp; for handbags, show the handles or hardware. These images can provide useful supporting evidence when shoppers want to inspect a product more closely.
16. Pattern and Print Showcase
Patterns, prints, and decorative motifs can be important selling points for fashion products. A dedicated image makes these details easier to see on printed scarves, patterned bags, clothing, shoes, and accessories.
 Photograph the relevant area clearly while leaving enough context to show where the pattern appears on the product. Use even lighting to maintain accurate colors and avoid glare. If the pattern repeats, choose a composition that demonstrates its design without distorting its scale.
17. Colorway Comparison Shoot
If a product comes in several colors, a colorway comparison can help shoppers understand the available options. This concept works for sneakers, handbags, hats, sunglasses, and other products offered in multiple finishes.
 Arrange the variants side by side with consistent framing, scale, and lighting. Keep the design identical across the images and change only the color or finish being represented. Use actual product references for every available variant rather than presenting AI-generated colors as real stock options.
18. Seasonal Fashion Shoot
Seasonal photography gives fashion products context for particular weather, occasions, or shopping periods. Boots and scarves may suit an autumn-inspired scene, while sunglasses and lightweight bags can work well in a summer setting.
 Choose props, lighting, and colors that complement the item and the intended season. Keep the product clearly visible, and avoid adding seasonal elements that obscure its features. This style can be useful for seasonal collections, gift guides, and promotional landing pages.
19. Size and Proportion Showcase
Product dimensions can be difficult to judge from a close-up or creatively angled photograph. A size and proportion shoot provides a clearer sense of the item’s scale.
 For handbags, show the full bag against a simple background or beside a familiar reference object. For hats and wearable accessories, use a suitable display form or model. Pair the photo with verified measurements when needed, and don’t rely on perspective alone to communicate exact size.
20. Product Feature Infographic
A product infographic combines a product photo with visual callouts to draw attention to specific features. It can work well for bags, shoes, watches, jewelry, and fashion accessories with several useful design details.
 Start with a clear product image and add simple labels or callout lines to point to visible features, such as pockets, closures, straps, or hardware. Keep the layout uncluttered and use accurate information. Verify every label before publishing, especially when describing materials, dimensions, or functional features.
How to Choose the Right Fashion Product Shoot
Not every product needs all those 20 fashion product shoot styles. The best combination depends on the item’s design, the information shoppers need, and the role each image plays in the listing.
| Product type | Useful shoot ideas |
| Clothing | On-model, movement, flat-lay, mannequin, ghost mannequin, texture |
| Shoes and sneakers | Studio, multi-angle, three-quarter angle, wearability, detail |
| Handbags and wallets | Studio, multi-angle, lifestyle, texture, craftsmanship, size |
| Jewelry and watches | Flat-lay, close-up details, on-model, colorway comparison |
| Sunglasses and hats | Studio, three-quarter angle, on-model, lifestyle |
| Scarves and belts | Flat-lay, display, texture, pattern showcase, outfit styling |
A practical product gallery usually starts with a clear main image, followed by additional angles and close-ups that answer likely customer questions. Lifestyle or editorial shots can add variety, while infographics can explain important features when necessary.
The goal is to answer shoppers’ most important questions without making the gallery repetitive. Keep image backgrounds, framing, and visual quality consistent across similar products, while making sure every image accurately represents the fashion product.
How to Create Clothing Listing Images More Efficiently
Planning different fashion product shoots can take time, especially when your store has many products or needs several listing visuals for each item. PicWish’s Fashion Listing Images Generator tool can help streamline the process by generating additional product listing visuals from uploaded product photos.
How to Use It:
1. Upload your product photos: Click + Upload Image(s) or drop/paste an image or URL. You can upload up to 5 images per product. Ensure the original photo clearly shows the product and its key details.
2. Add Product Info: Input product information such as product name, key selling points, target audience, desired scenarios, and specifications. You can also click AI Copywriter to generate these details automatically.
3. Adjust Generation Settings: Select your target marketplace platform, target language, model/style preset, and batch size.
4. Select Image Types: Choose the specific listing visual types you want to generate and set the quantity and aspect ratio for each.
5. Generate and Review Results: Click Generate to process the images, then carefully check the image results against the original photo for accuracy in shape, color, pattern, hardware, and product materials before saving.
AI-generated images can help explore different visual directions, but they should still be reviewed carefully. Check that details remain accurate and that any depicted colors, variants, materials, or features match the actual product before publishing.
Conclusion
A strong fashion product shoot gives shoppers more than an attractive picture. It helps them understand the garment, examine its details, visualize how it can be worn, and compare the available options.
Start with clear product shots, then add the angles, styling concepts, and detail images that best suit each item. By combining consistent clothing product photography with carefully selected creative concepts, fashion brands can build more informative product galleries and present their collections with a cohesive visual identity.




Leave a Comment