
Welcome to Picwish’s new Team Mode! We are excited to introduce this exciting feature that allows you to create teams, share and manage credits with your members, and view detailed usage records. In this tutorial, we will guide you through the steps on how to utilize the Team Mode feature in Picwish. Let’s get started!
1. Create a Team and Invite members
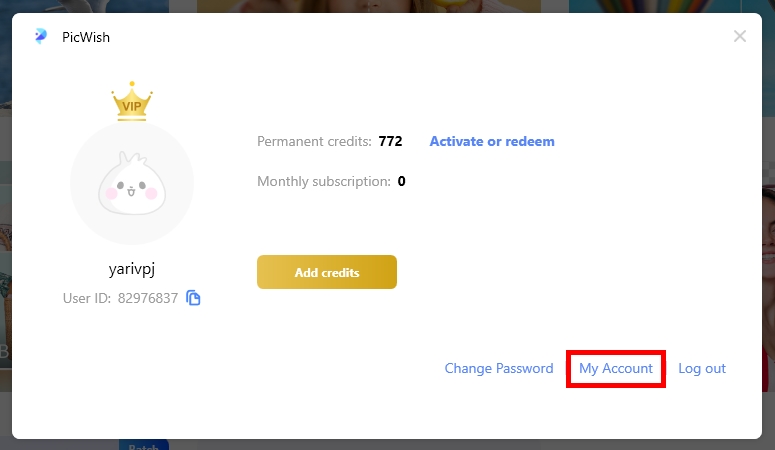
- Open the Picwish app on your PC and Mac and log in to your personal account. You can also manage your team from PicWish website.
- Locate and click on the “My Account” option.
![picwish app my account]()
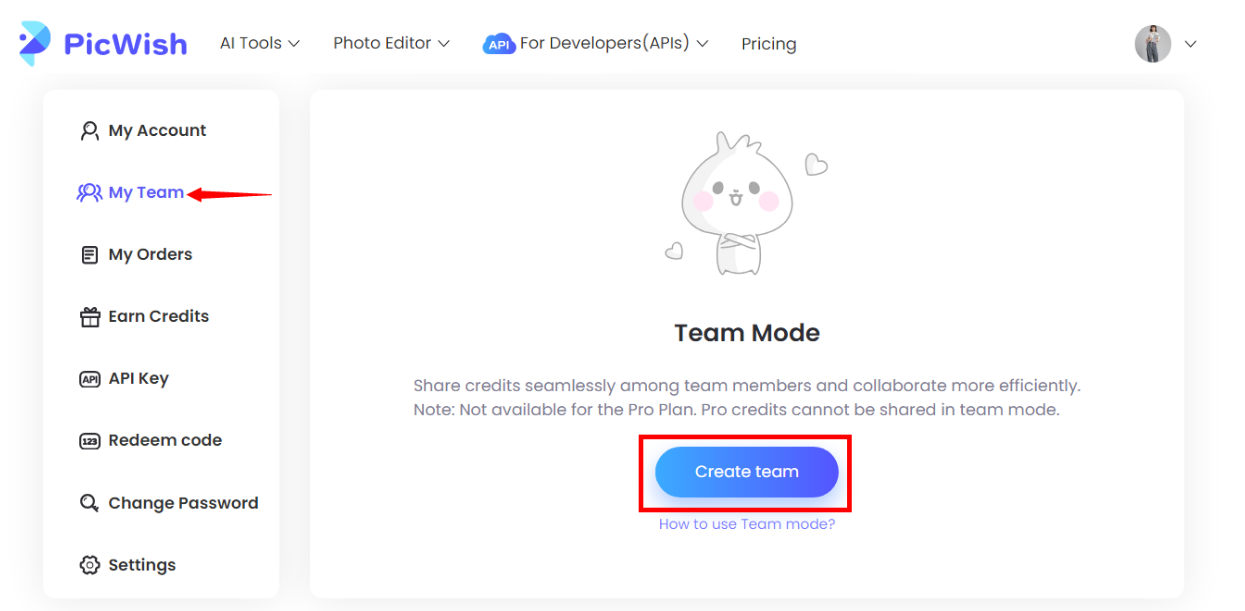
- Click on “My team” and create your team.
![team mode create team]()
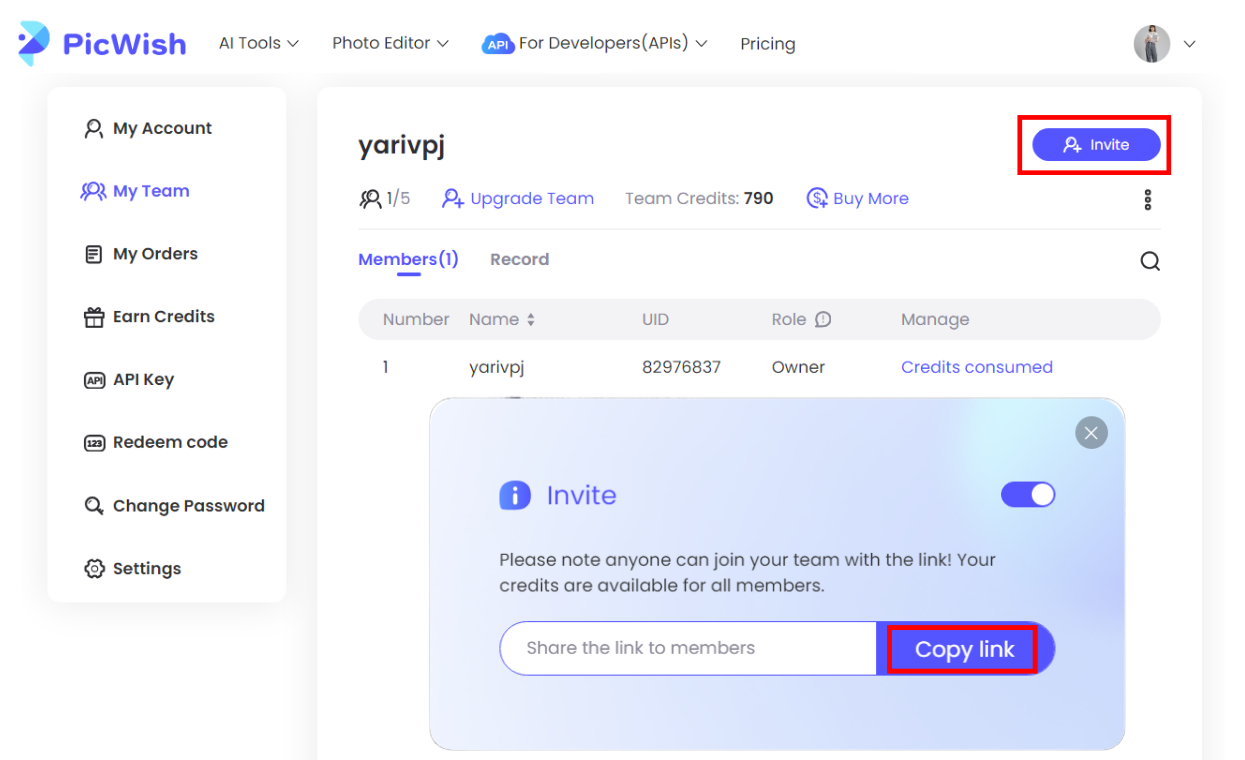
- On the team homepage, click on the “Invite” button. Copy the link and share with the member you want to invite.
![invite copy link members]()
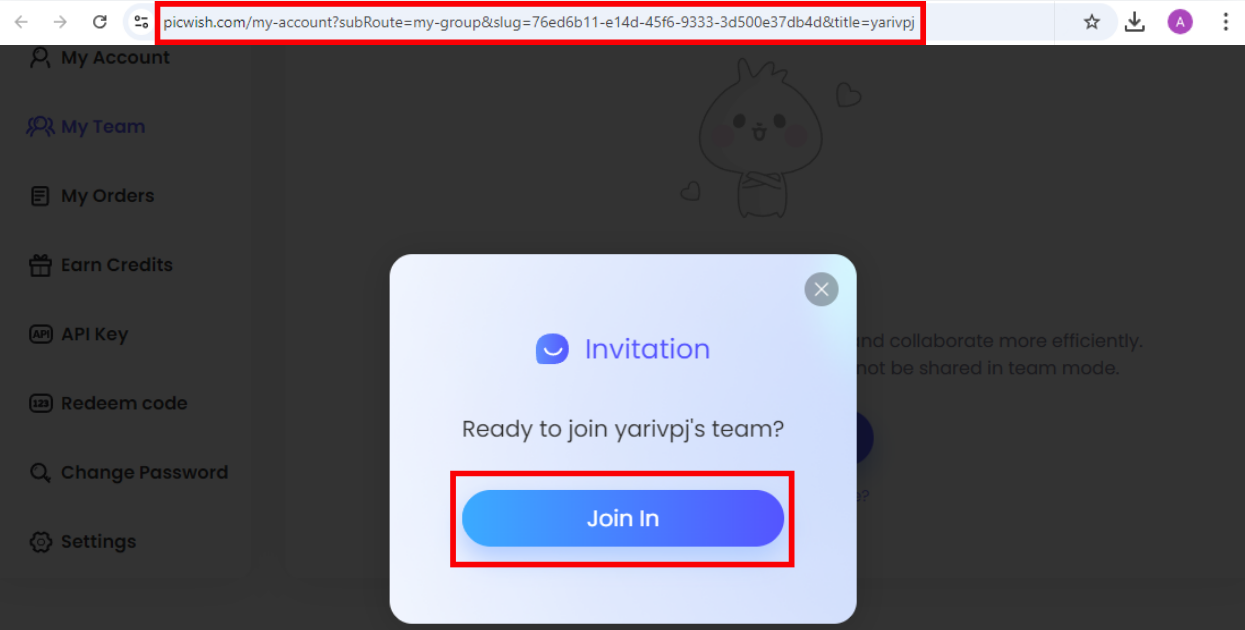
- The member paste the link and click on the Join button to accept the request.
![invitation join member in]()
2. Credits Sharing and Management
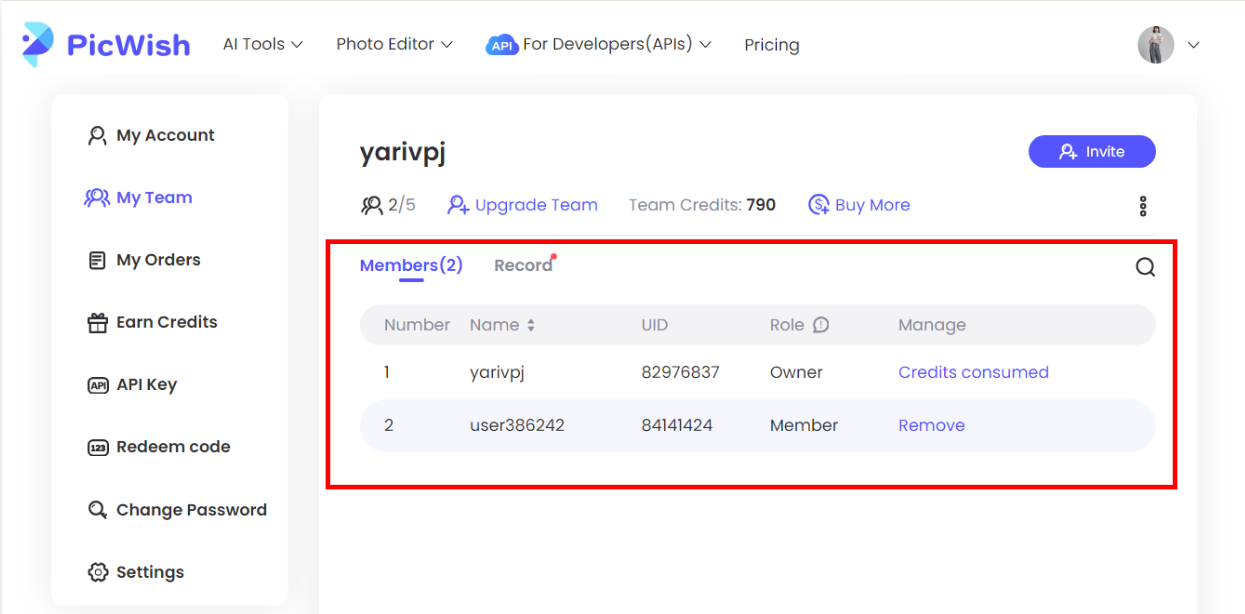
- On the team homepage, you can view the credit details of your members. Your team will share the credits on PC, Mac and the PicWish website.
![my team list panel]()
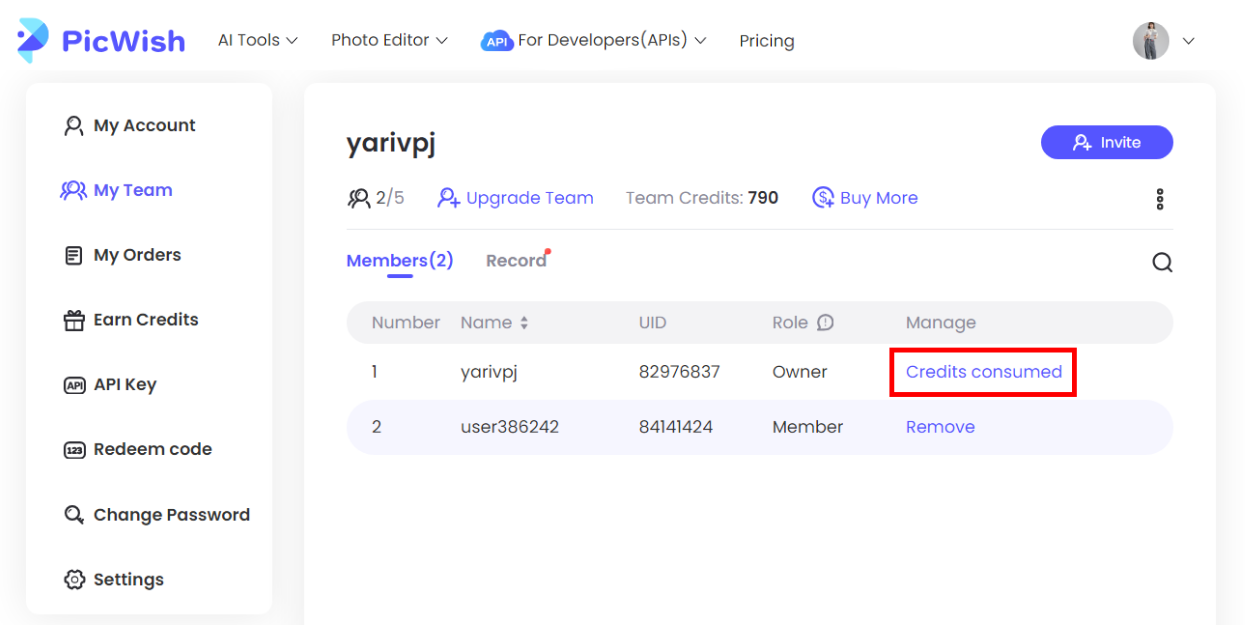
- Click on “credits consumed” and you can view the credits details for both personal and team consumption within the past 7 days.
![credits consumed managed members]()
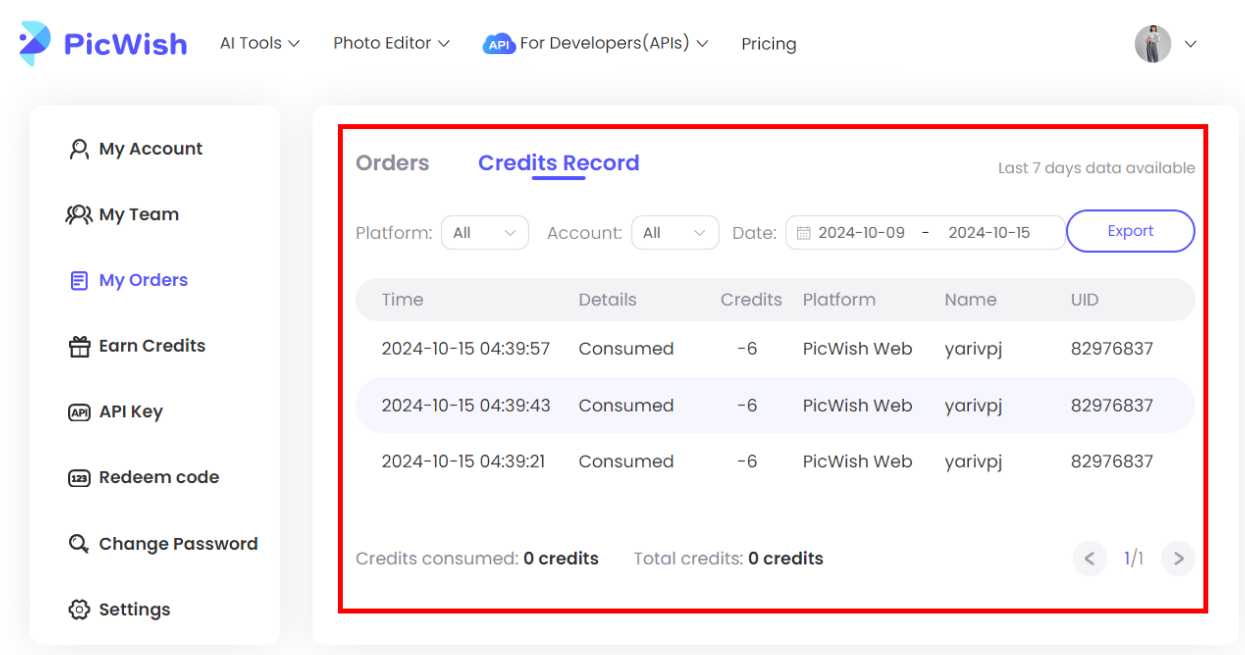
- In this list, you can see the orders and credits records. In the credits record, you can view the details of credits consumed on different platforms, including the date. To export the data for further analysis and record-keeping, click on the “Export” button.
![record of credits consumed]()
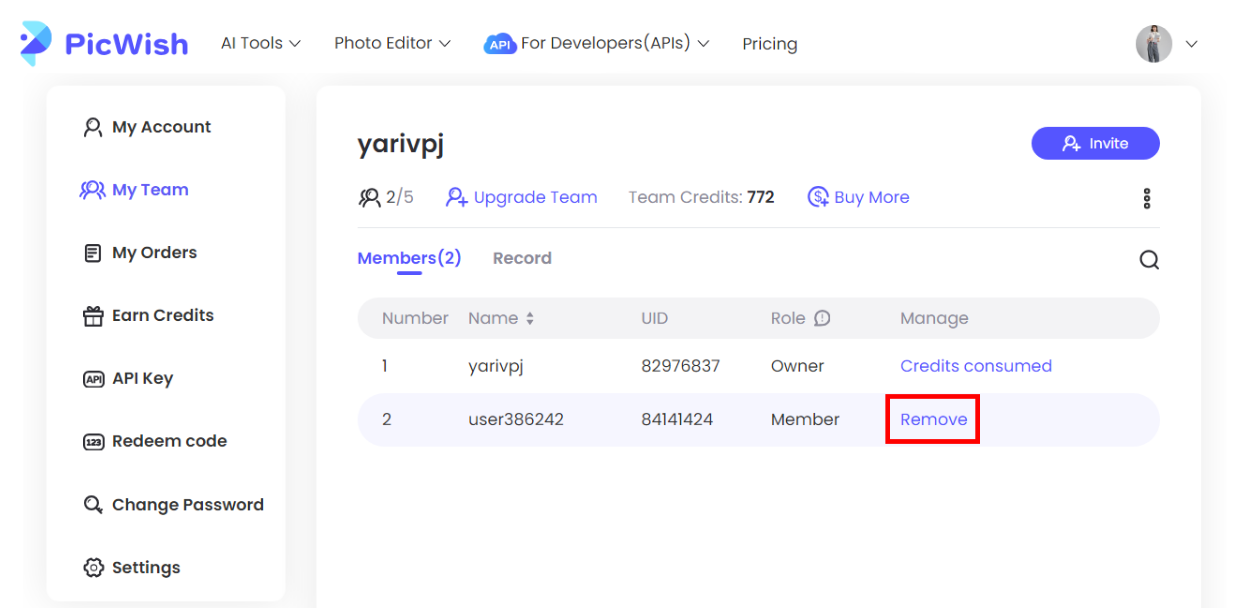
- You can remove team members at any time by clicking the Remove button. Credits will no longer be shared. Also, you can click the delete button to disband the team.
![remove invited members team]()
3. Purchase Credits
- To purchase credits for Picwish, visit the following link: Purchase Credits
![subscribe picwish get credits]()
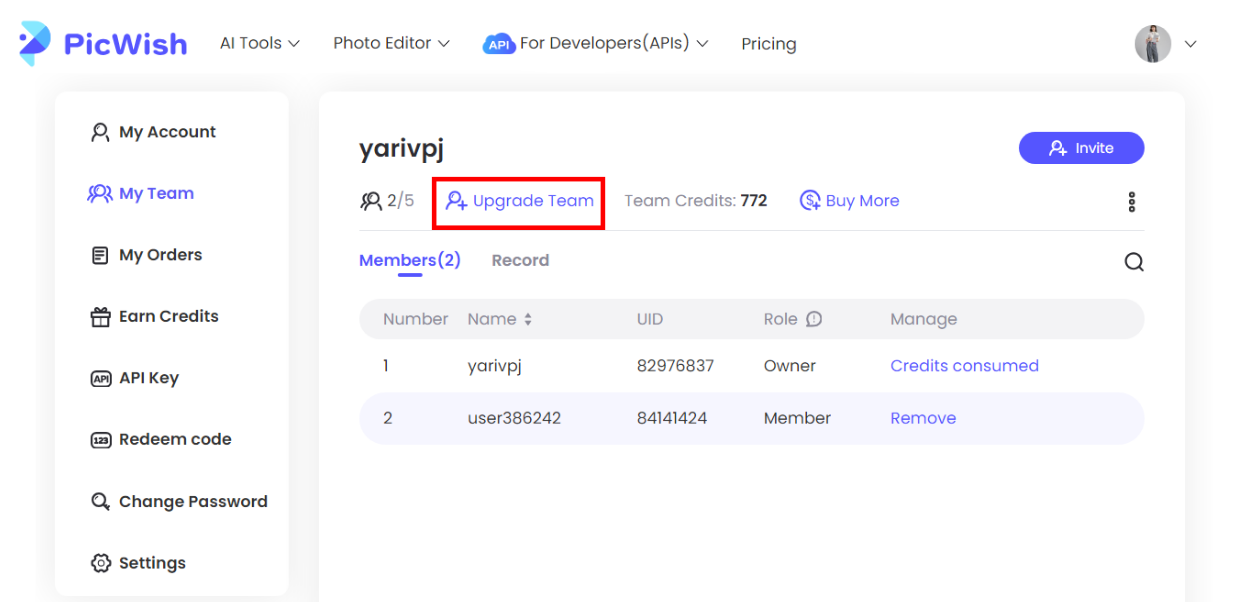
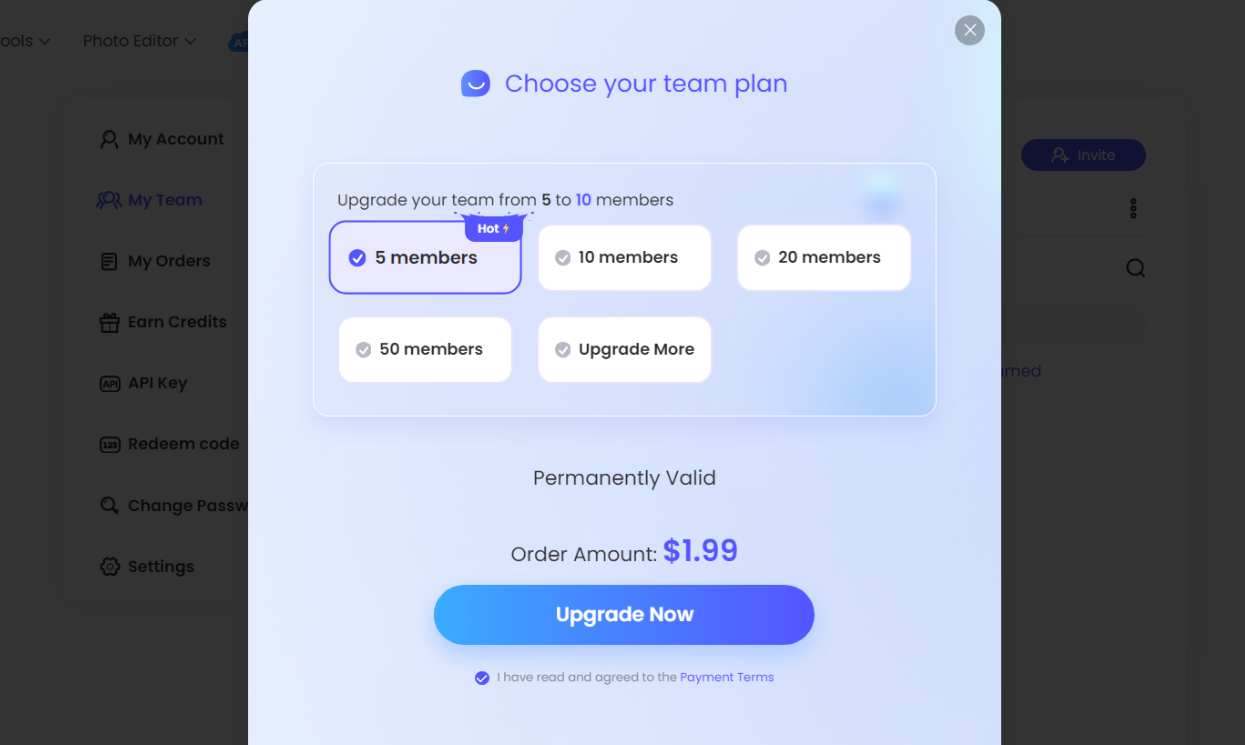
- If you need to invite more members, please contact us.
![picwish team numbers upgrade]()
![choose upgrade now plan]()
That’s it! You have learned how to use the team mode feature in the Picwish app. We hope this tutorial helps you in managing and sharing credits more effectively. If you have any further questions, feel free to contact our customer support team.


Leave a Comment