Detailed Guide on How to Use PicWish on PC
1. Introduction
PicWish is an efficient image processing app with advanced AI technology, including background removal, photo retouching and enhancing, ID photo, compression, watermark and other functions, supporting batch processing of a large number of images.
2. Download and Install
2.1. Microsoft store
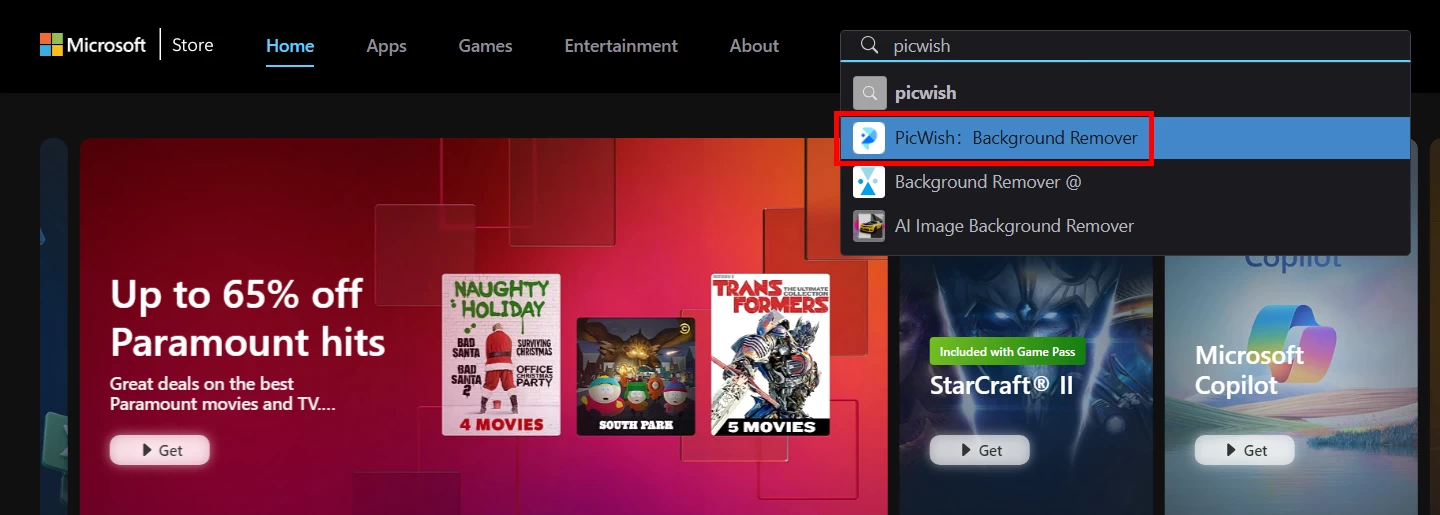
- Go to Microsoft store and search for PicWish.
![microsoft store search picwish]()
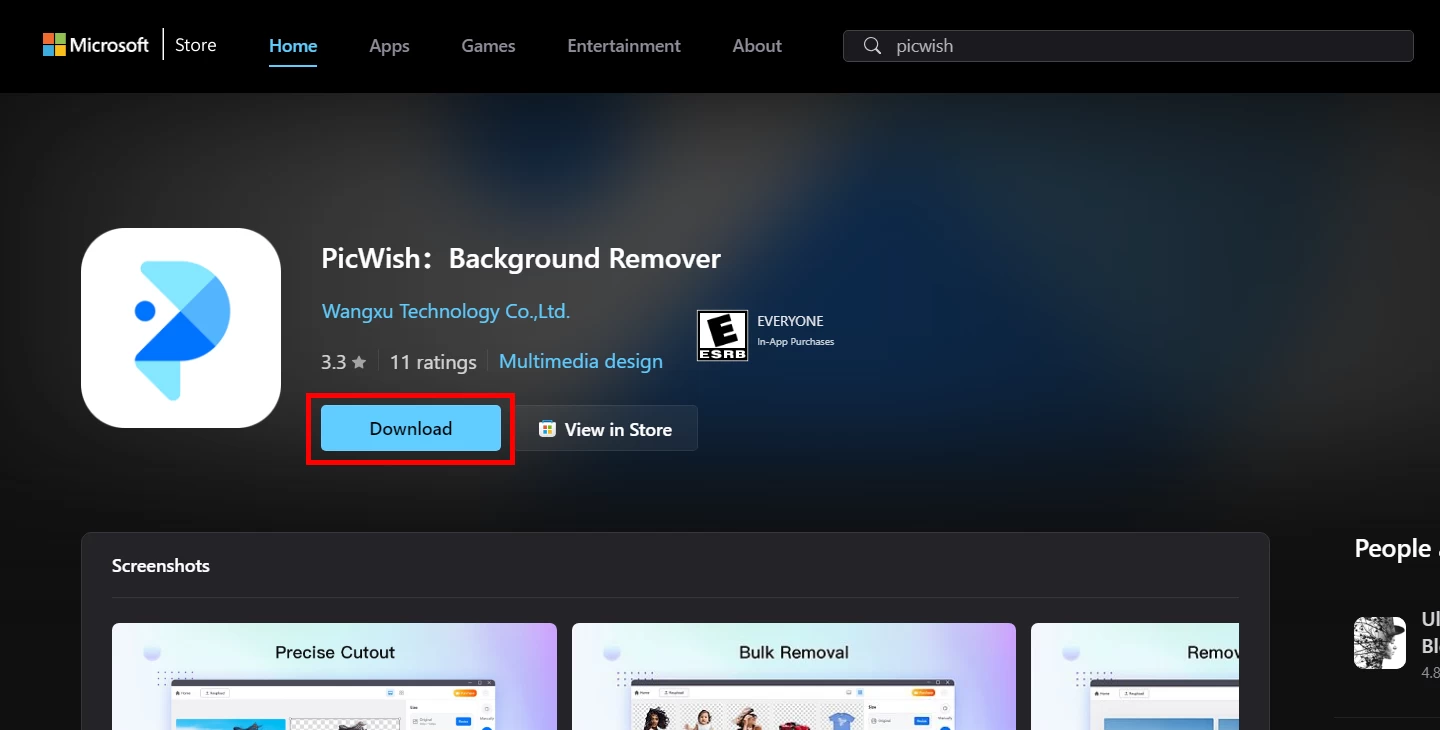
- Click the button to install.
![microsoft store download picwish]()
- Go to Microsoft store and search for PicWish.
- Or you can install the app by clicking the button below.
2.2. From official website
- Go to PicWish Download Center and click the download button for Windows PC.
- After successful download, just follow the steps to install.
3. Sign up/Log in
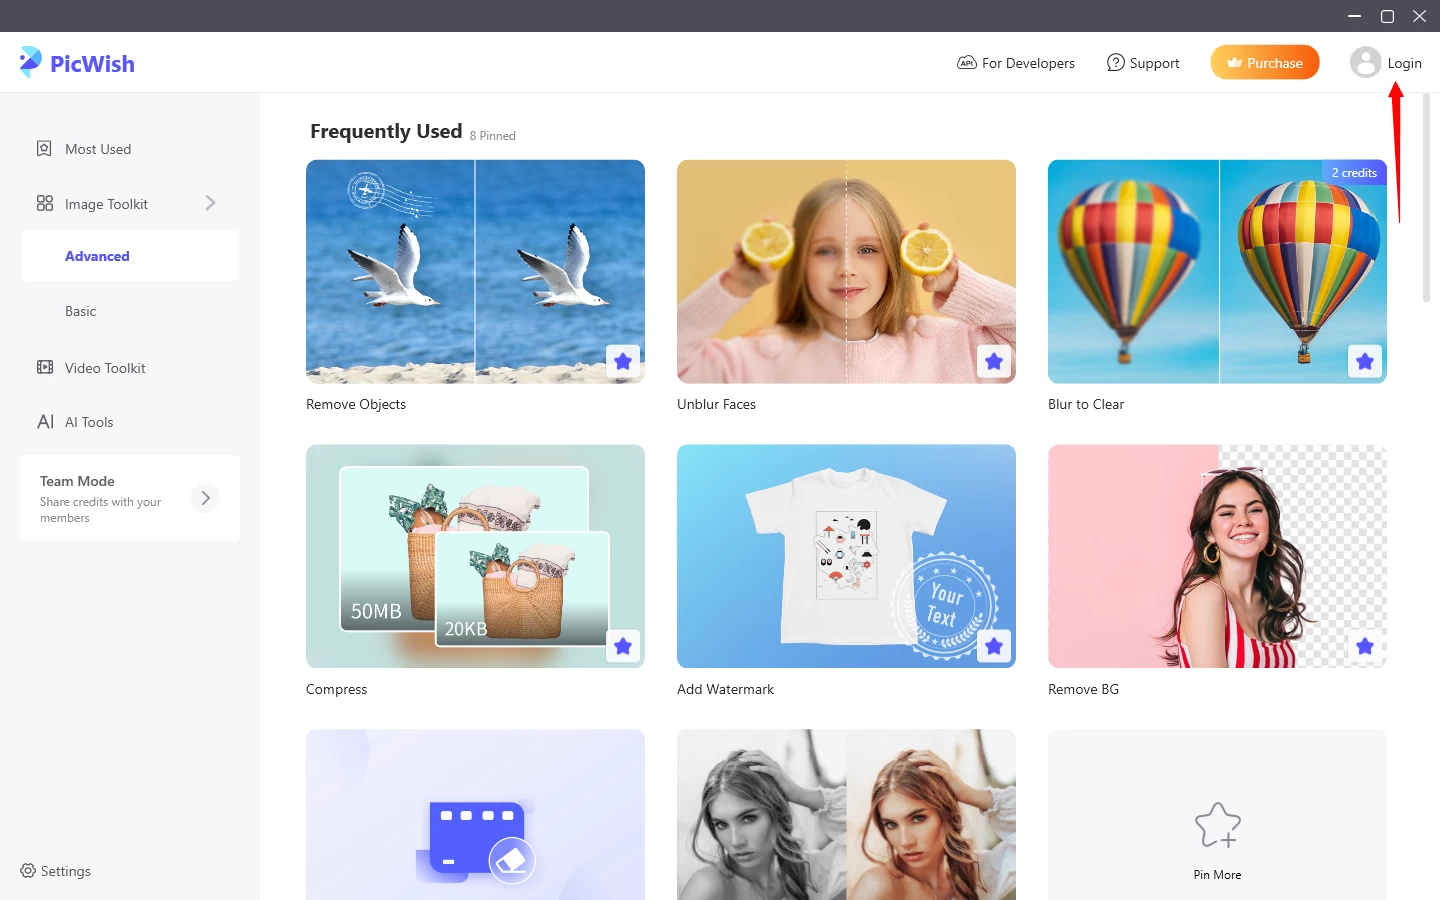
- Open PicWish app on your PC and click the login button in the upper right corner.
![picwish app login button]()
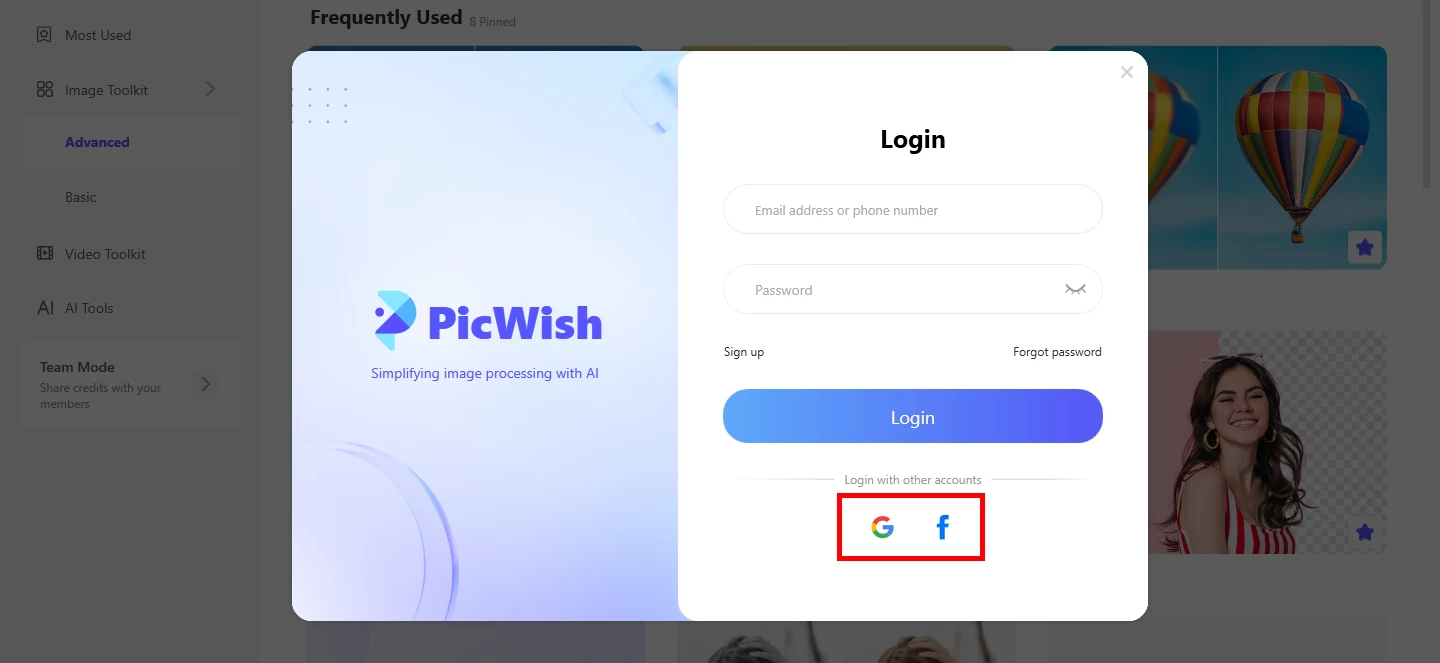
- You can log in to your account using email or other platforms.
![picwish other login methods]()
4. Features
4.1. Remove Background
The background removal function automatically identifies a person through intelligent AI technology. It uses sophisticated technology to remove the background in one click, and the hair can be well separated. The steps are as follows:
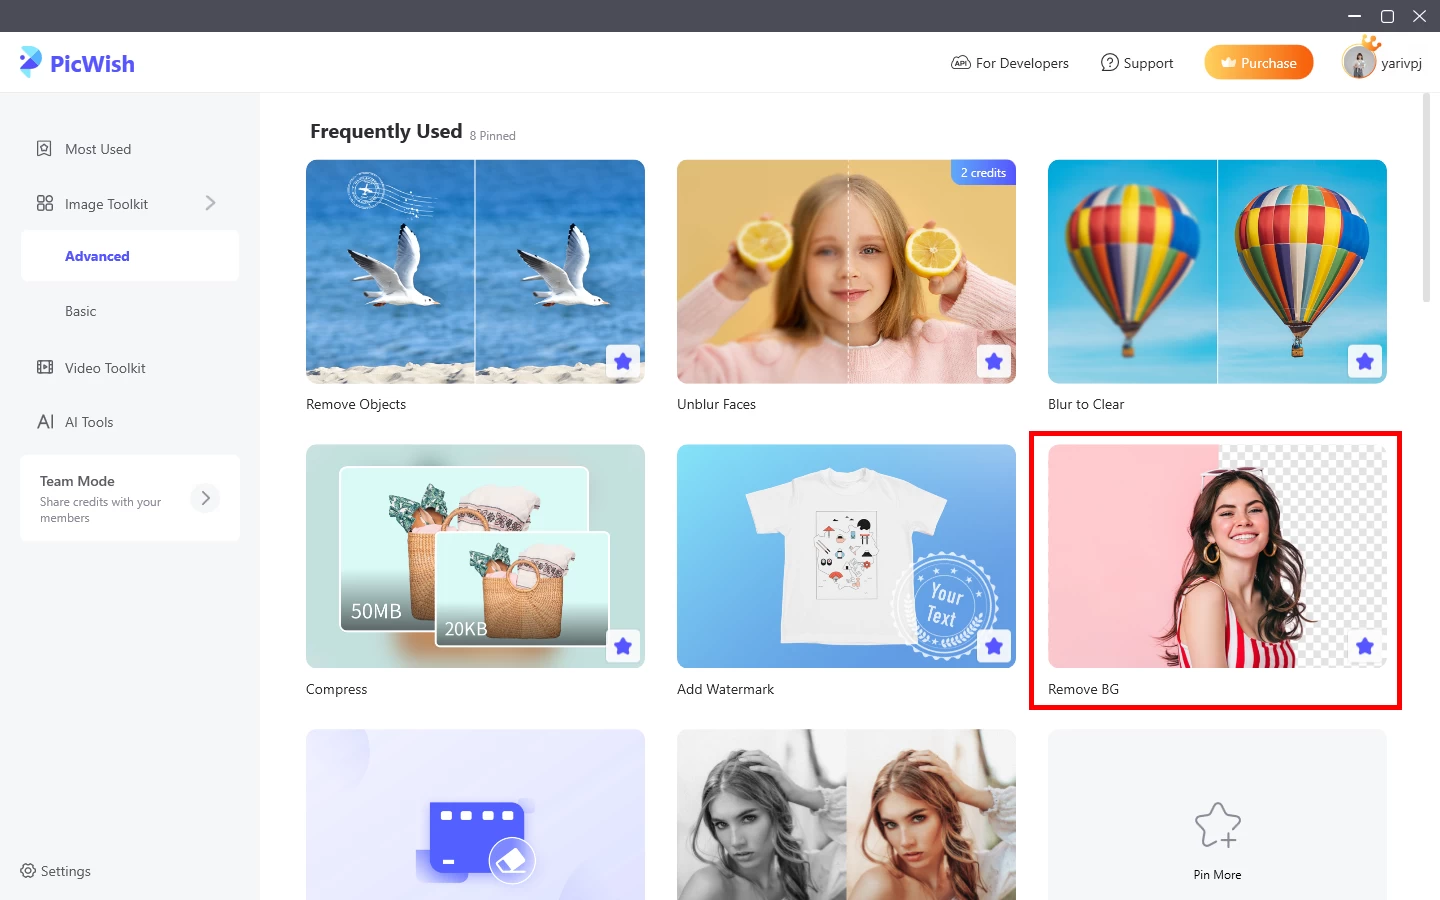
- Choose Remove BG from Toolkit.
![picwish remove bg tool]()
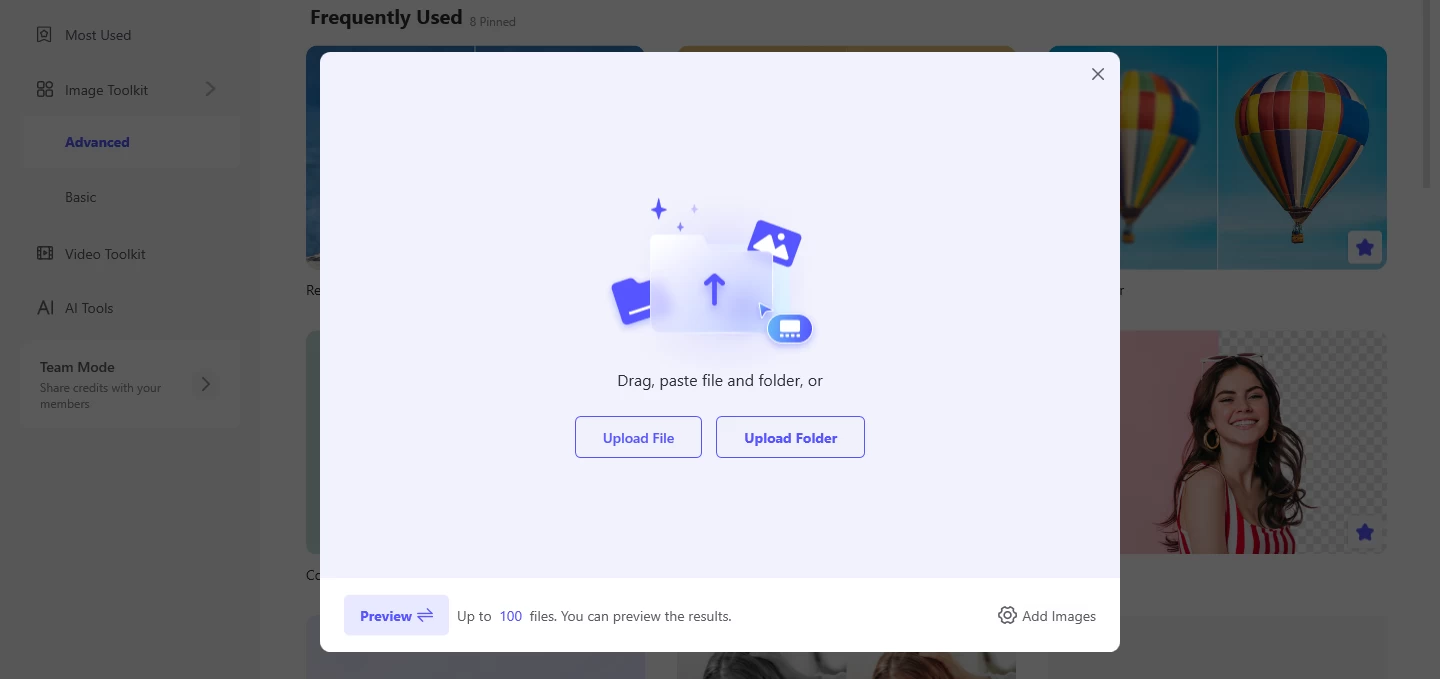
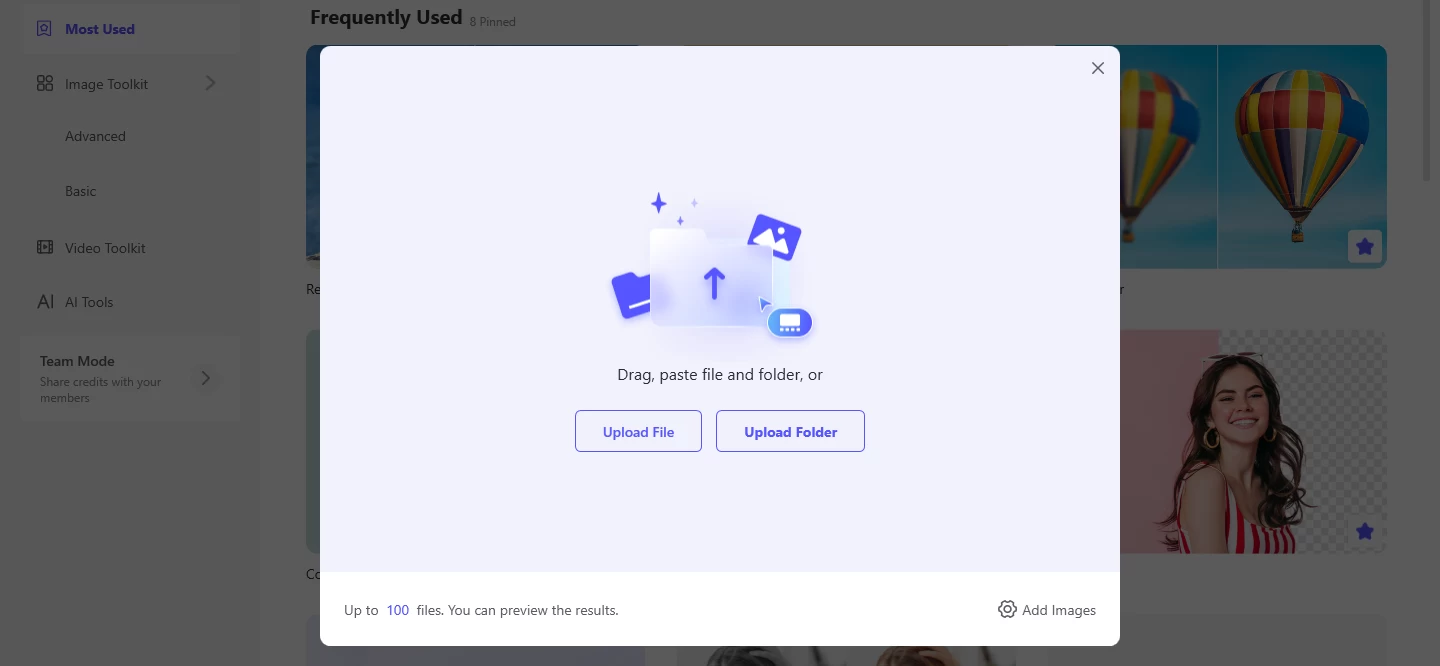
- There are two modes. The preview mode supports batch processing of 100 images at the same time and allows you to preview the effect, while the number of images in list mode is unlimited and it increases the speed by 2 to 5 times. However, the list mode does not support previewing the effect. You can choose the corresponding mode according to your needs.
![picwish upload files or folder]()
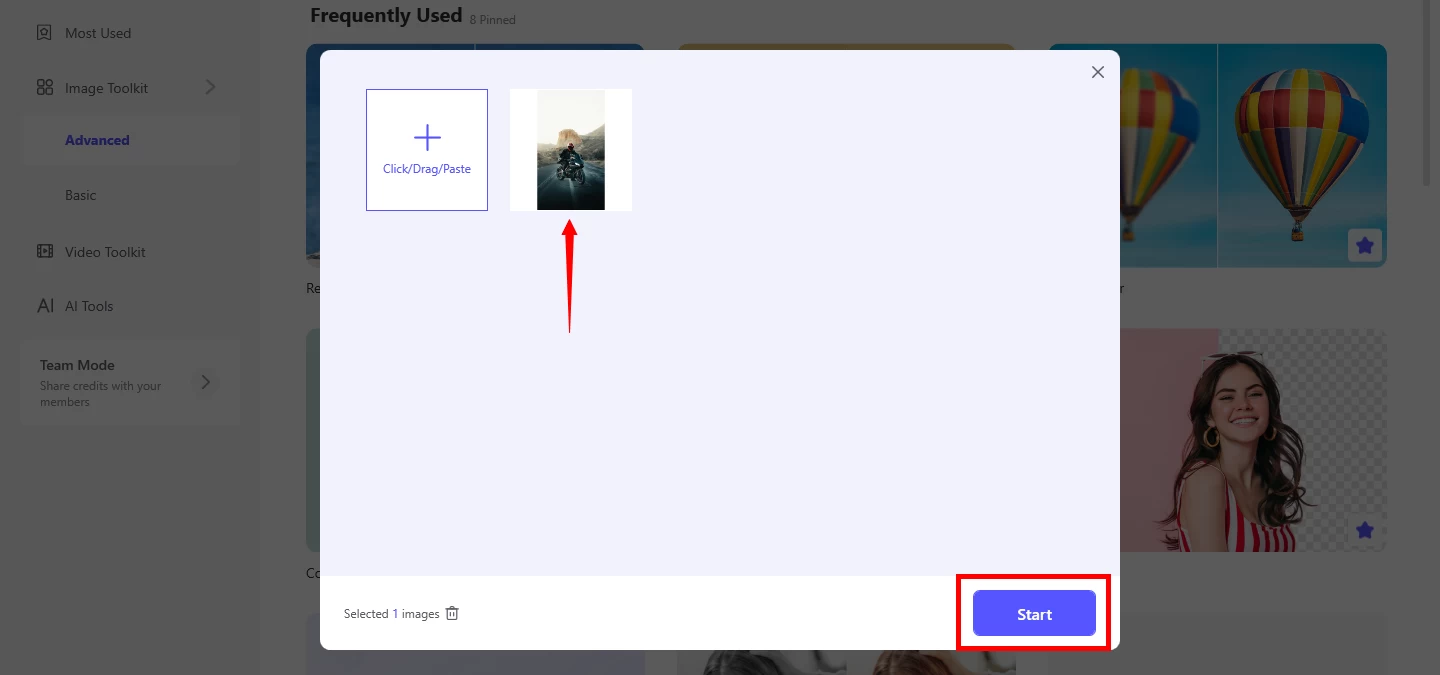
- Then you can click the Start button or drag the images you want.
![picwish remove bg upload]()
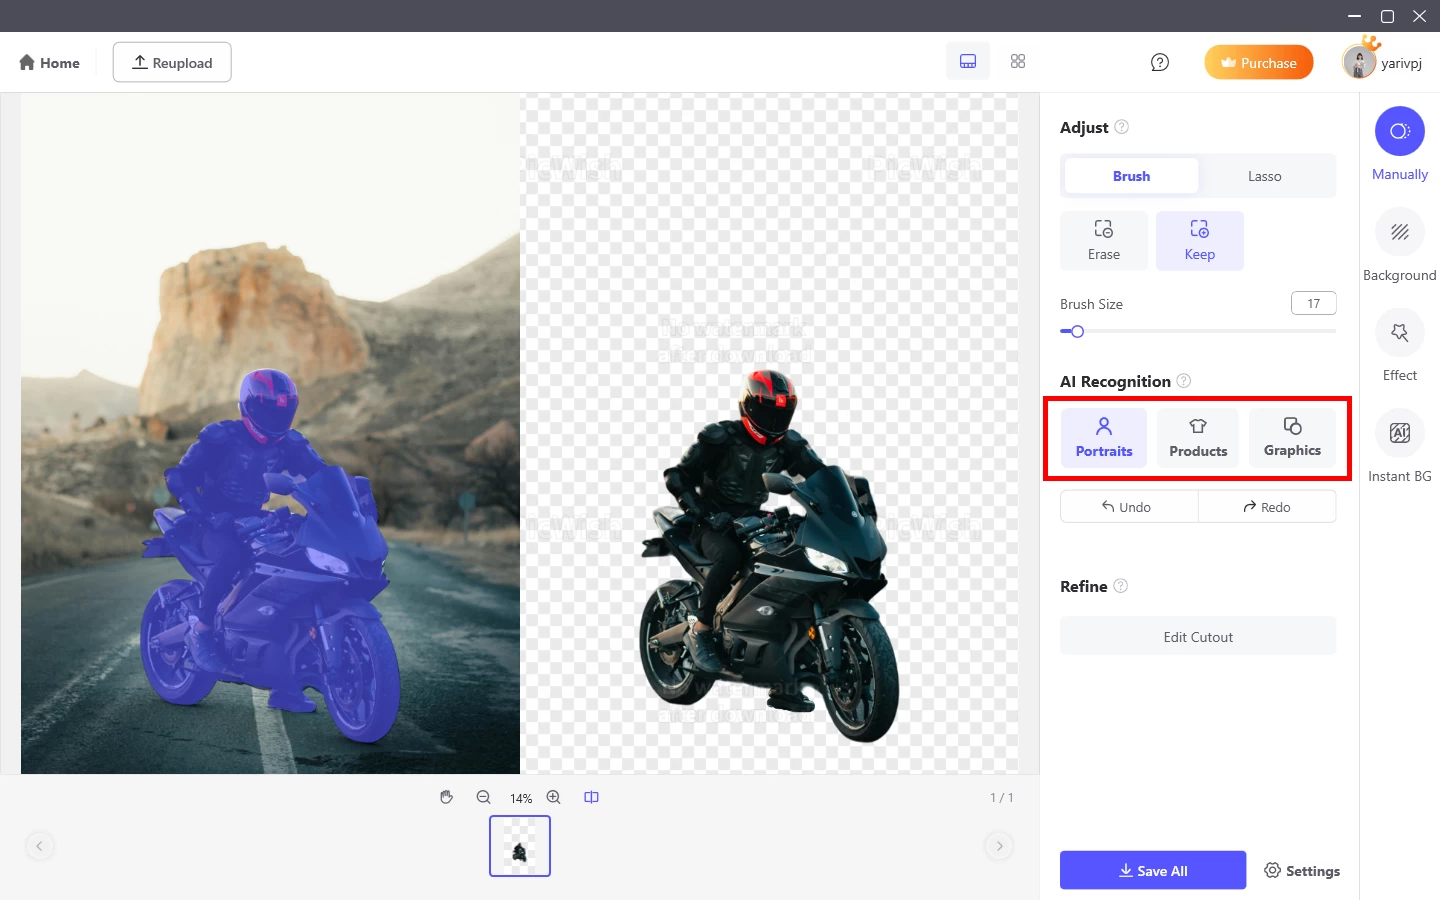
- Choose the method to remove background according to the type of image, including Portrait, Products, and Graphics. Note: Right click to move the canvas.
![picwish remove bg ai recognition]()
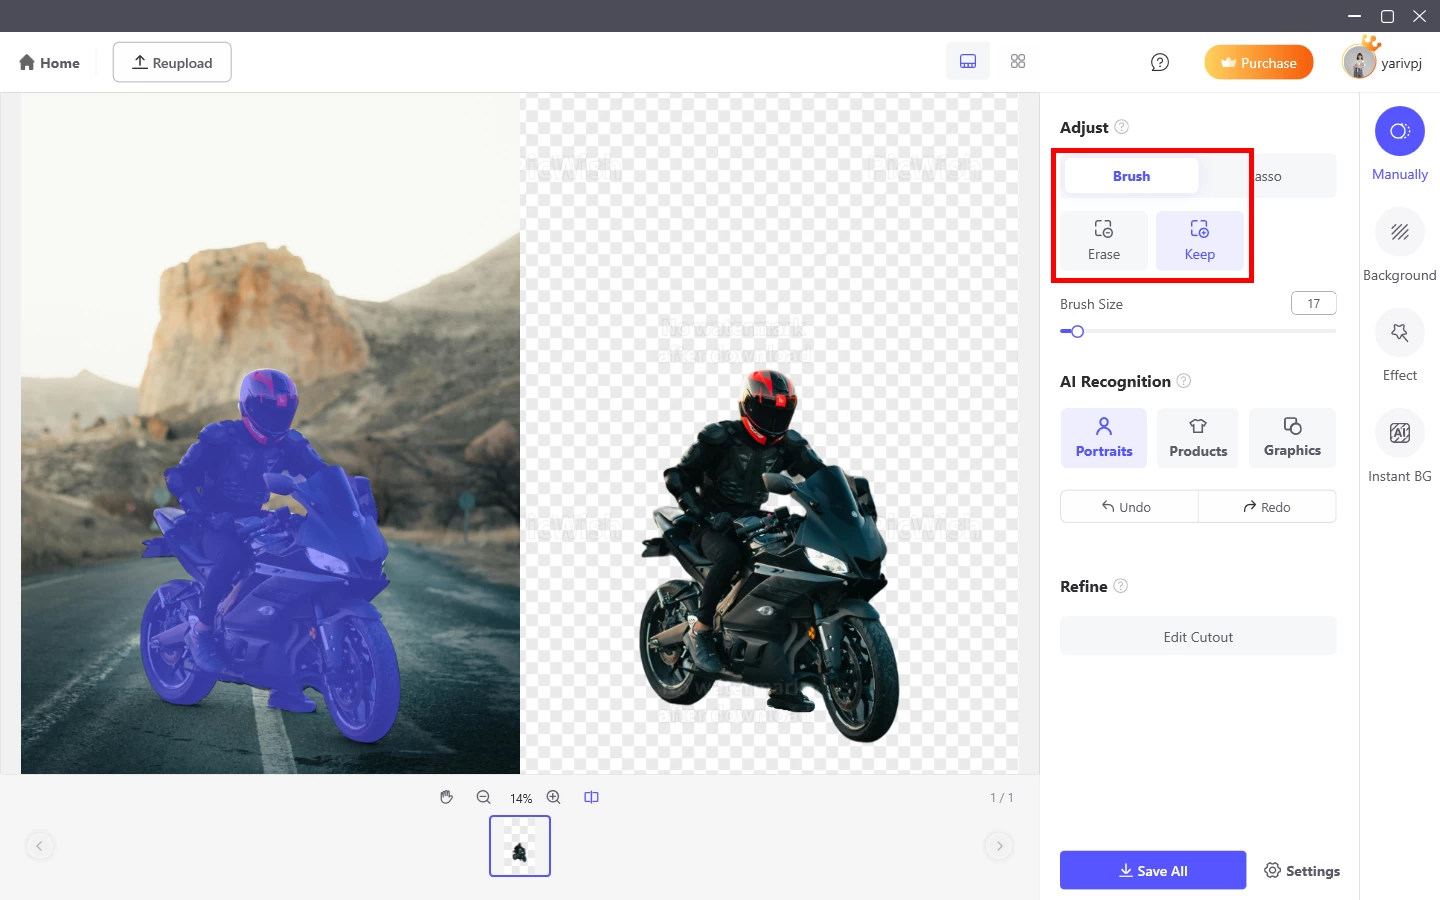
- If you are unsatisfied with the auto-removal effect, you can manually remove the background to edit the details with more choice and freedom.
![picwish remove bg brush]()
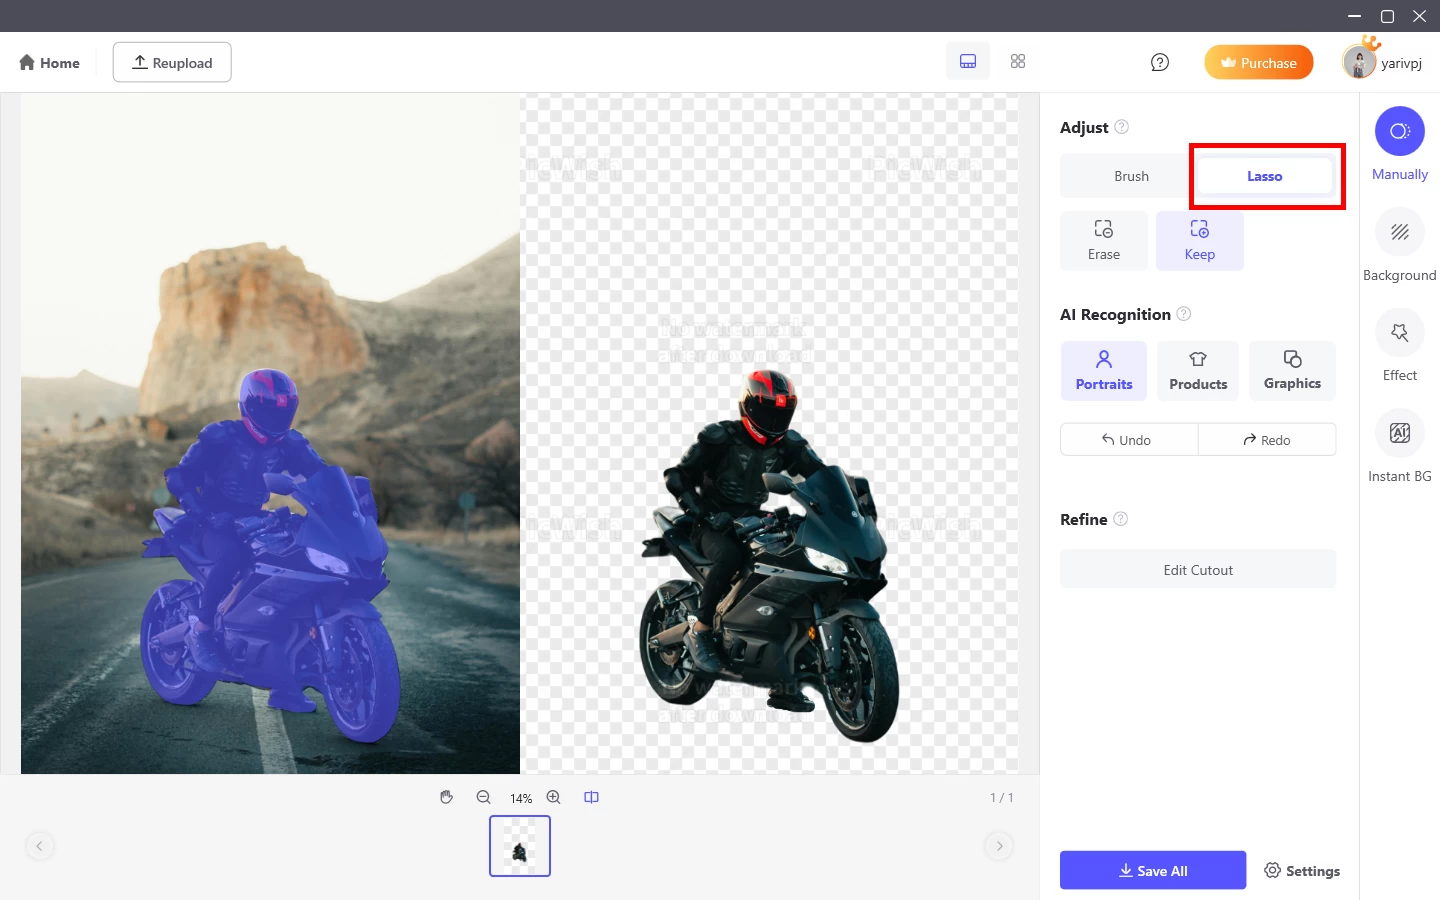
- You can also choose the Lasso tool, which handles edges better and supports undoing modifications at any time during the process.
![picwish remove bg lasso]()
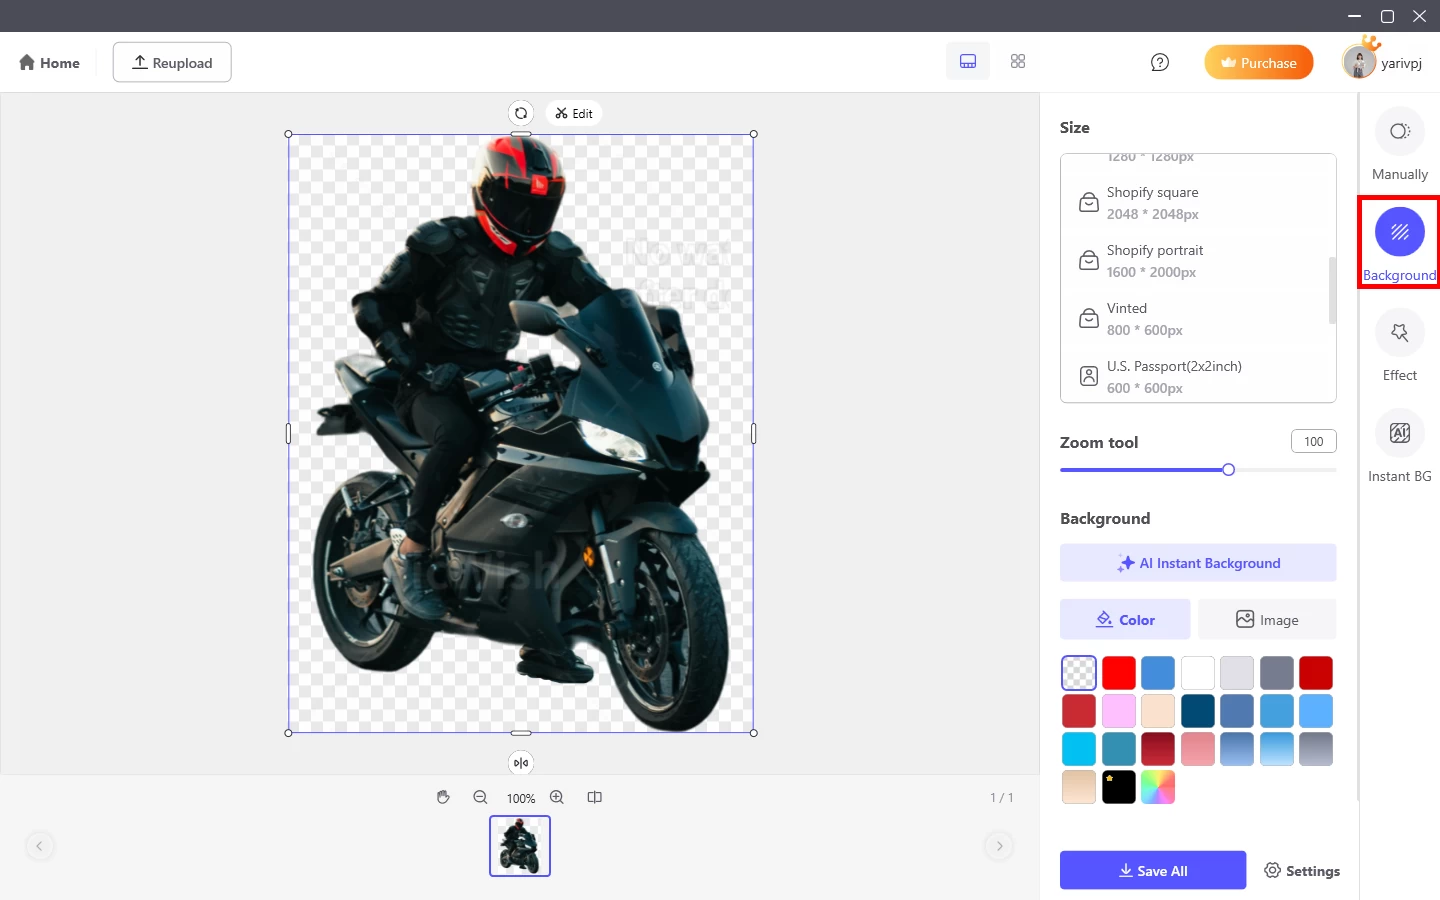
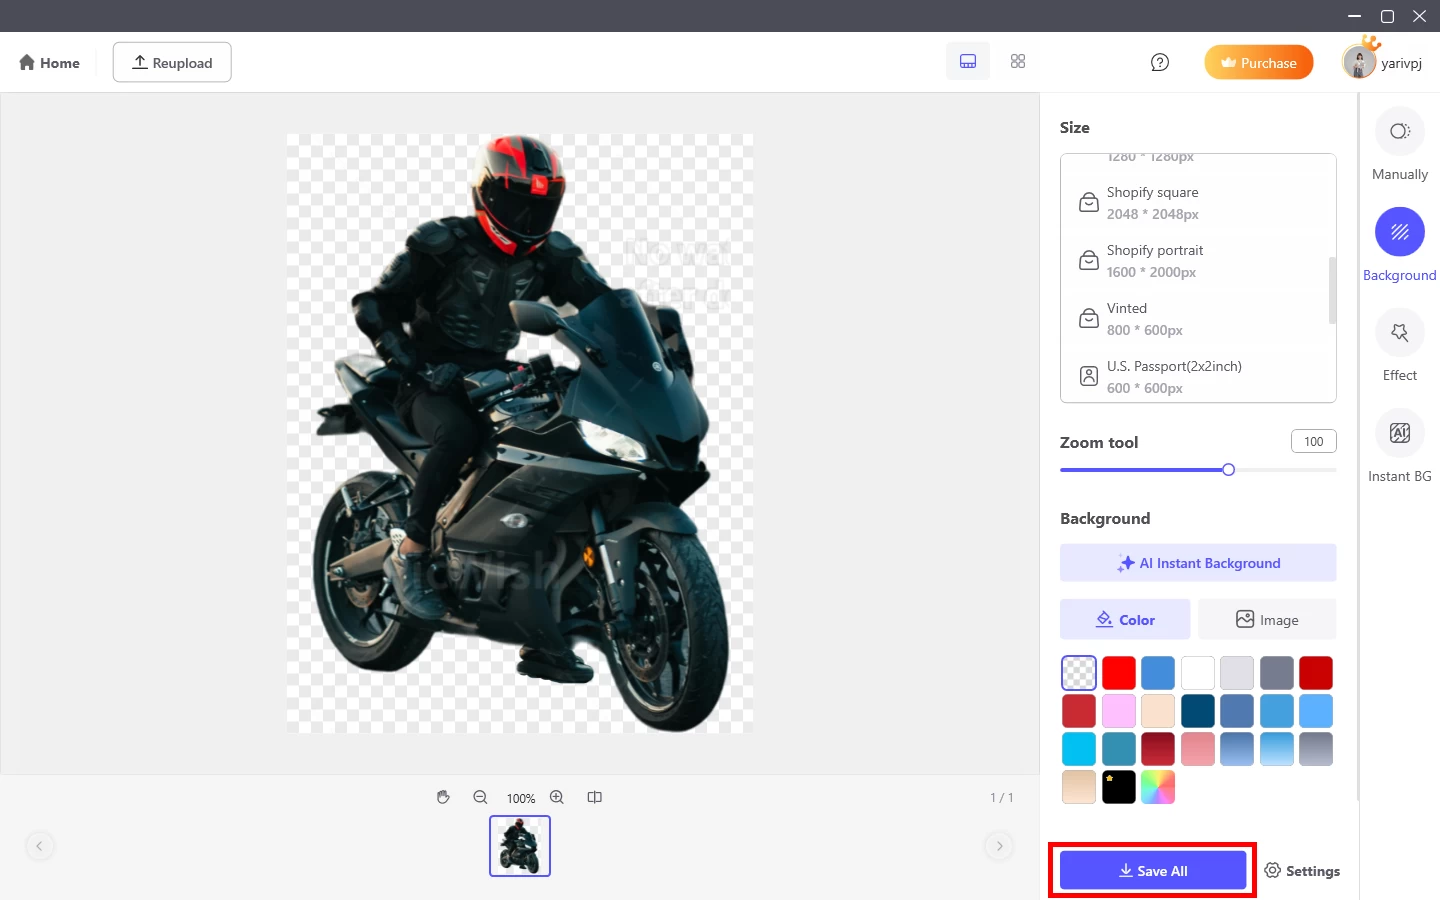
- Click on the right side to adjust the size of the image and change the background after completion. You can choose a color background or upload an image to set a custom background.
![picwish remove bg background edit]()
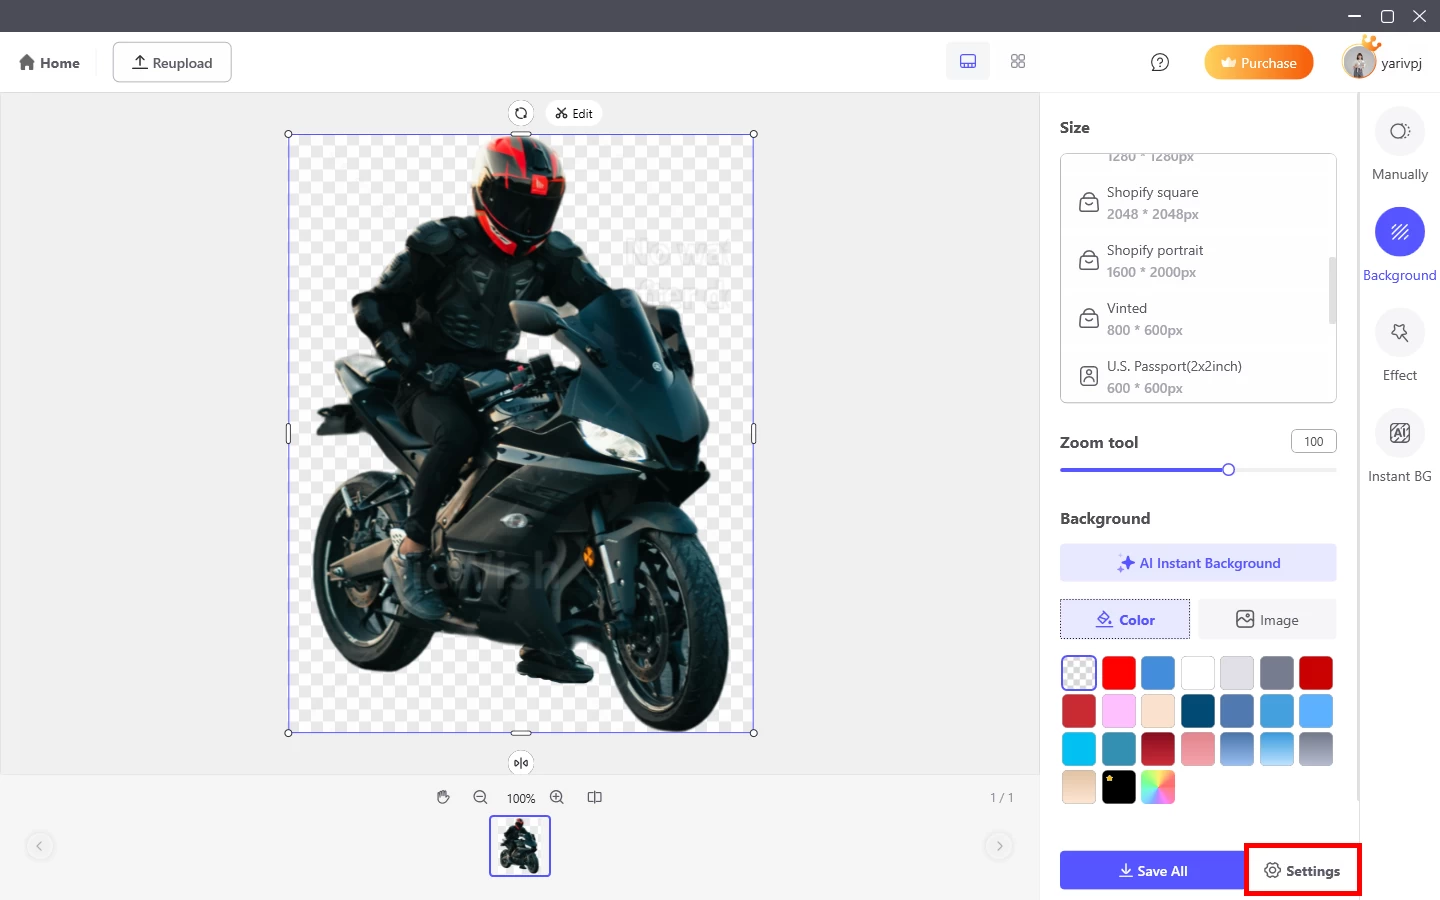
- If you need to change the output folder, format, DPI, and save transparent and white background images, you can tap on the Settings at the bottom right corner.
![picwish remove bg settings]()
- Click the Save All button to save the processed image to your PC.
![picwish remove bg save all]()
4.2. Remove Objects
PicWish allows you to remove logos, stains, bypassers, and batch delete text from images with just one click. There’s no need to learn complicated techniques to achieve satisfying results. The steps are as follows:
- Click Remove Objects and upload the images you want to process. You can process up to 100 images at the same time.
![picwish remove objects upload]()
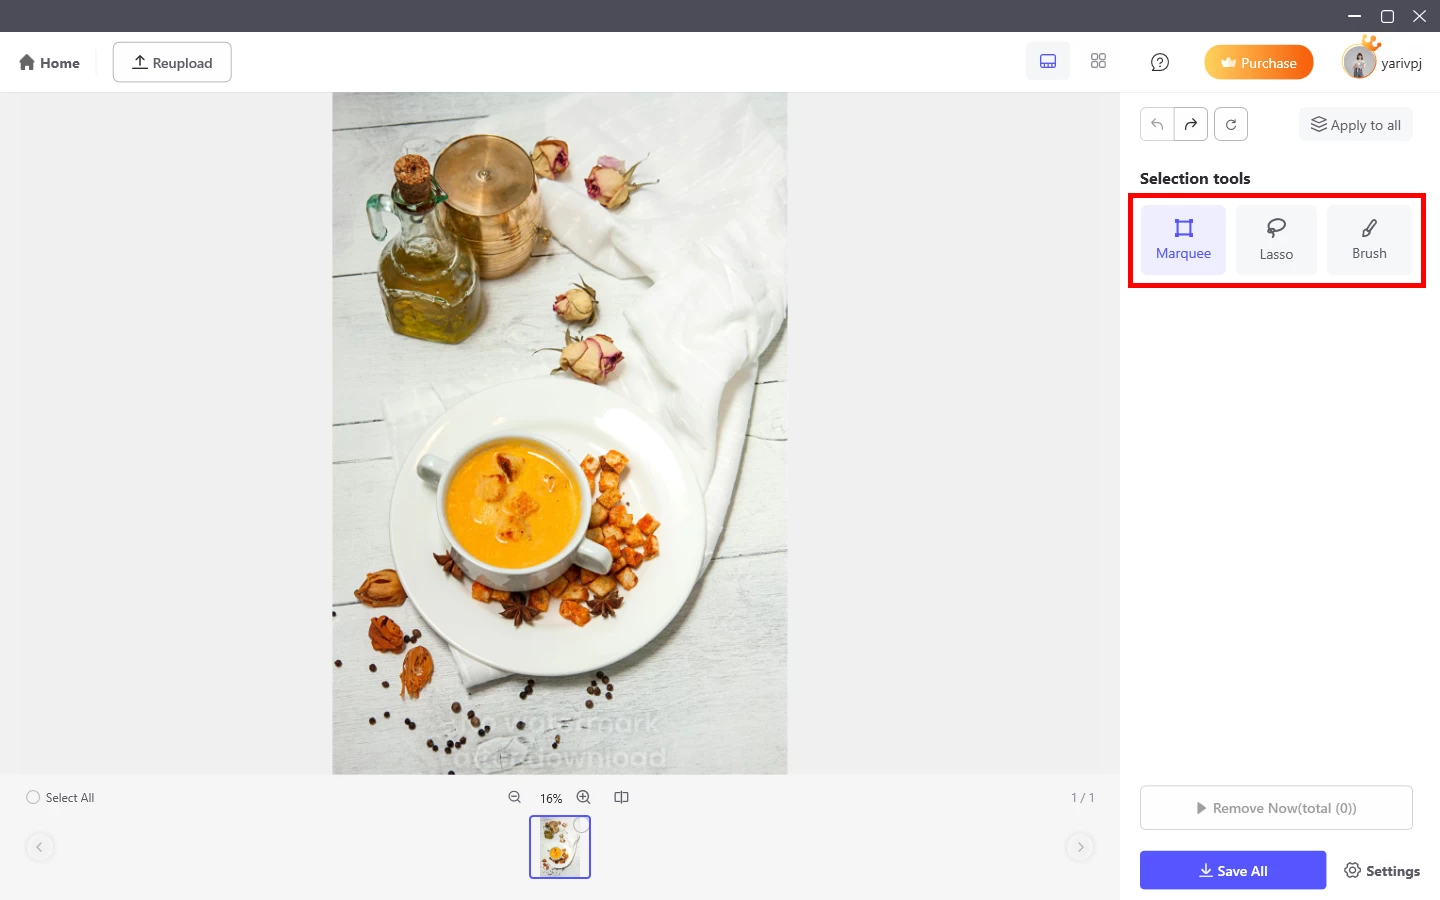
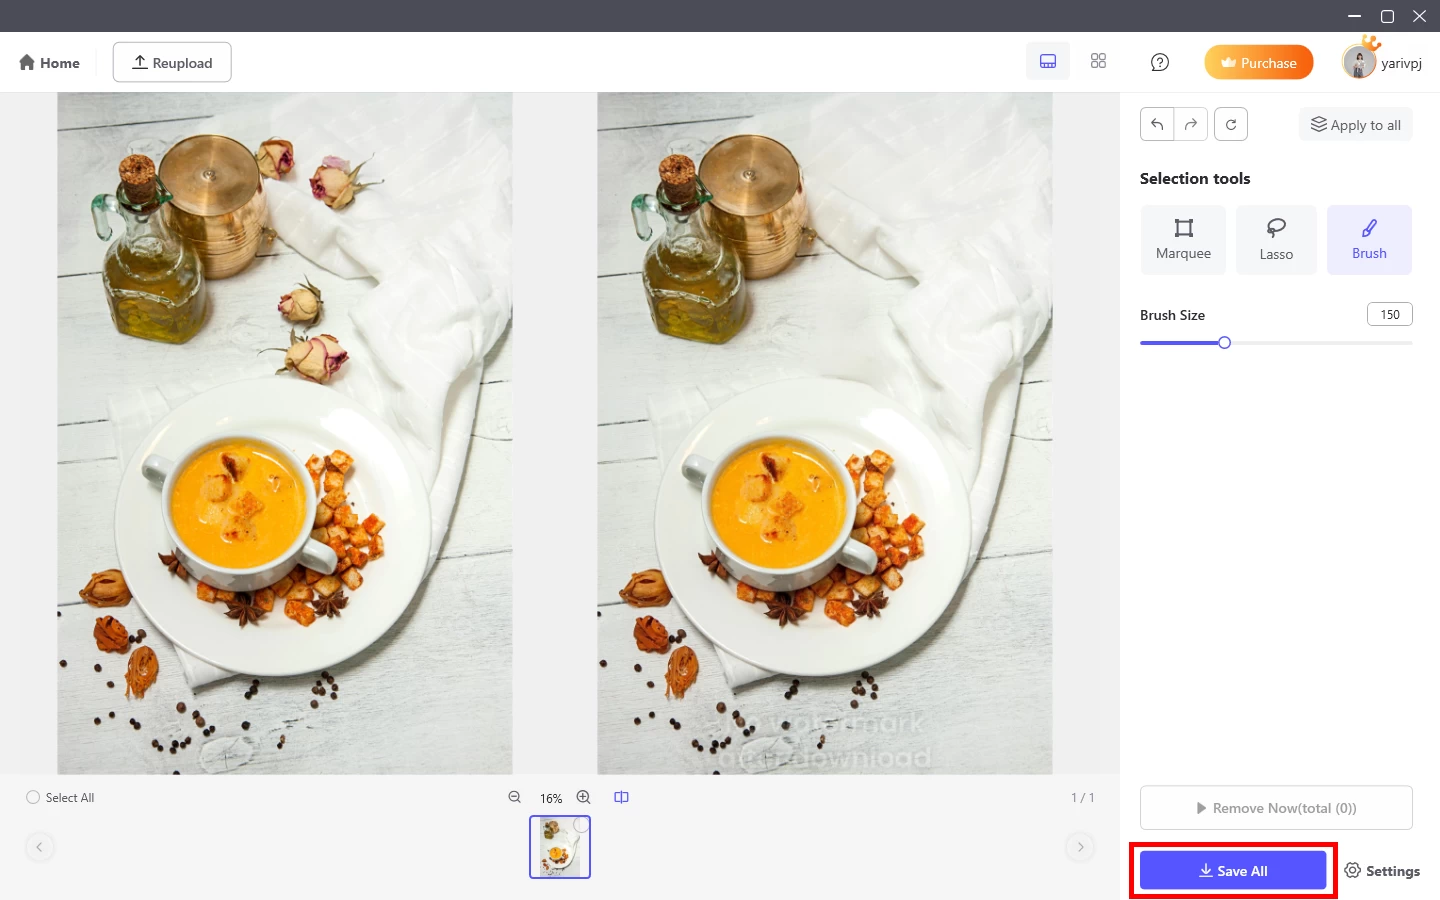
- Depending on the size of the area, you can choose from three tools: Marquee, Lasso, and Brush.
![picwish remove objects selection tools]()
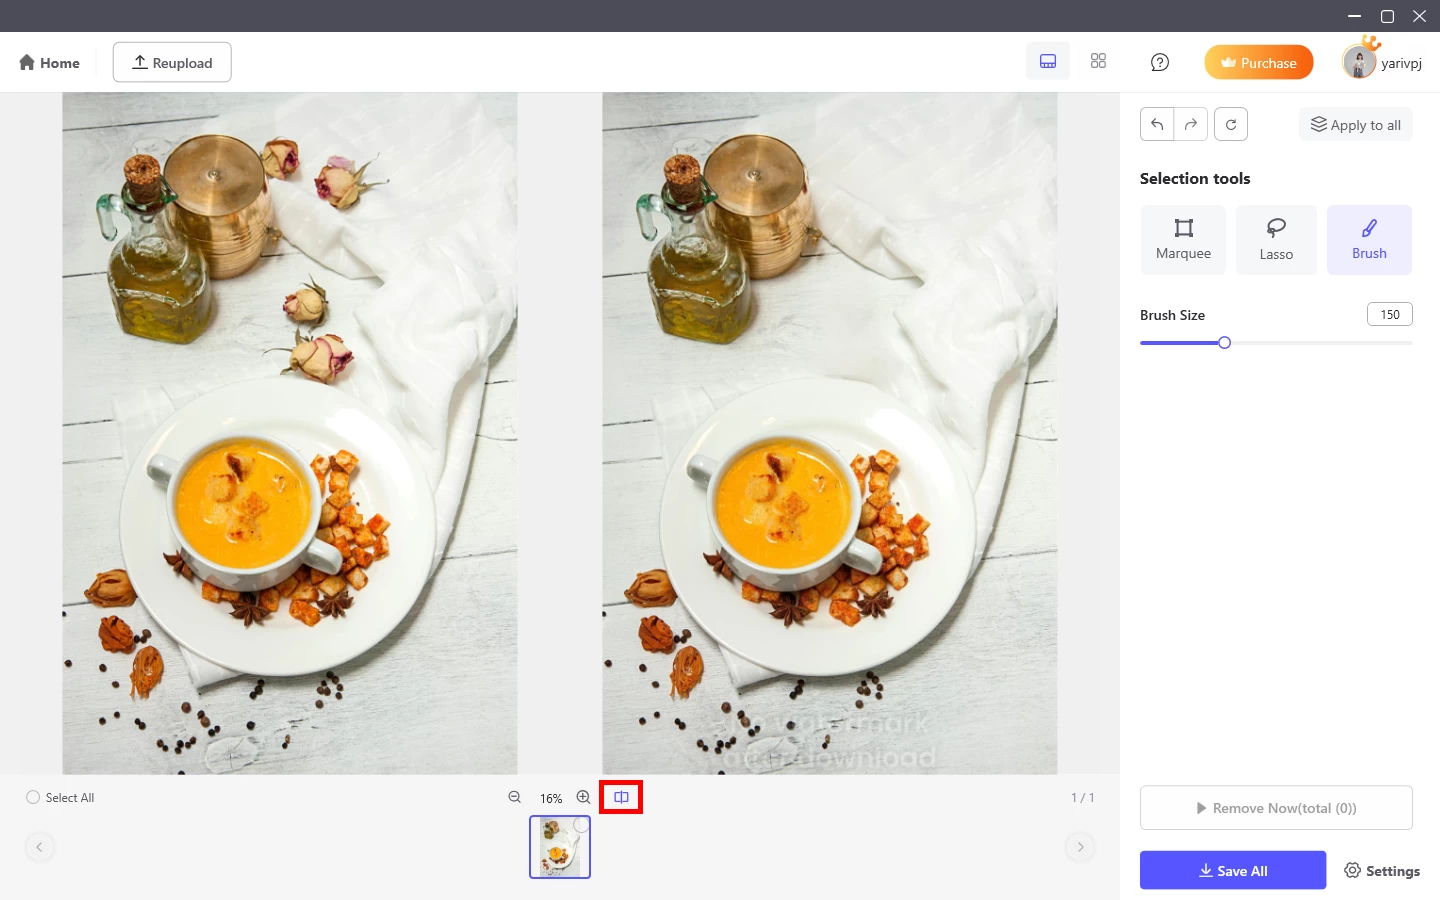
- Click the comparison icon below to view the comparison before and after removal.
![picwish remove objects comparison]()
- You can change the folder in the settings, and then click Save All to get the processed pictures.
![picwish remove objects save all]()
4.3. ID Photo
The ID photo function allows you to switch the background color and size of your photos as you wish:
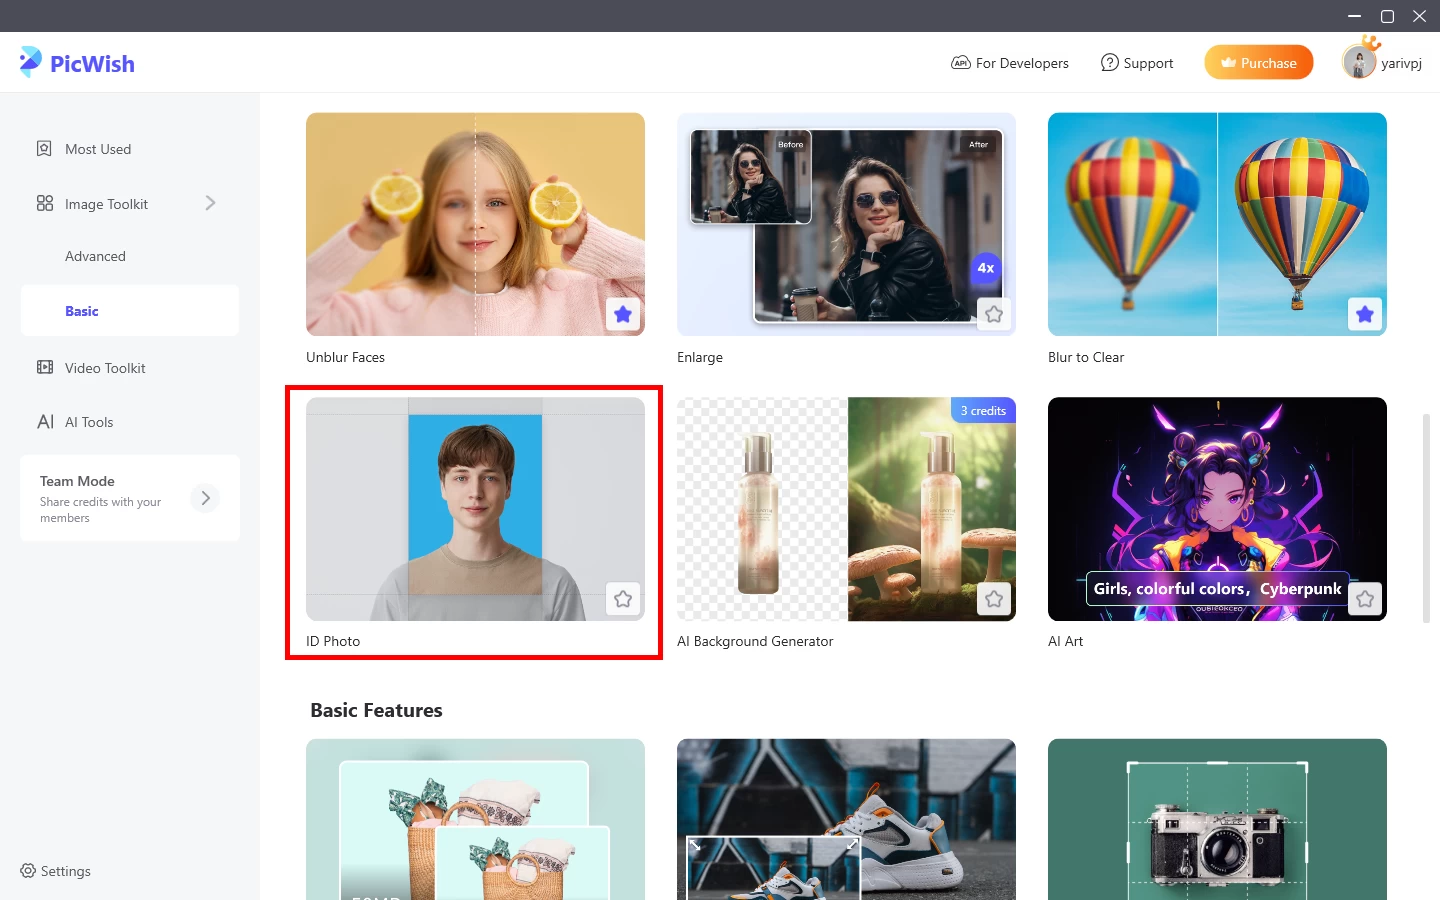
- Click ID Photo from Toolkit. You can process up to 100 images at the same time.
![picwish id photo tool]()
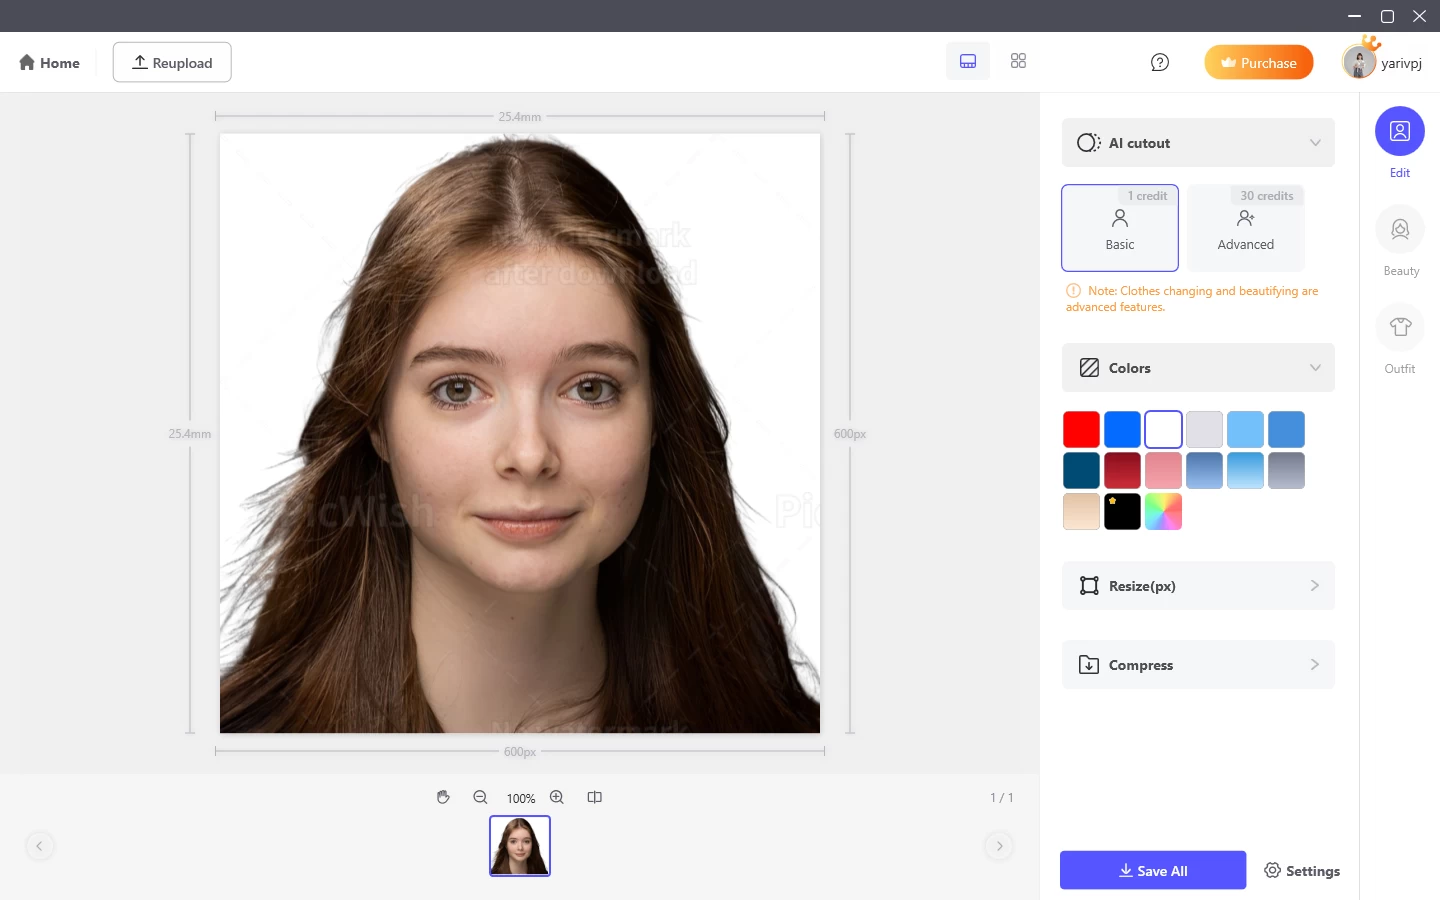
- After the image is uploaded, PicWish will automatically remove the background for you. You can choose the background color.
![picwish id photo basic]()
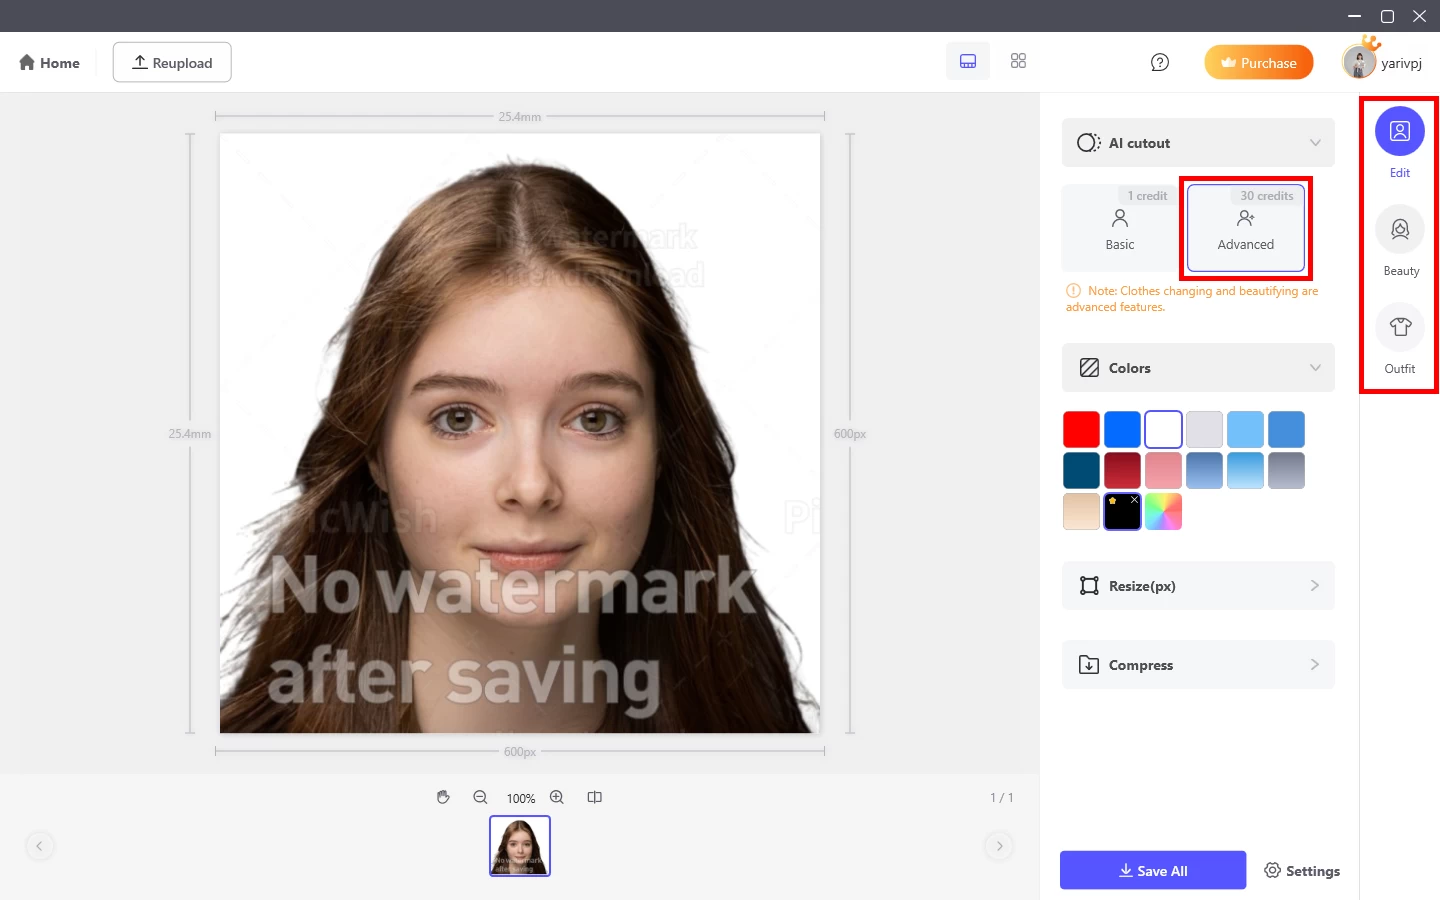
- There are outfit changing and beautification functions in the advanced function. You can also change different clothes according to your need.
![picwish id photo advanced]()
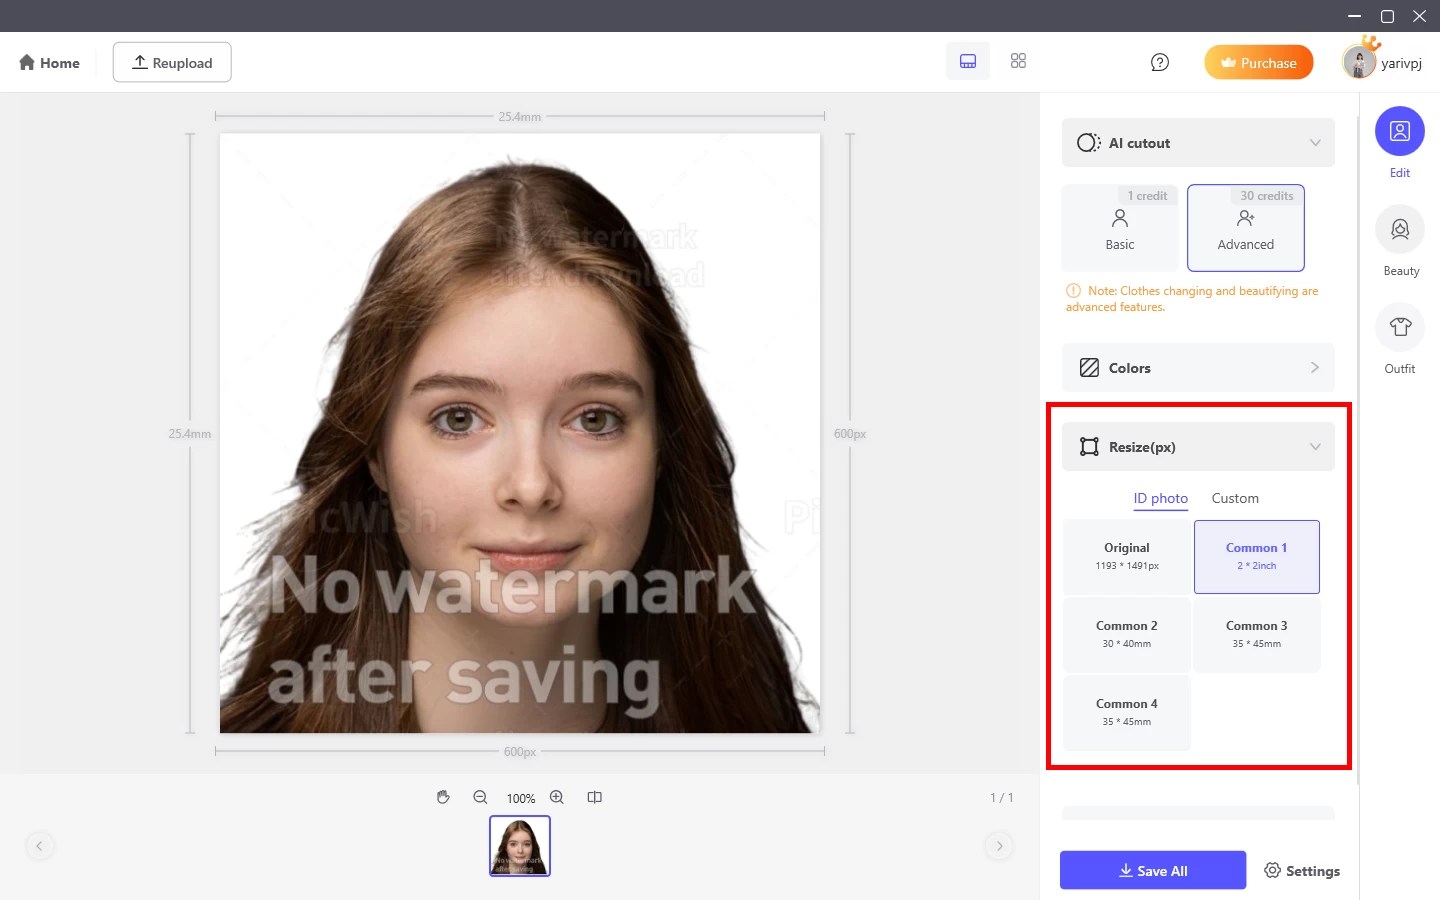
- Multiple sizes are available.
![picwish id photo resize]()
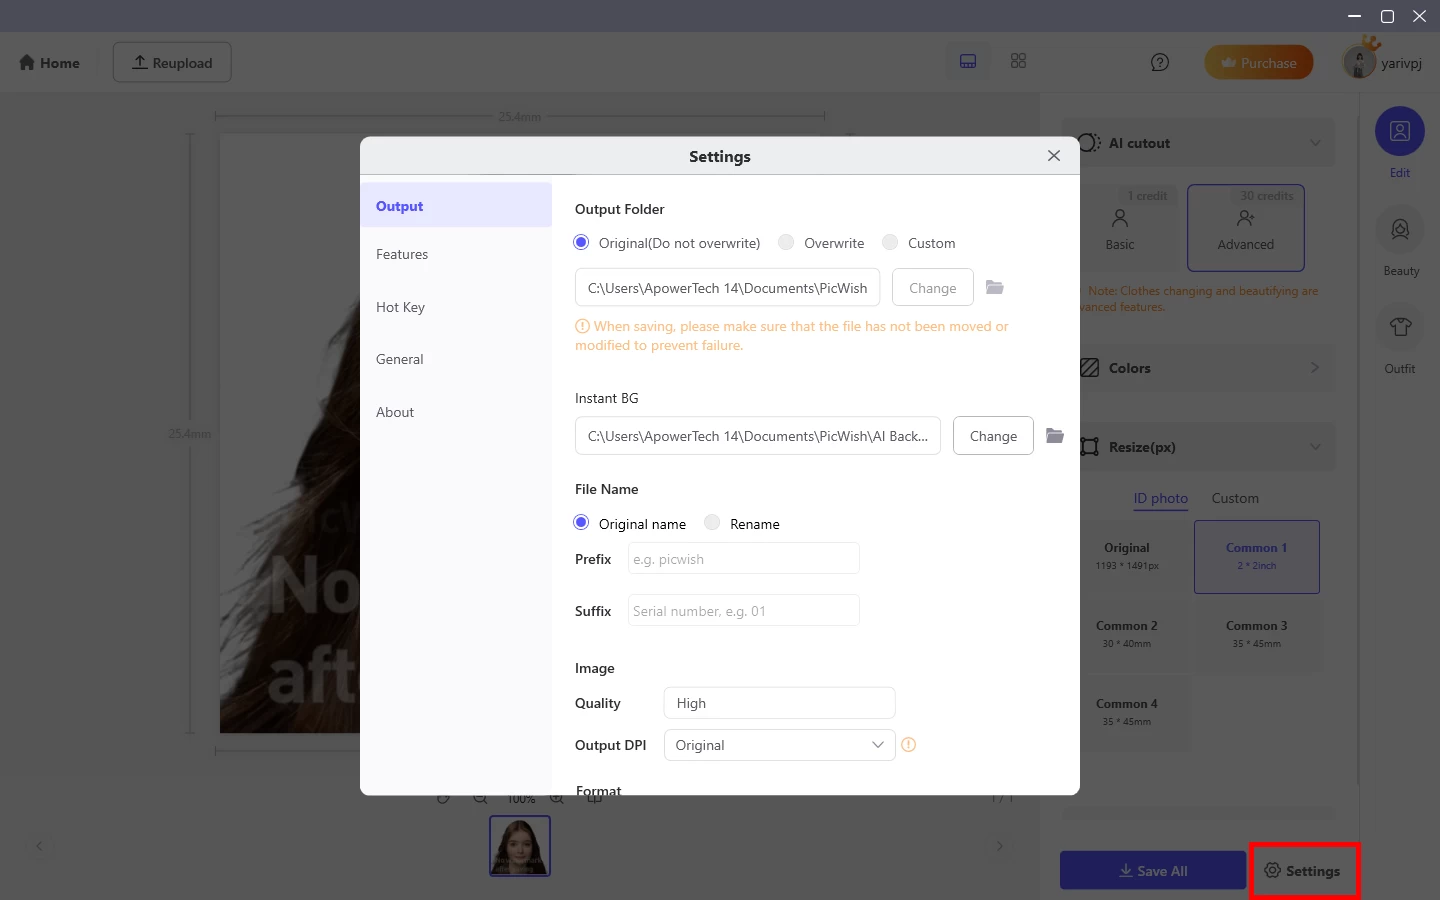
- Click Settings to change the output folder and format.
![picwish id photo settings]()
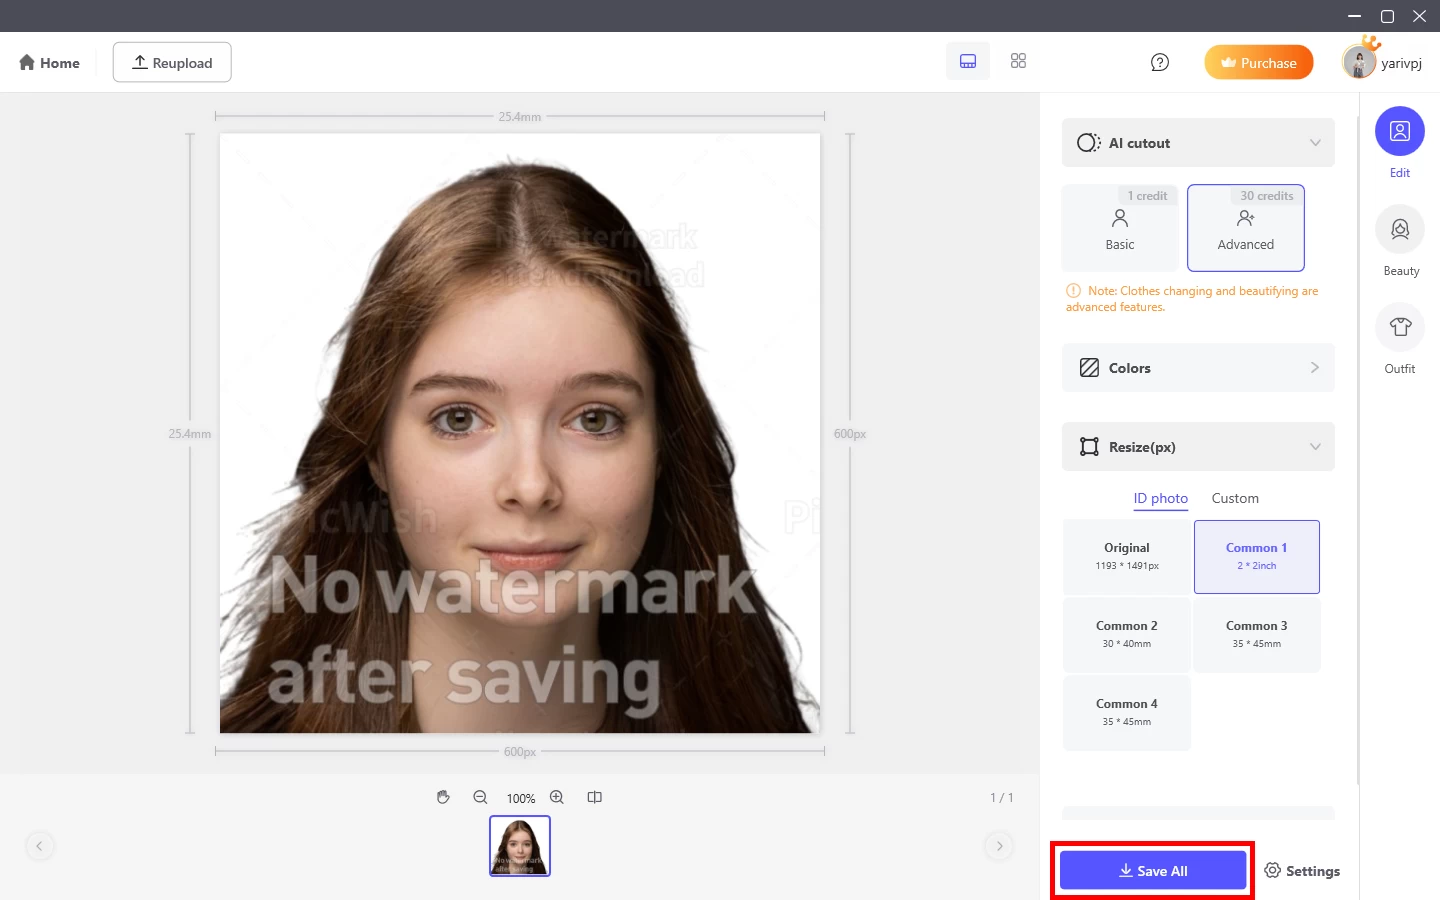
- Click Save All to save the ID photo.
![picwish id photo save all]()
4.4. Blur to Clear
The function includes Portrait enhancement and photo enhancement. The portrait enhancement automatically identifies blurred faces and fixes facial details in high definition through AI technology. The photo enhancement, on the other hand, integrates a variety of optimization methods to unblur the picture quality of objects, icons, animations and other pictures with one click. There are two enhancement functions: Preview Mode and List Mode, the steps are the same.
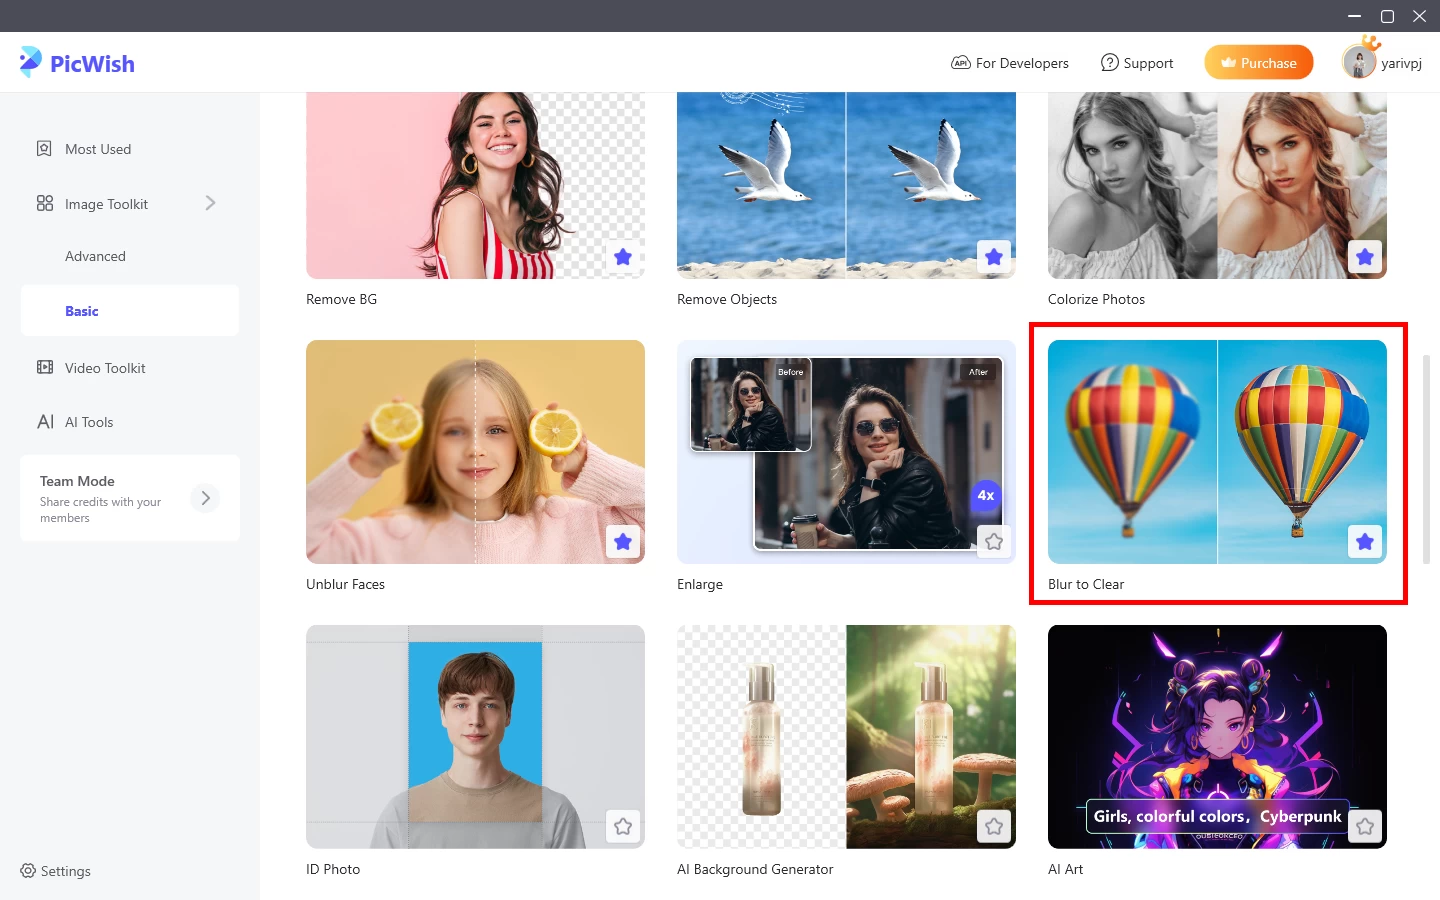
- Click Unblur Faces or Blur to Clear from Toolkit and upload your image.
![picwish blur to clear tool]()
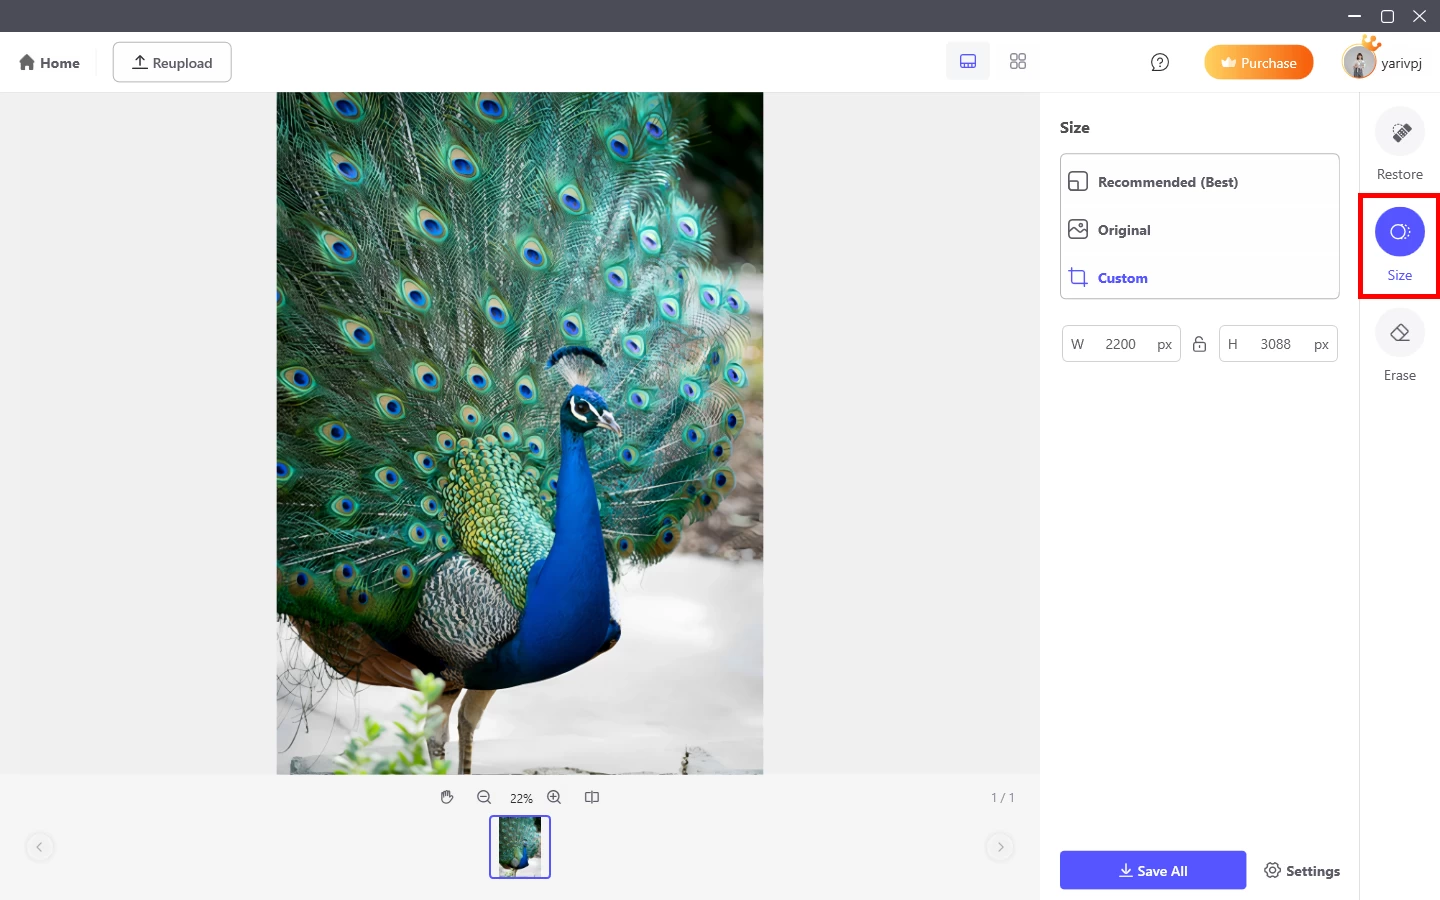
- You can adjust the image size on the right.
![picwish blur to clear resize]()
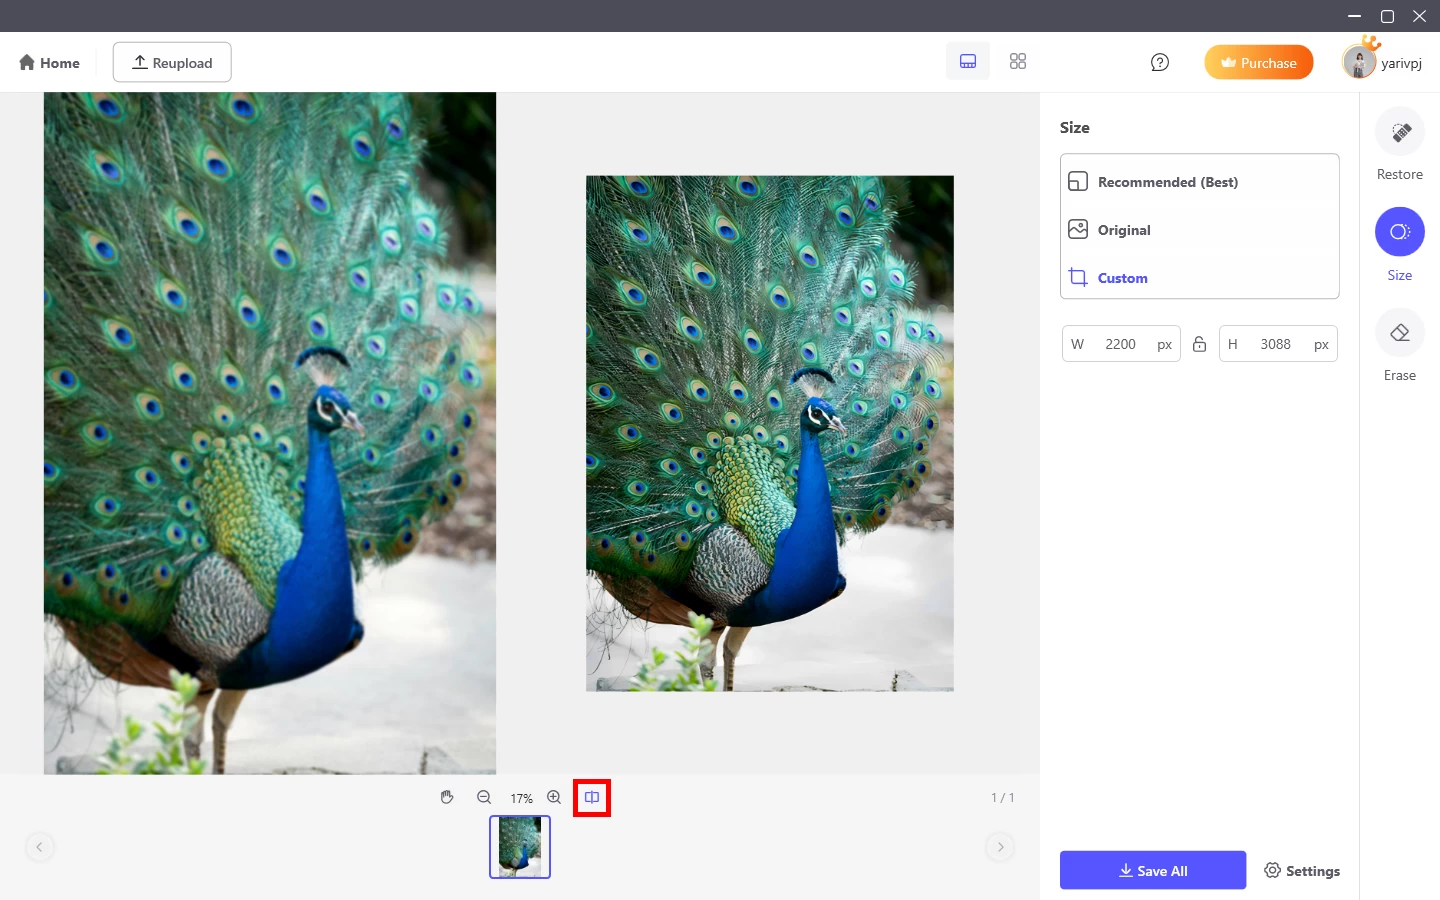
- Click the button below to view the contrast images.
![picwish blur to clear comparison]()
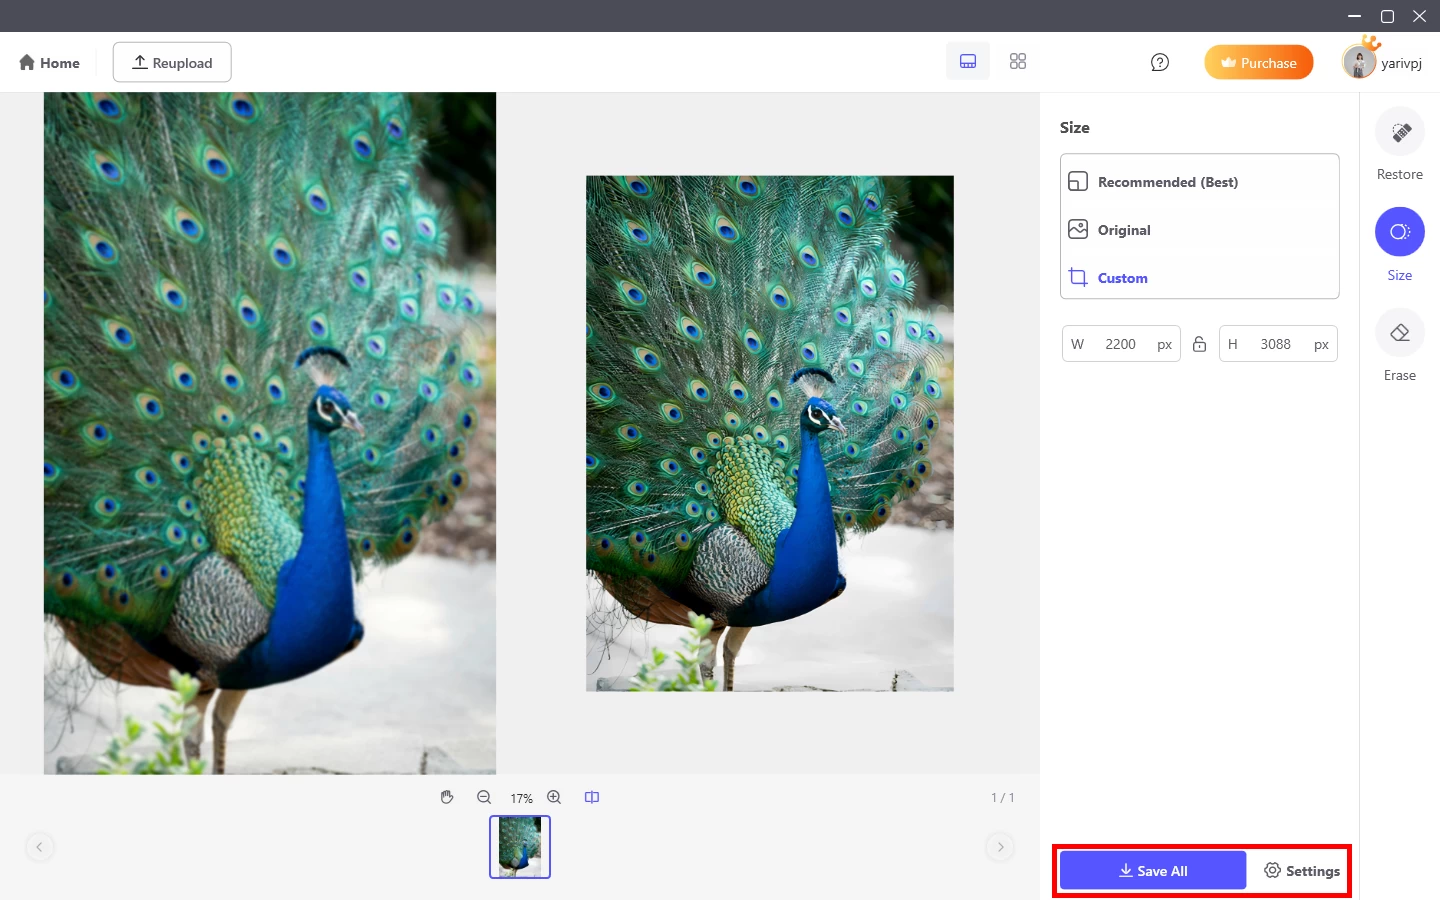
- You can also change the output folder on the right. Click Save All to save the images.
![picwish blur to clear save all]()
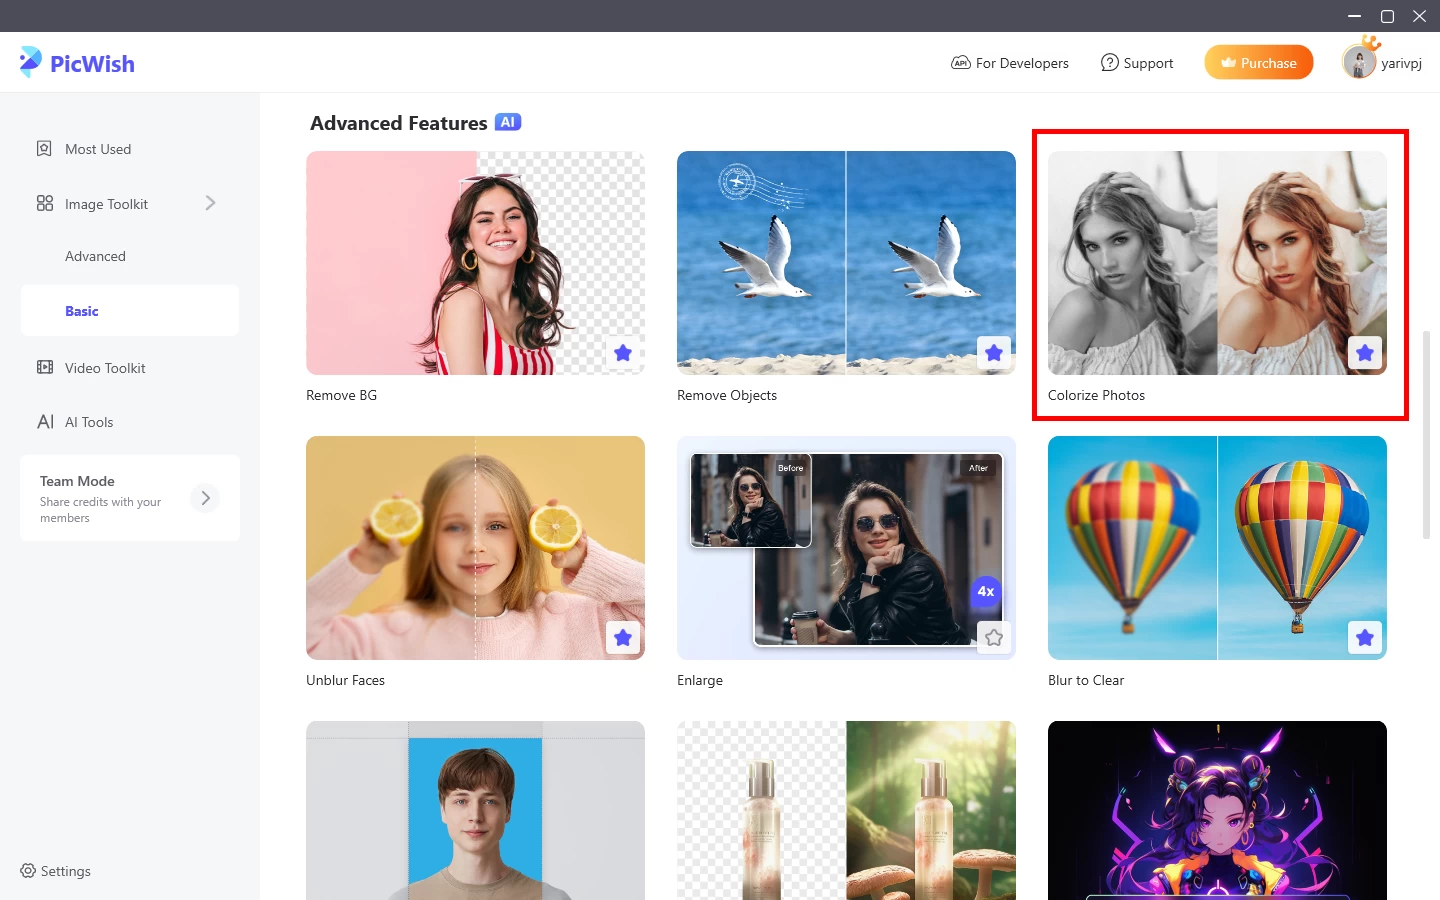
4.5. Colorize Photos
Turn your old photos to color naturally, bringing them a new look for free.
- Click Colorize Photos from Toolkit. You can process up to 100 images at the same time.
![picwish colorize photo tool]()
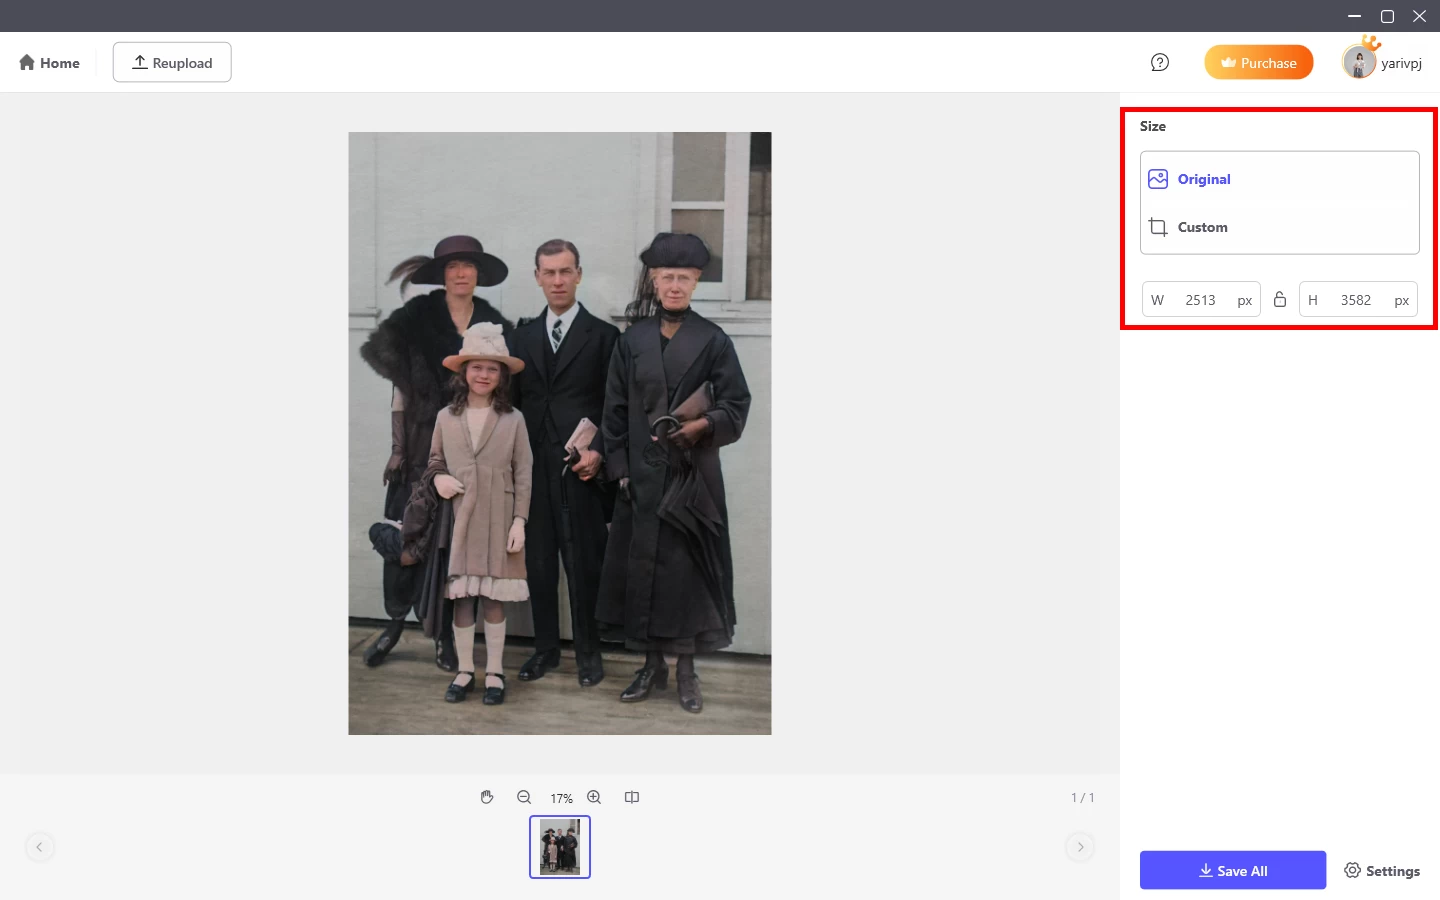
- It will be automatically colorized. You can also change the size.
![picwish colorize photo resize]()
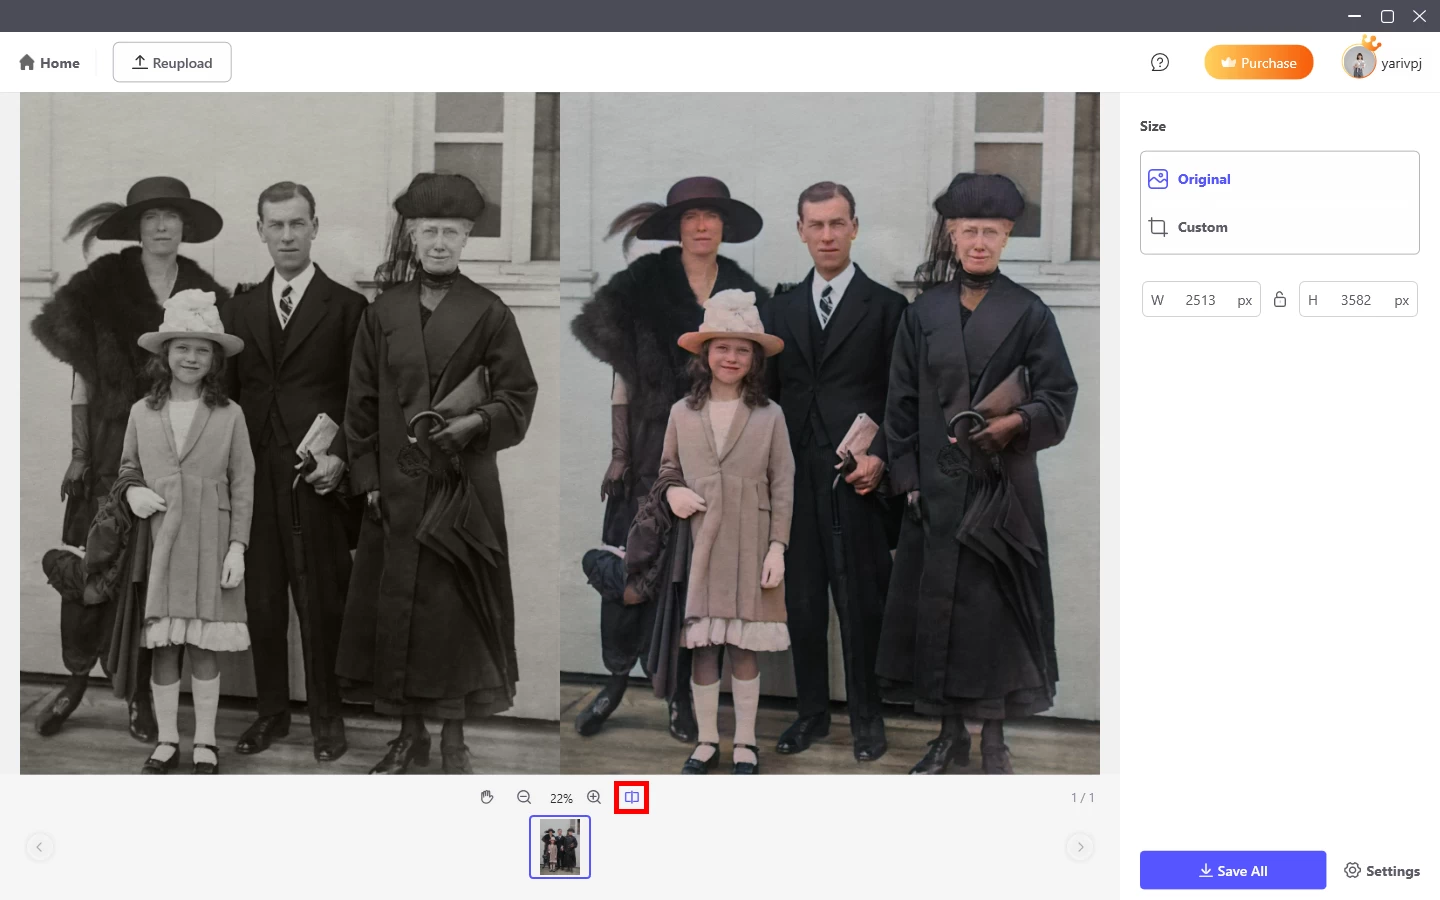
- Click the button below to view the contrast images.
![picwish colorize photo comparison]()
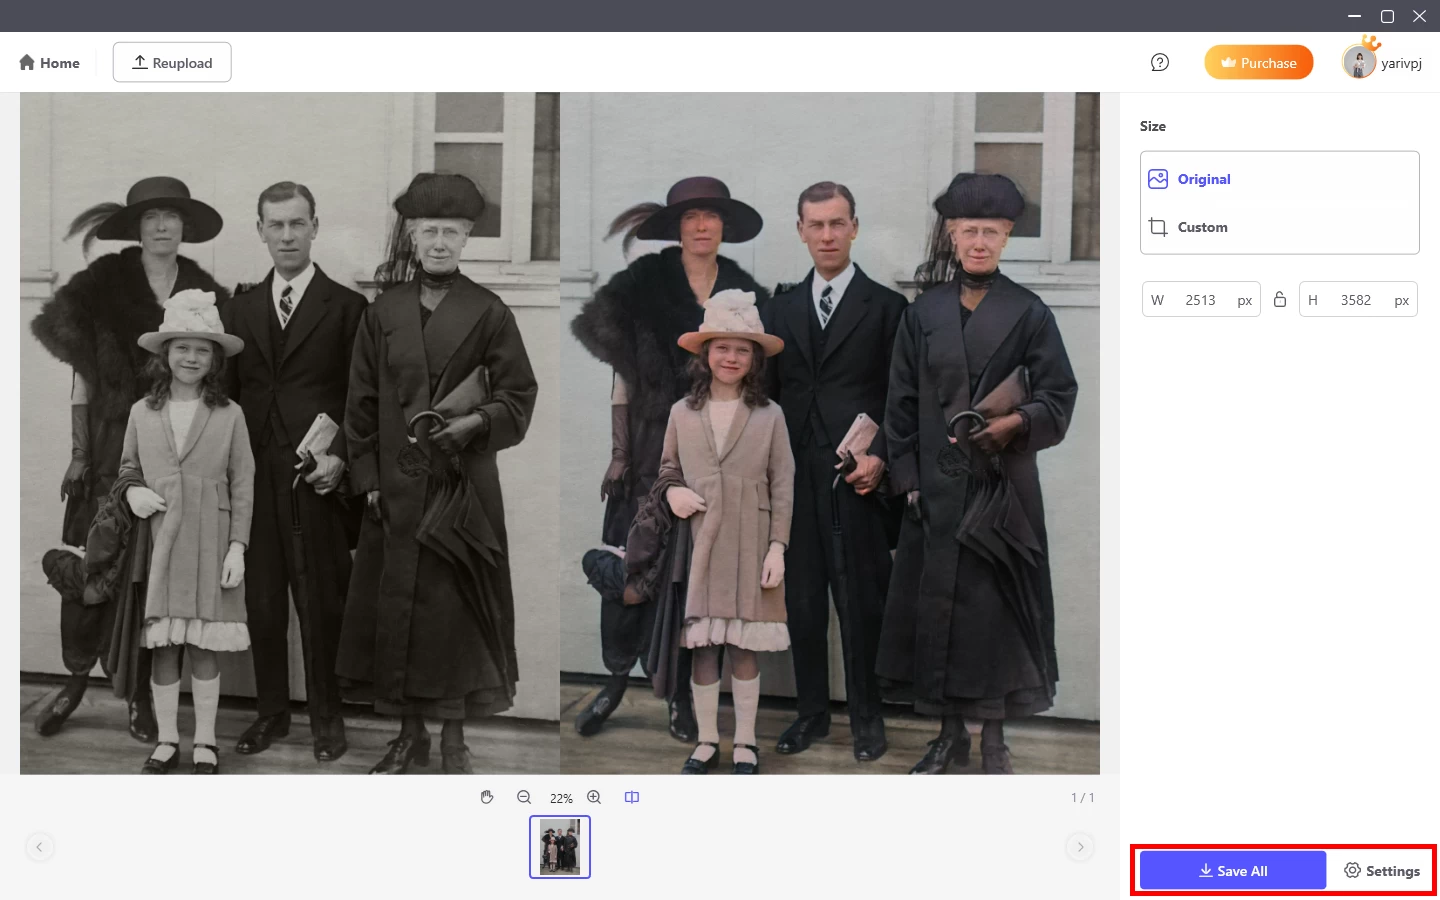
- You can also change the output folder and format on the right. Click Save All to save the images.
![picwish colorize photo save all]()
4.6. Compress
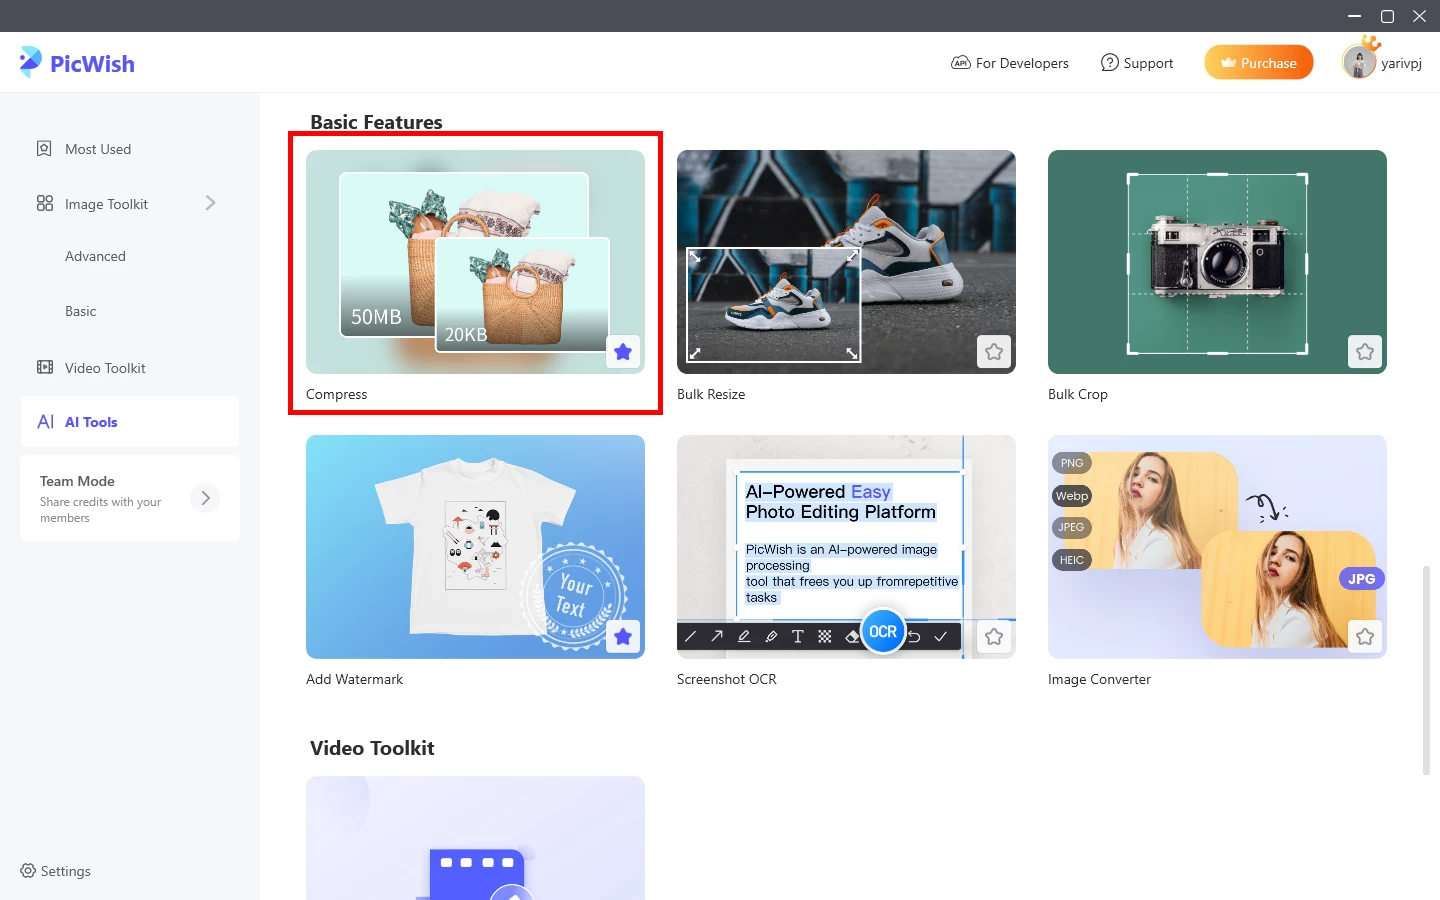
The compression function of PicWish can compress images to the maximum extent without loss. JPG, JPEG, PNG, BMP and other formats are supported.
- Click Compress from Toolkit. You can process up to 100 images at the same time.
![picwish app compress tool]()
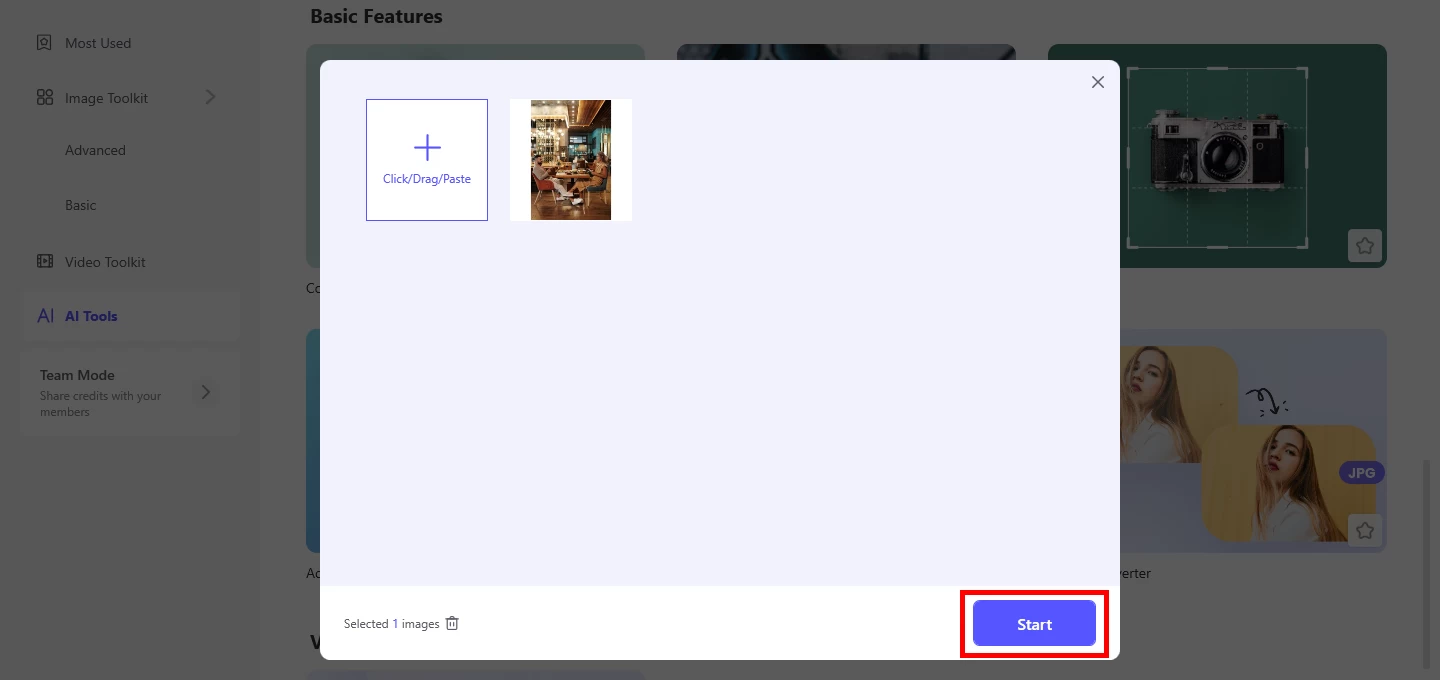
- Click Start to compress.
![picwish compress upload image]()
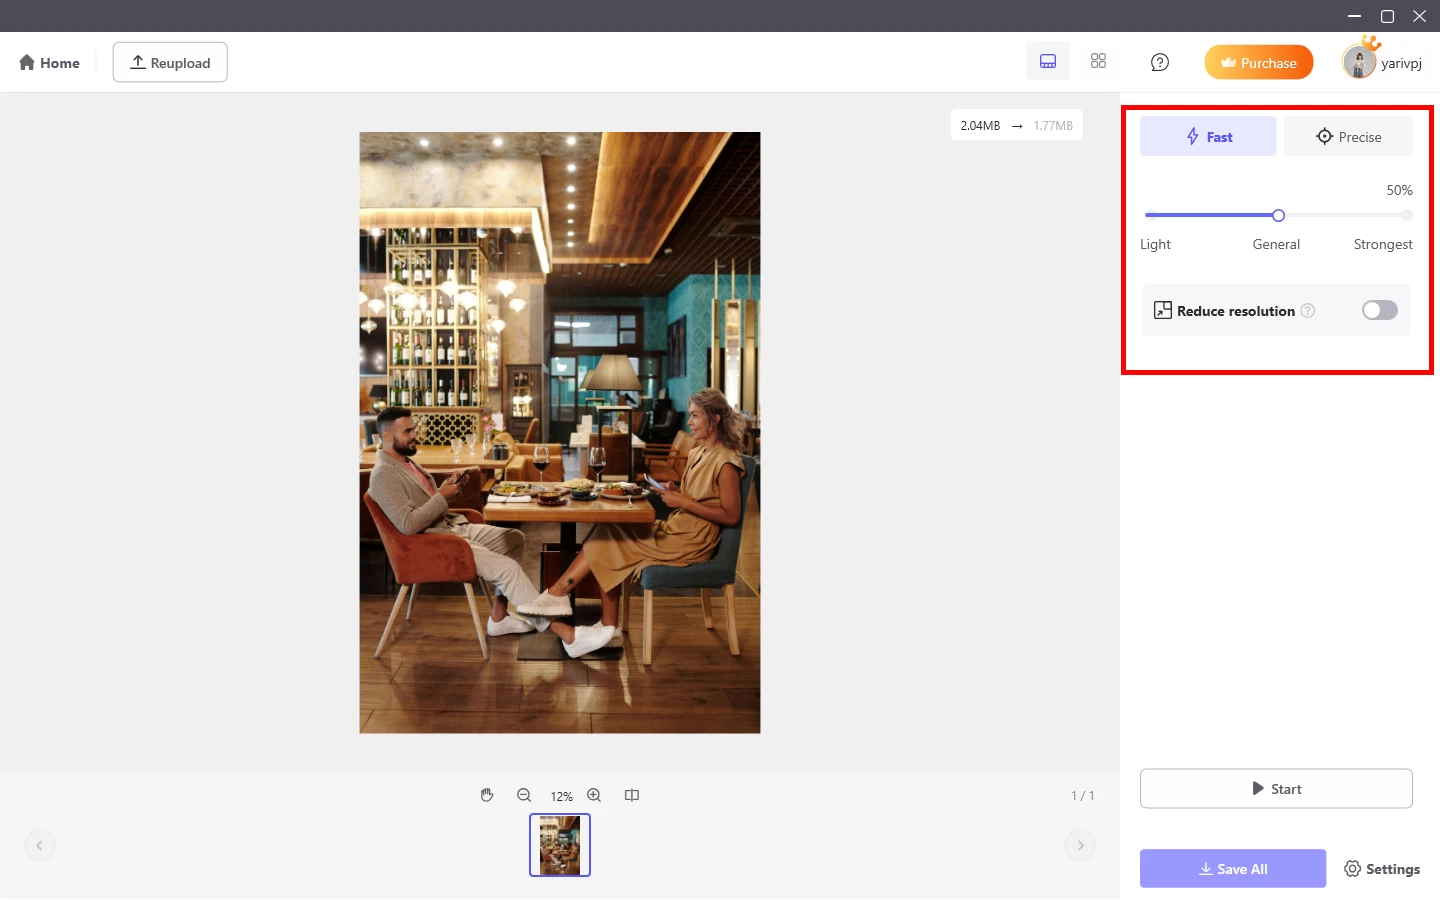
- Here you can adjust the compression level (the stronger, the smaller the image), the resolution (the smaller the resolution, the smaller the image).
![picwish compress image fast]()
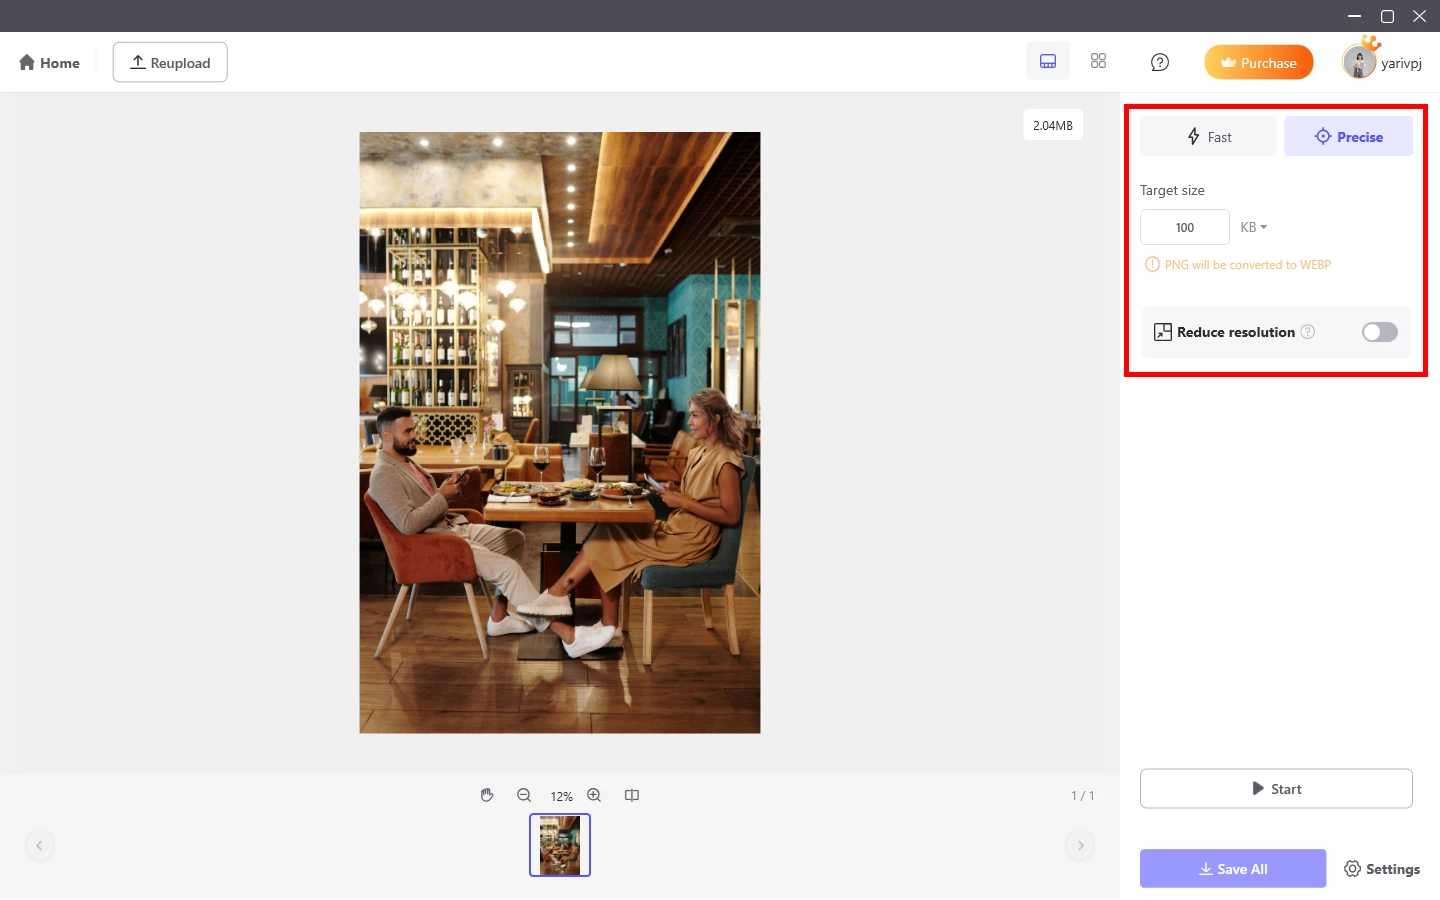
- You can also compress the value to a specified range.
![picwish compress image precise]()
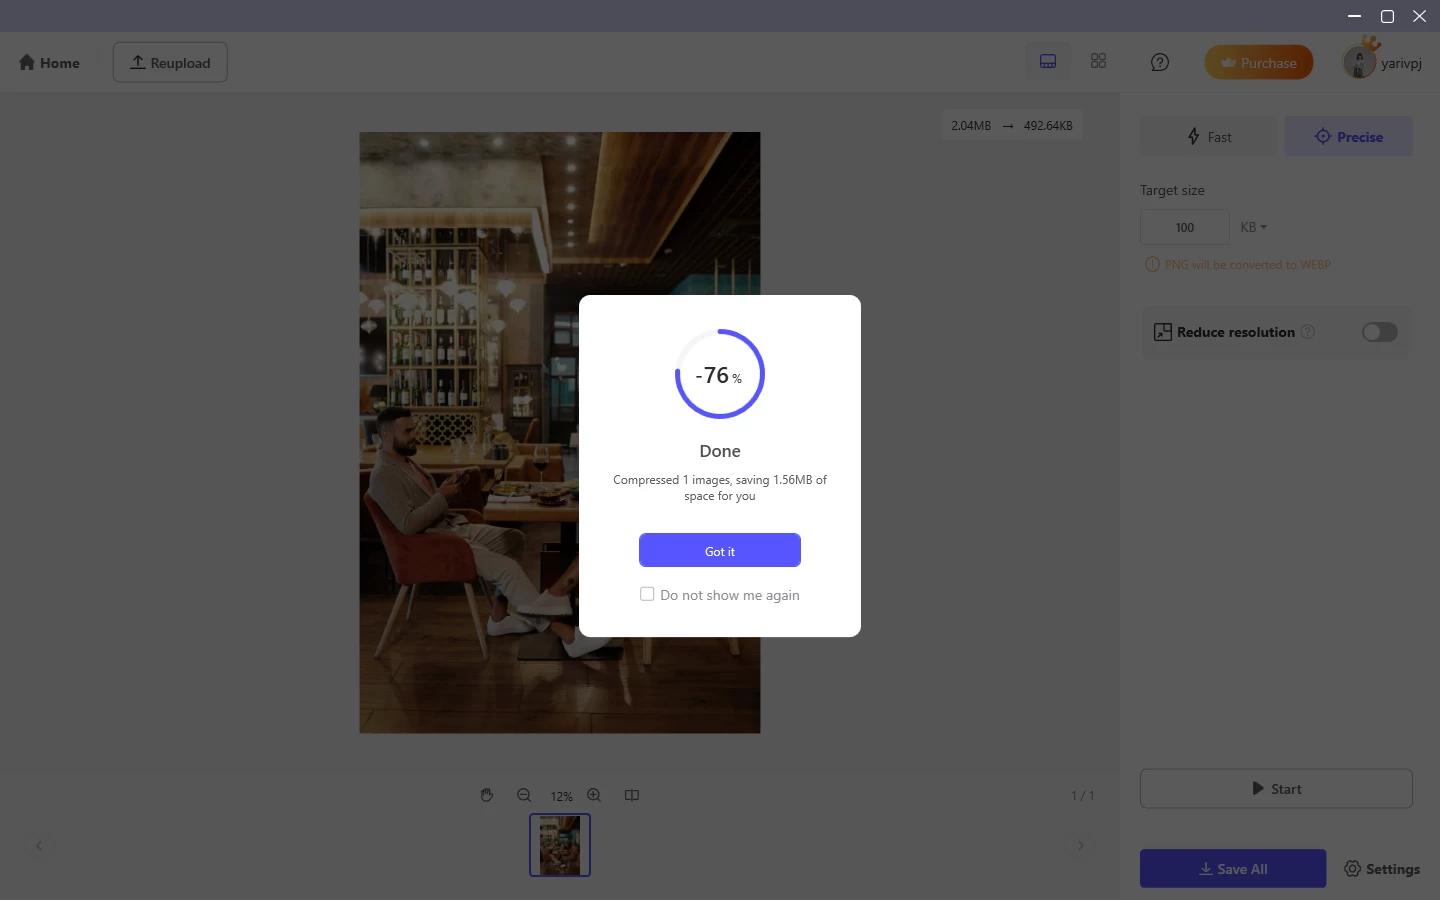
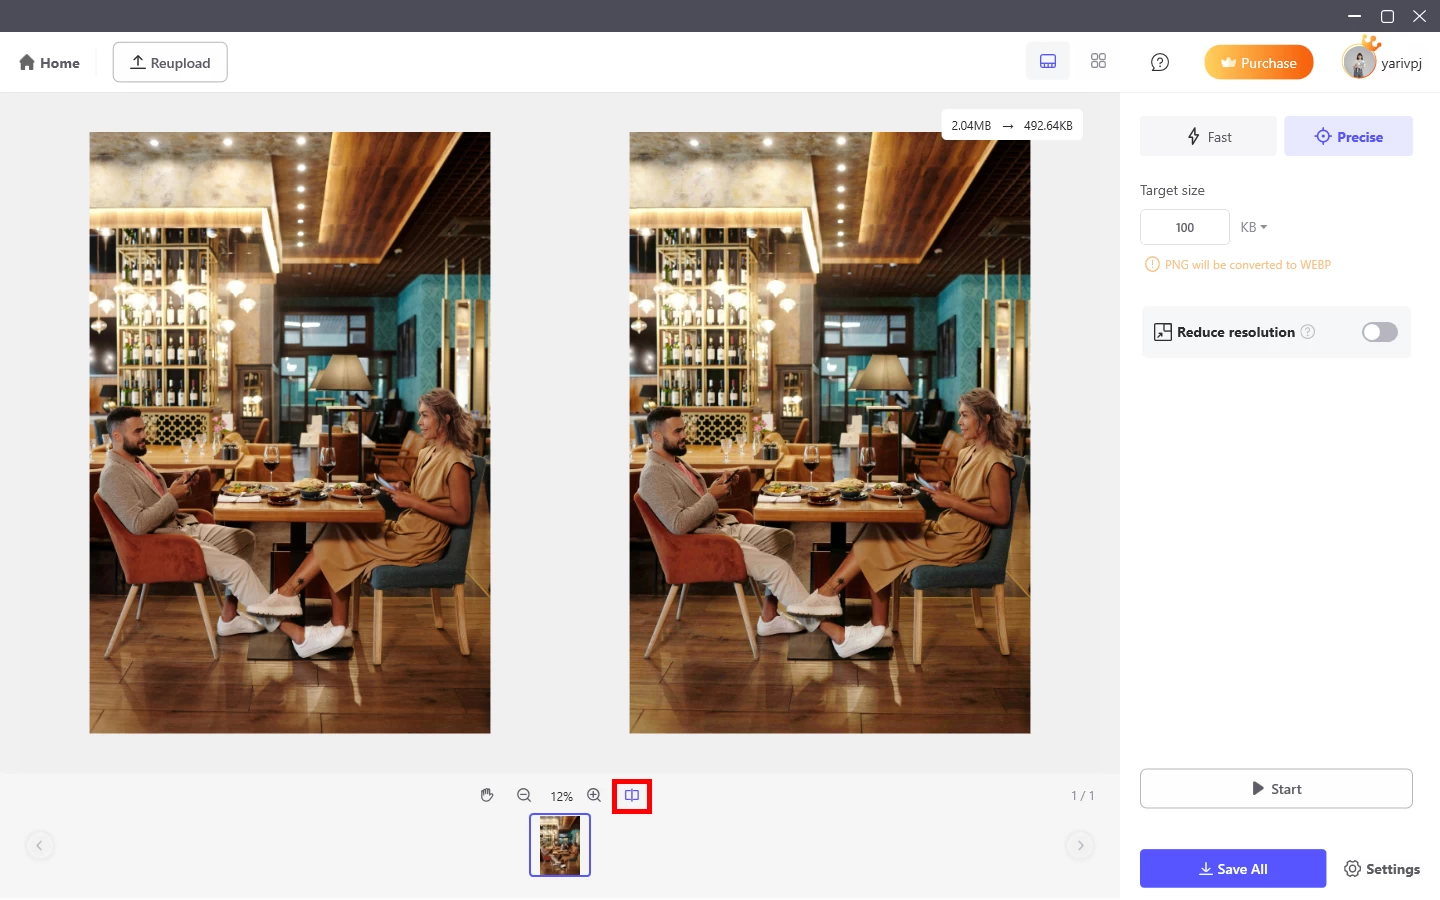
- Then you can click Start to compress and preview the effect.
![picwish compress image done]()
- Click this button to make a contrast with the original image.
![picwish compress image comparison]()
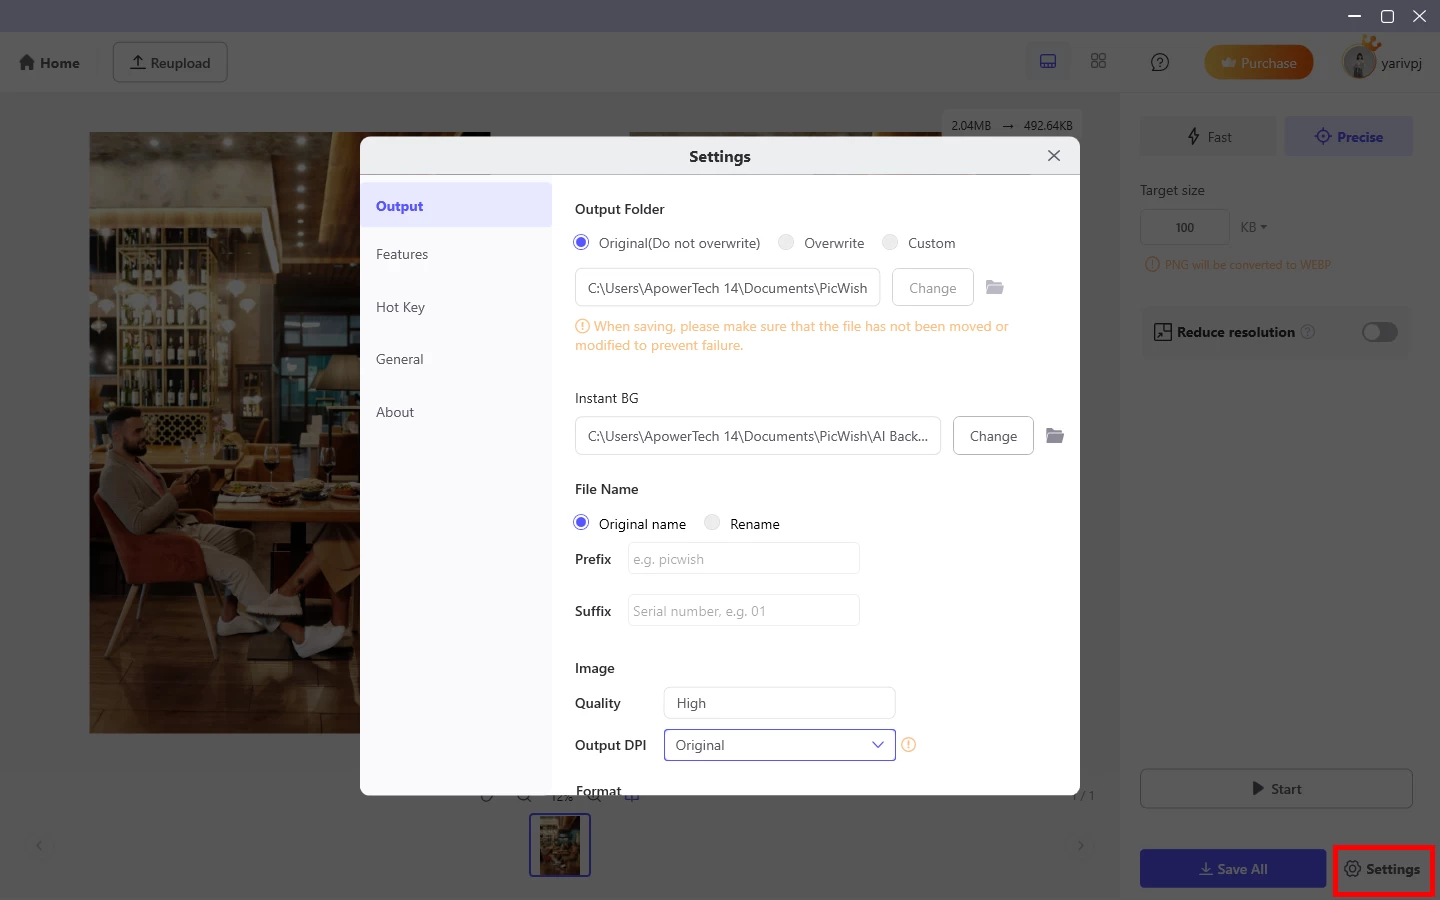
- You can also change the output folder and format in the lower right corner.
![picwish compress image settings]()
4.7. Add Watermark
The method of adding the watermark to the image is as follows:
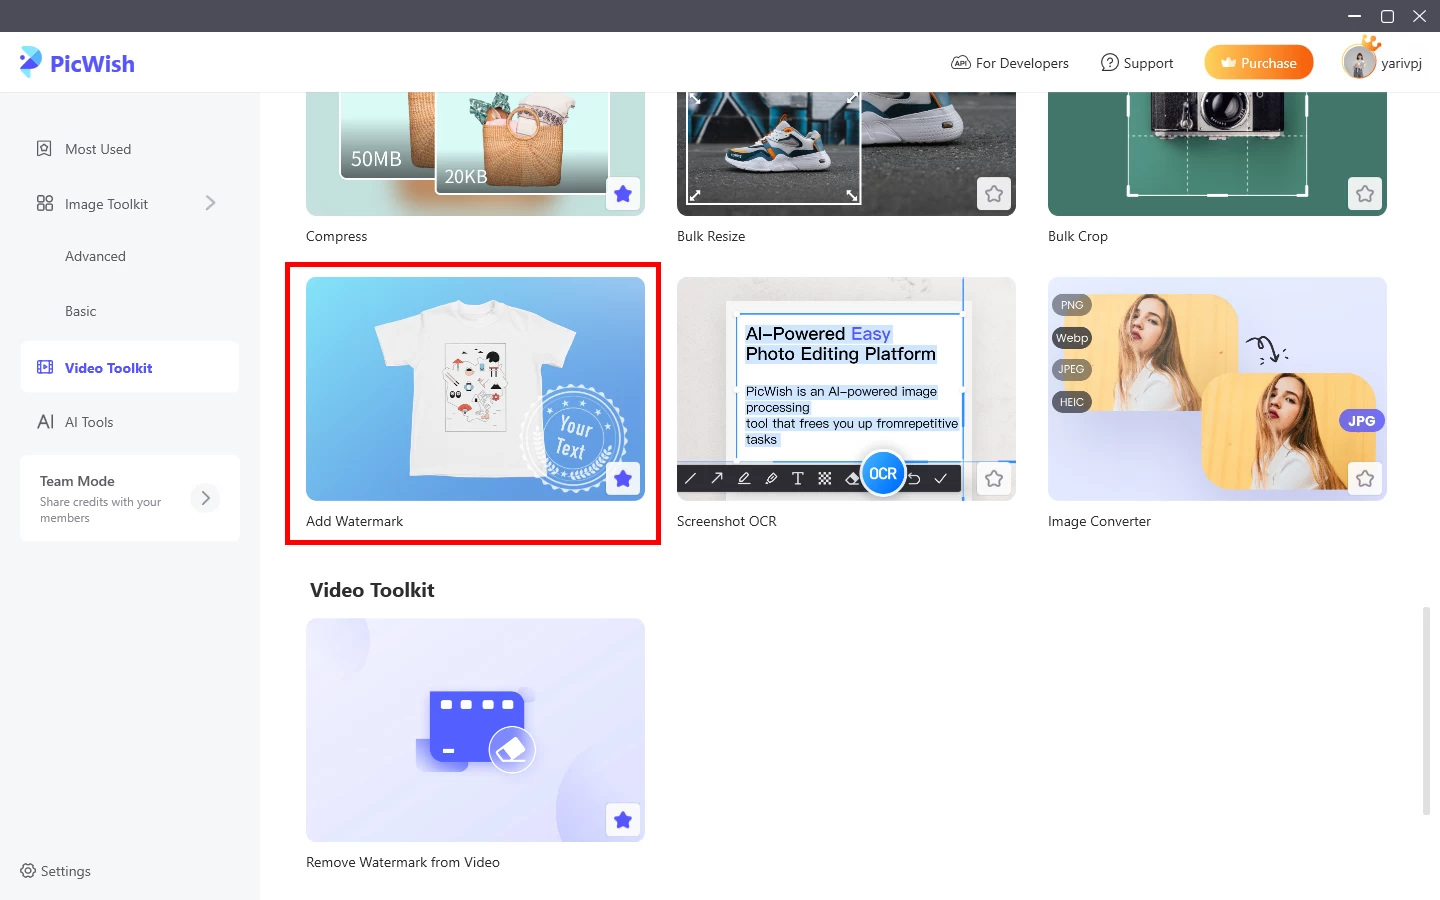
- Click Add watemark from Toolkit. You can process up to 100 images at the same time.
![picwish add watermark tool]()
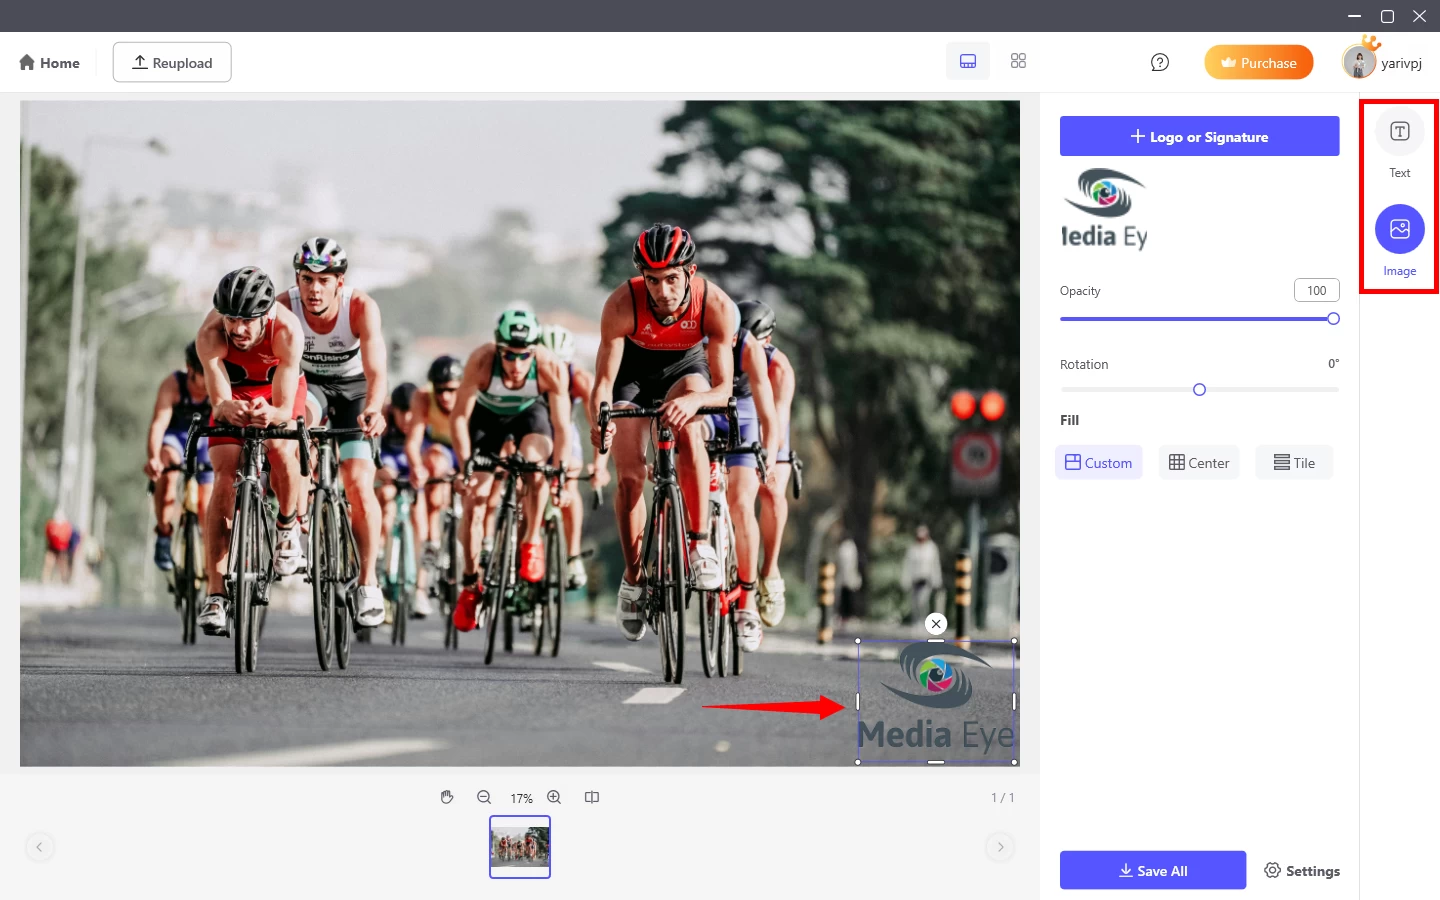
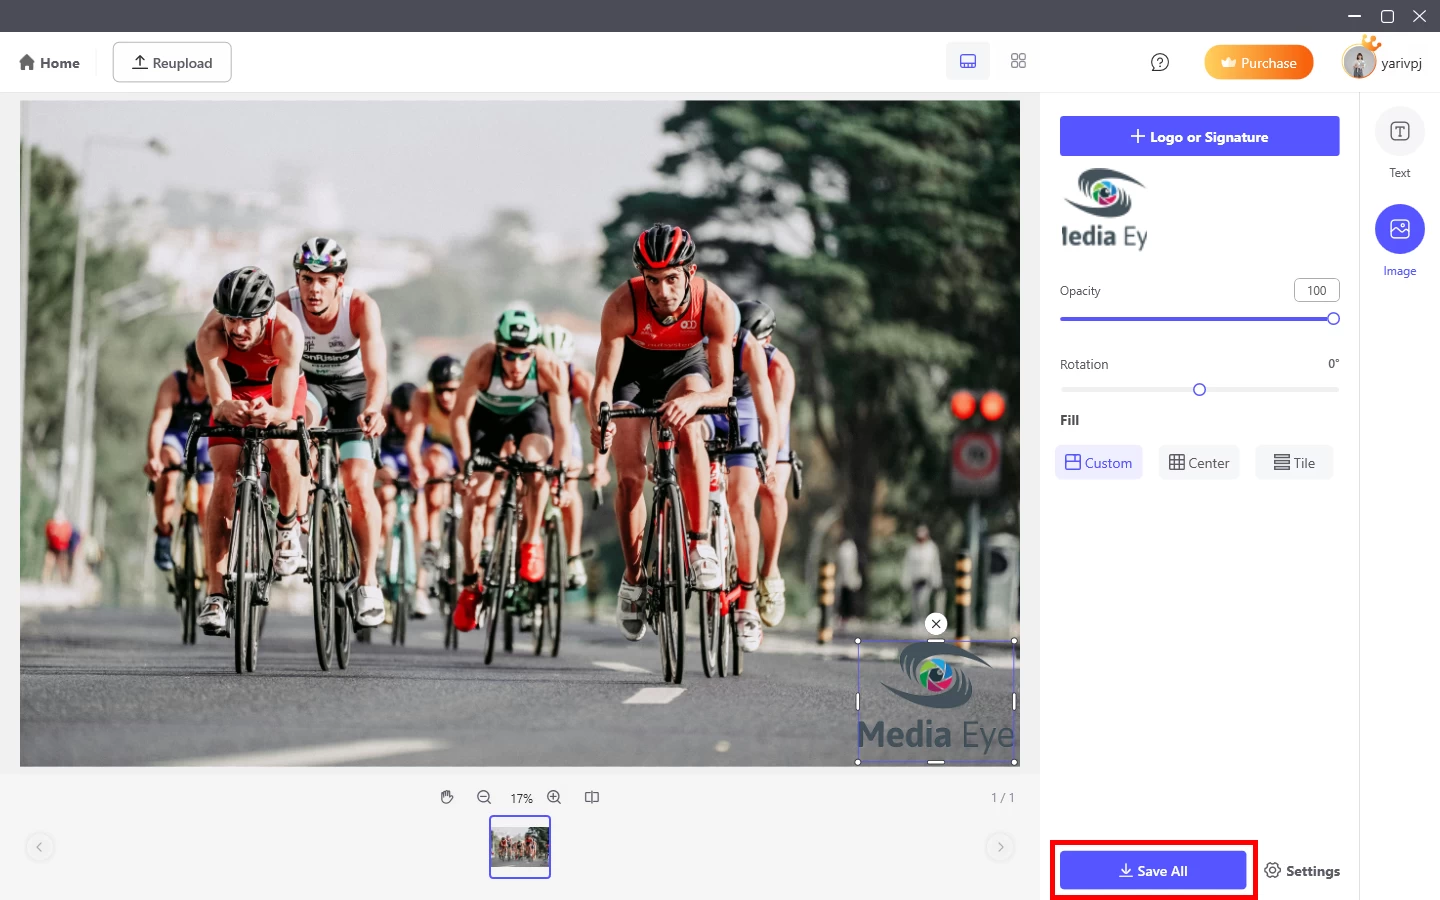
- After uploading the image, select the text/image watermark you need to add on the right side, after adding it, you can manually adjust the opacity, rotation angle, text, and also change the font size and color. If you choose an image watermark, you can customize the transparency, rotation angle, and position.
![picwish add watermark image]()
- Click Save All to save the images on PC.
![picwish add watermark save all]()
4.8. Bulk Resize
PicWish enables you to batch resize photos and also offers a variety of standard sizes with the option to lock the aspect ratio.
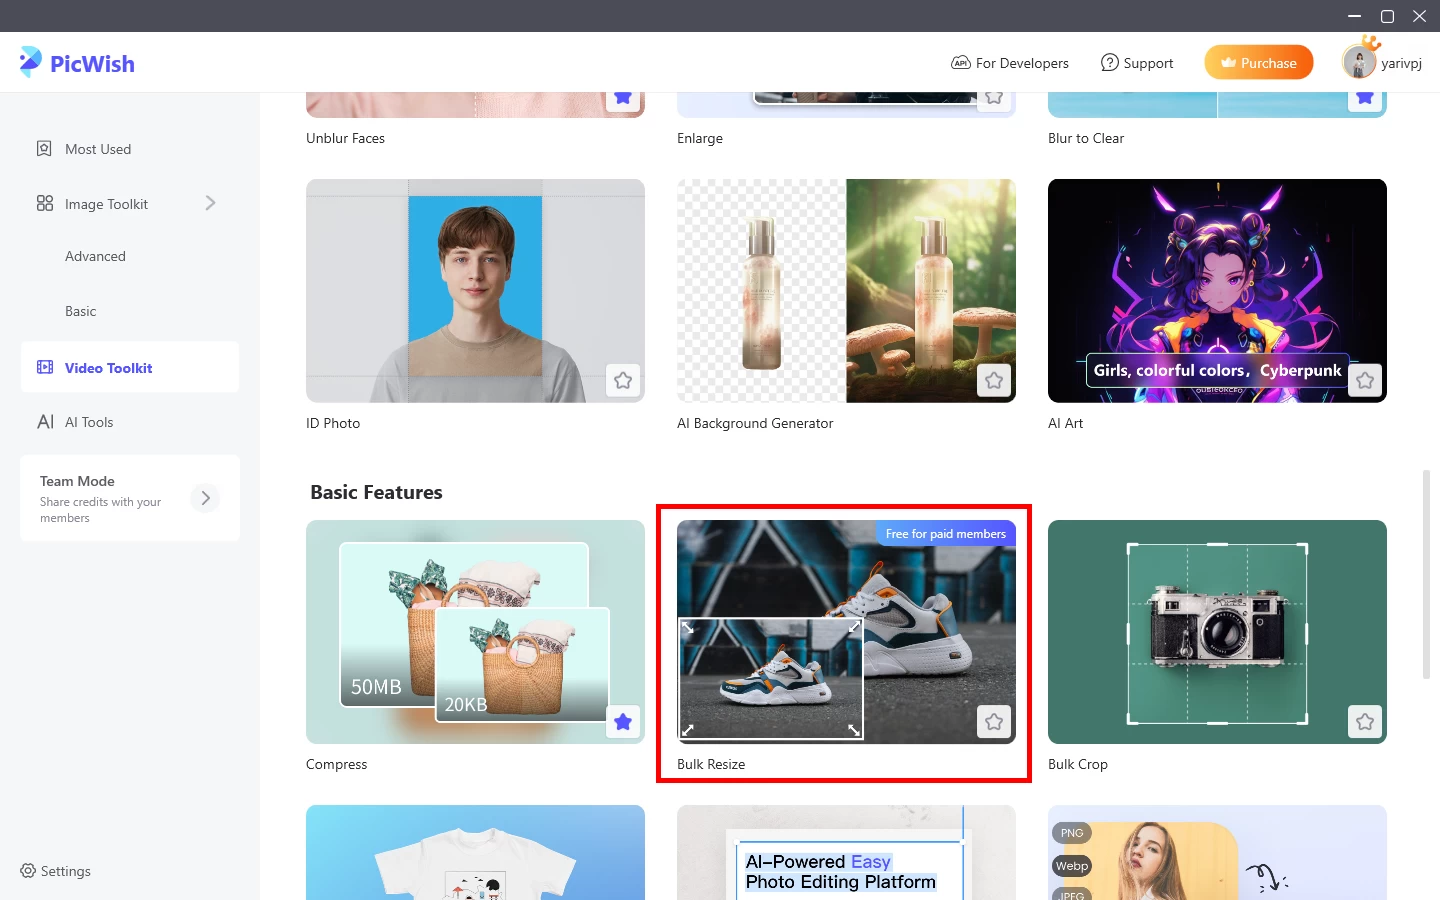
- Click Bulk Resize from Toolkit. You can process up to 100 images at the same time.
![picwish bulk resize tool]()
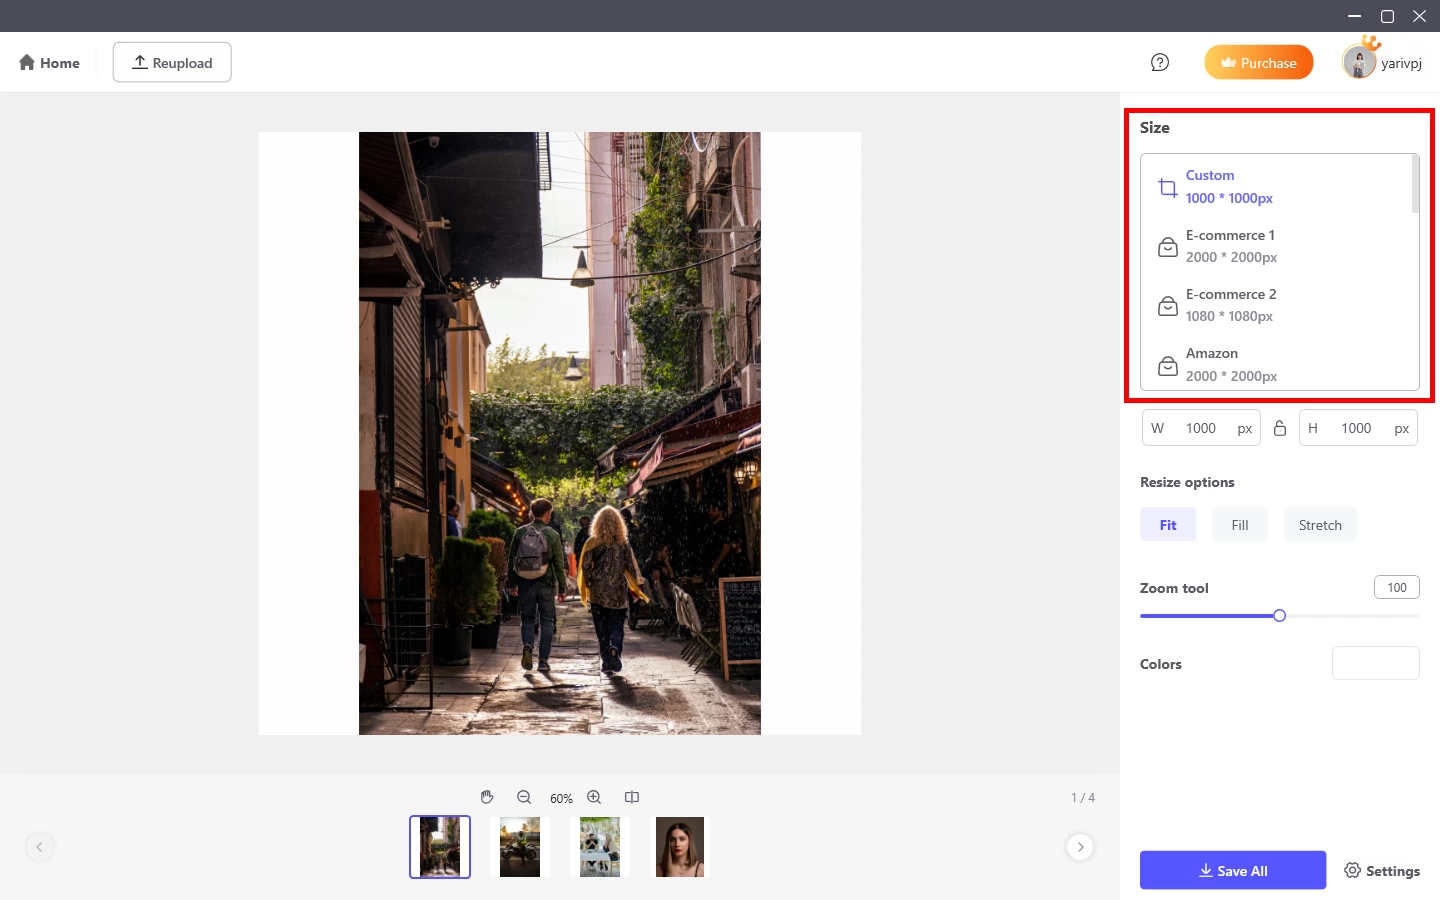
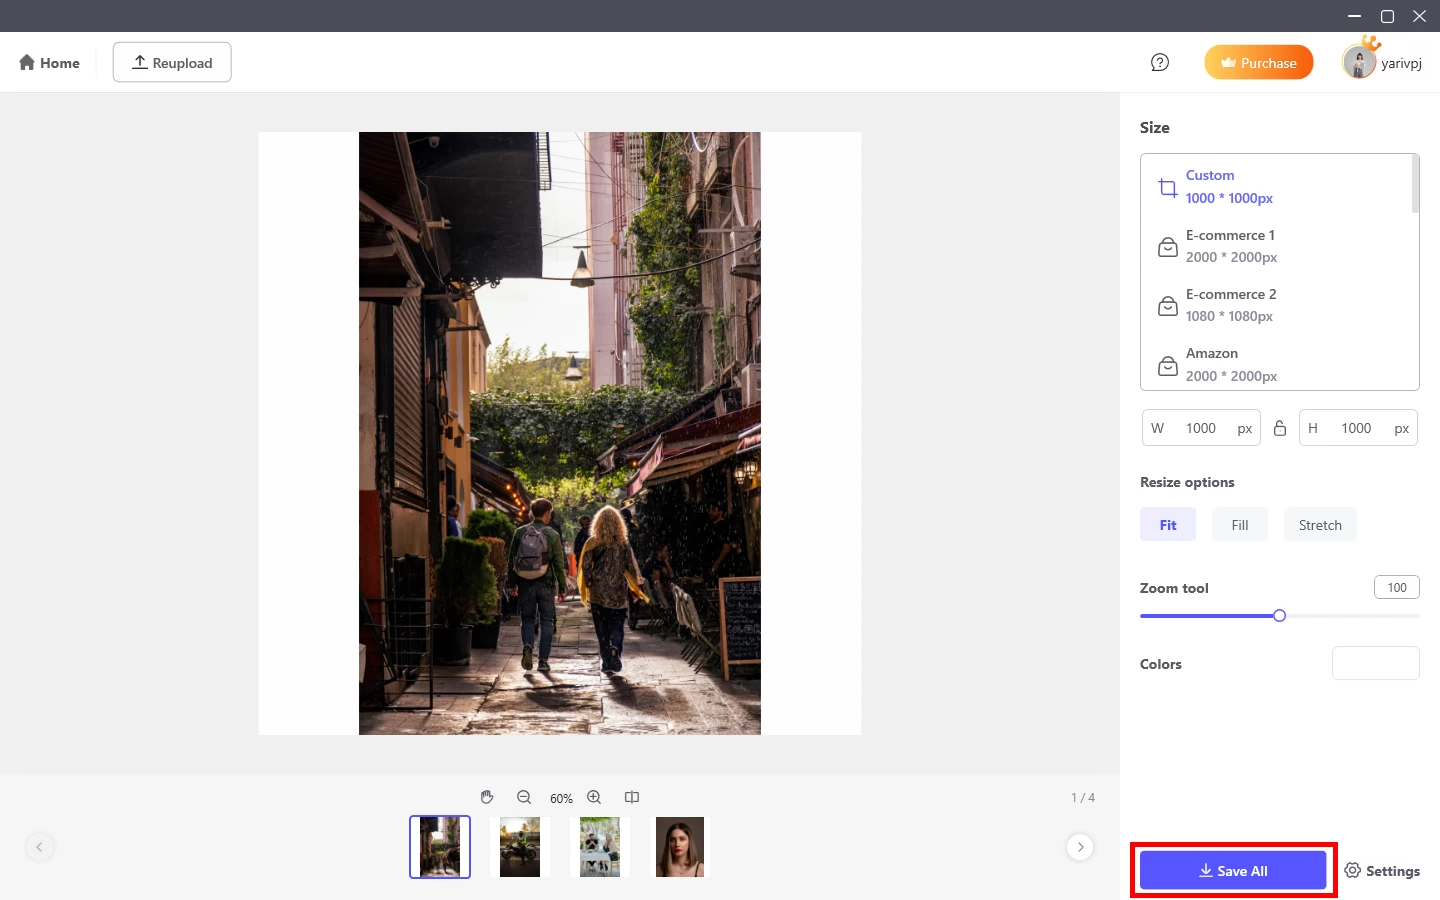
- You can enter a custom image size or select another size on the right.
![picwish bulk resize sizes]()
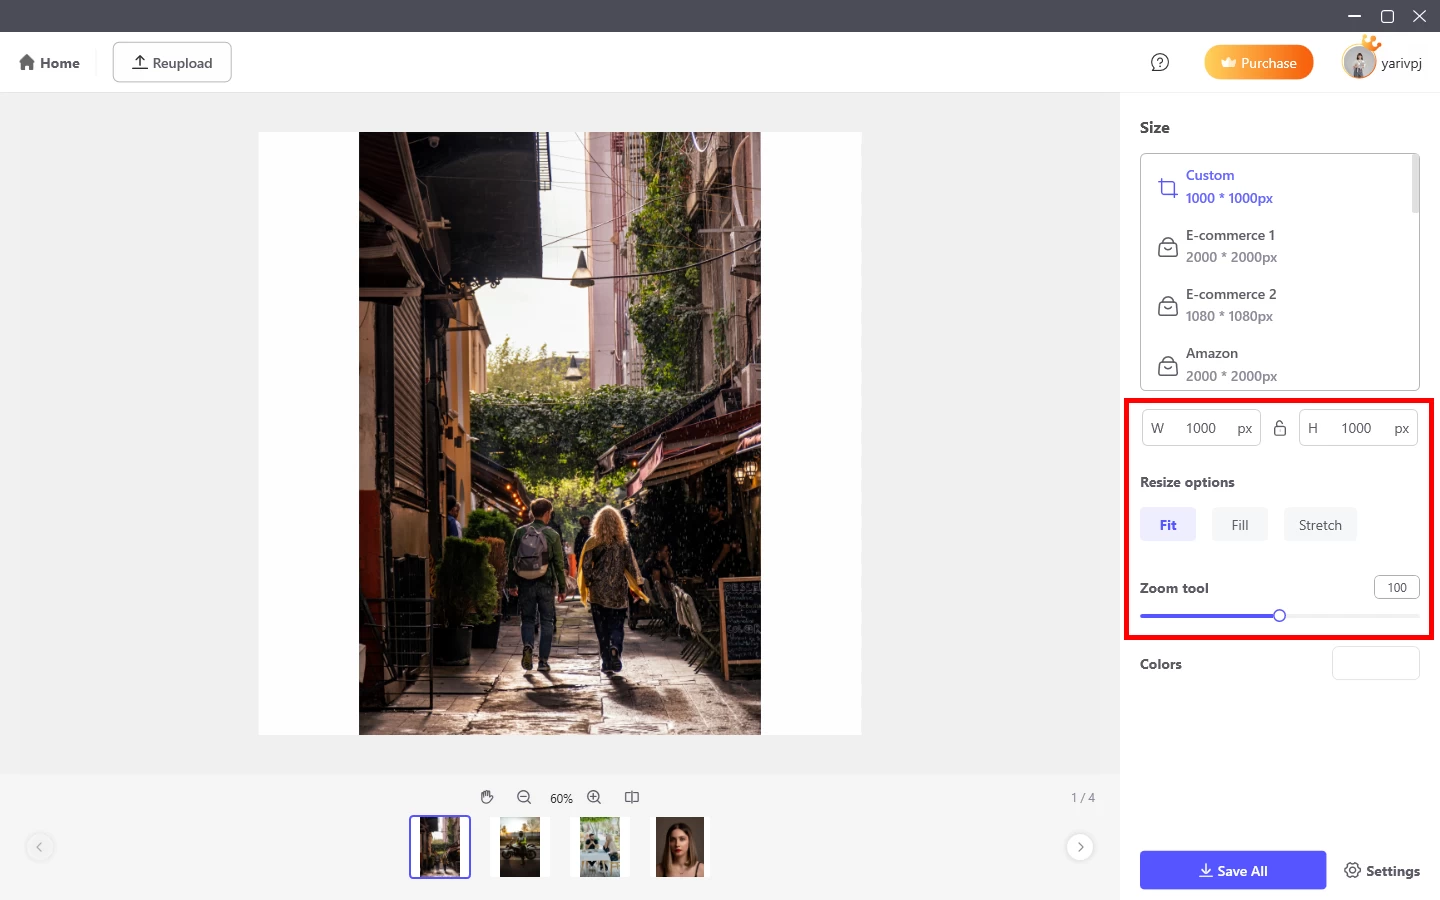
- You can adjust the layout of the picture.
![picwish bulk resize option]()
- Click Save All to save images.
![picwish bulk resize save all]()
4.9. Bulk Crop
You can customize the image height and width, and freely set the cropping area.
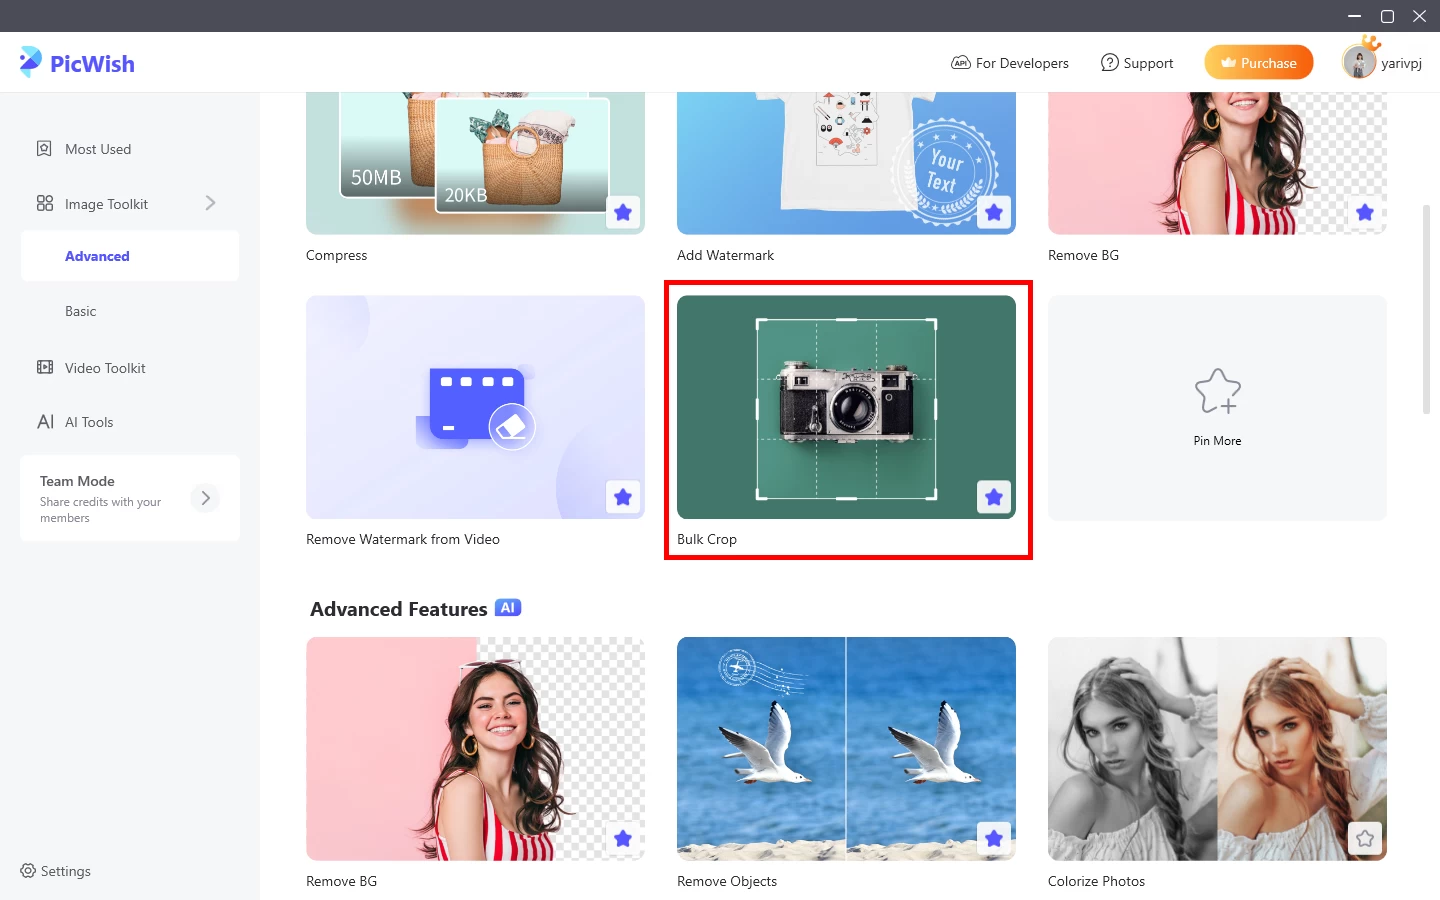
- Click Bulk crop from Toolkit. You can process up to 100 images at the same time.
![picwish bulk crop tool]()
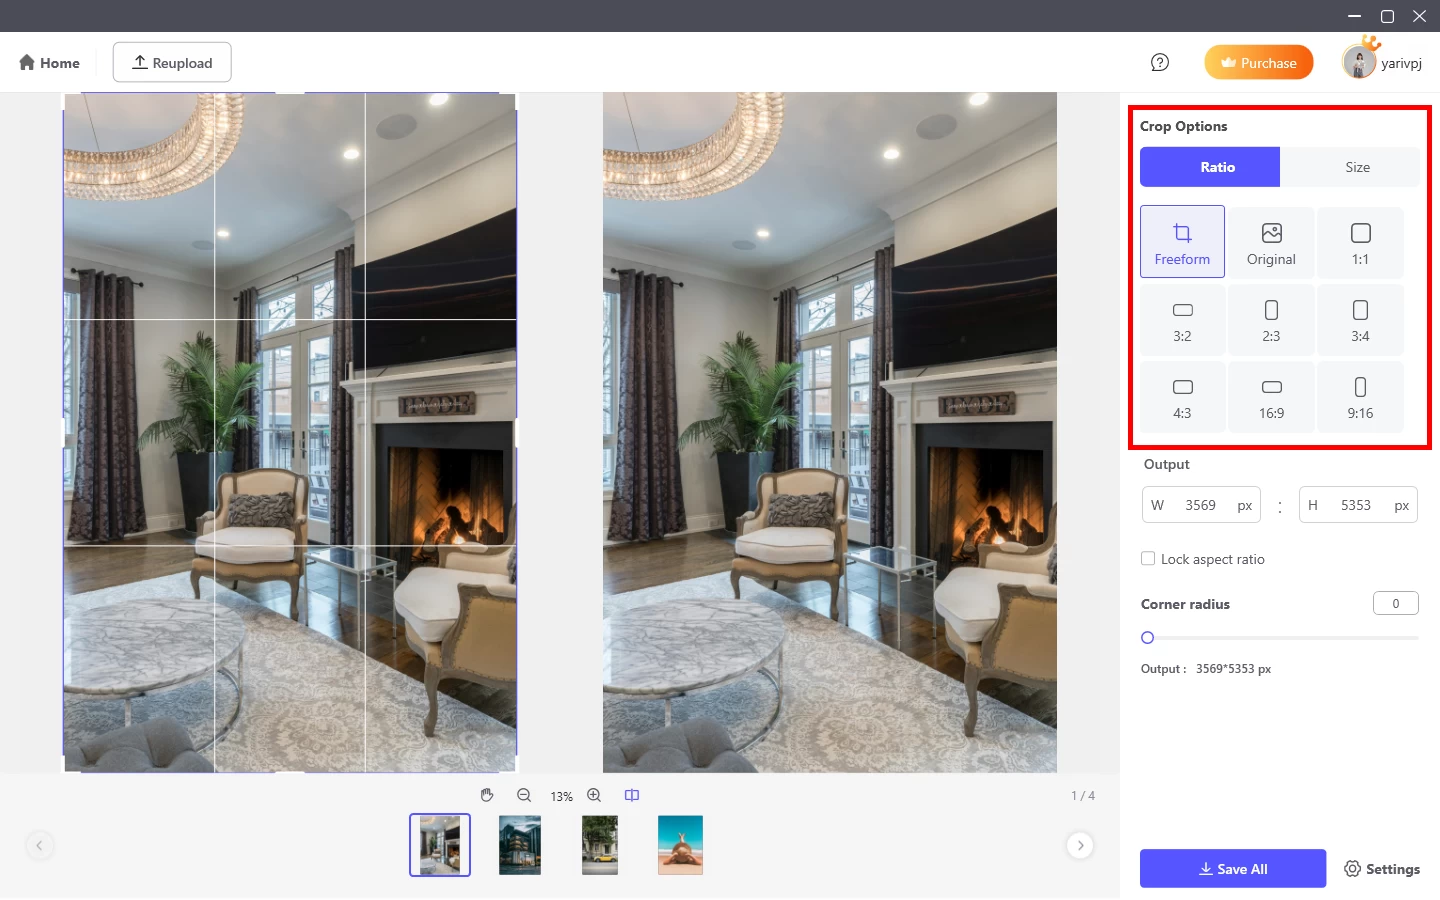
- Various ratios are available: 1:1,4:3,3:4,16:9,9:16.
![picwish bulk crop options]()
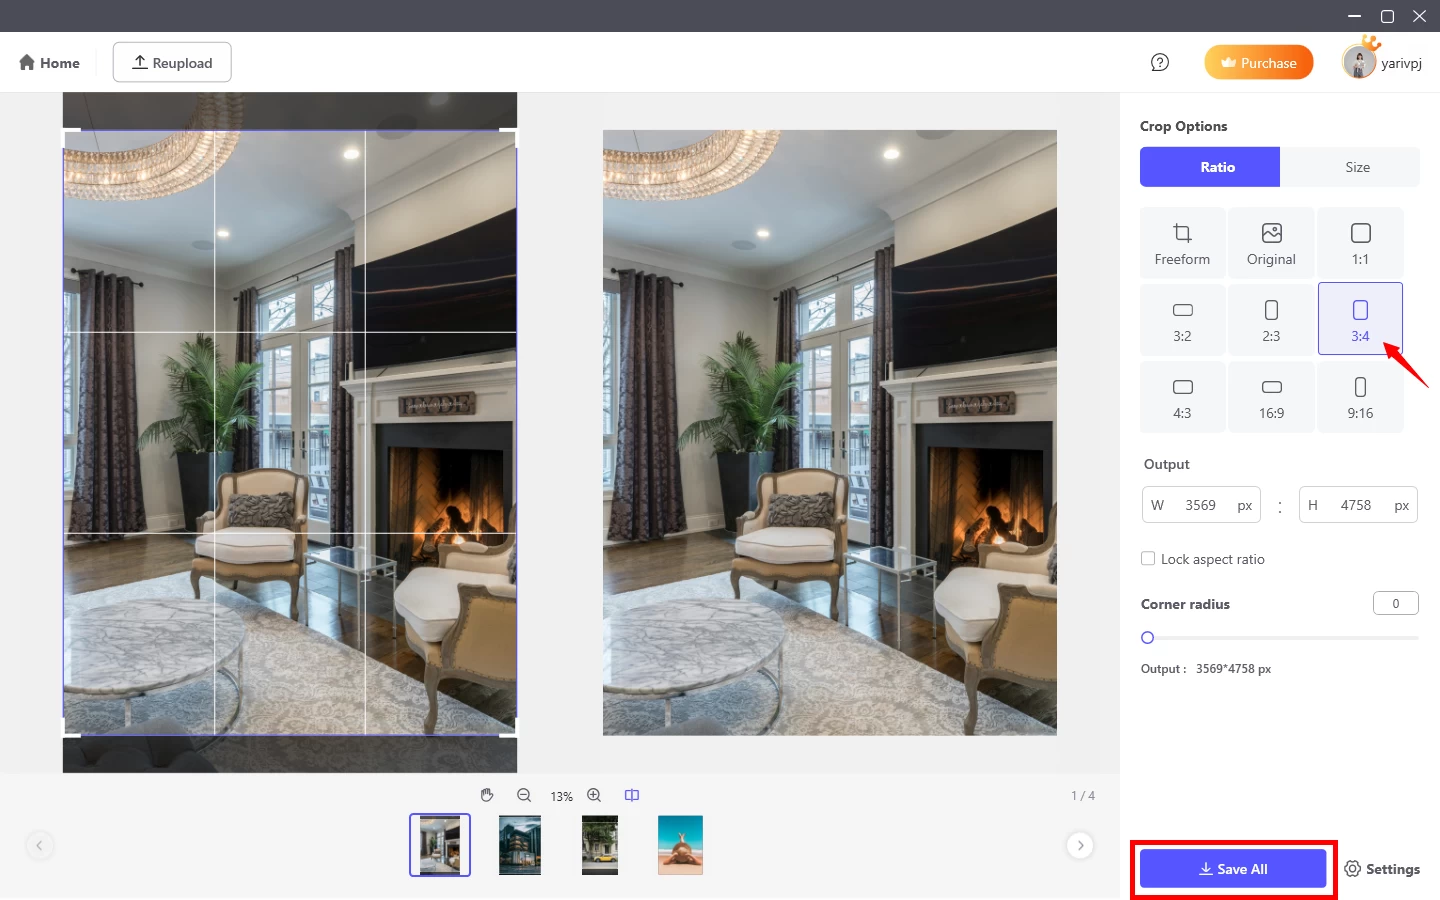
- Click Save All to save images.
![picwish bulk crop save all]()
4.10. Screenshot OCR
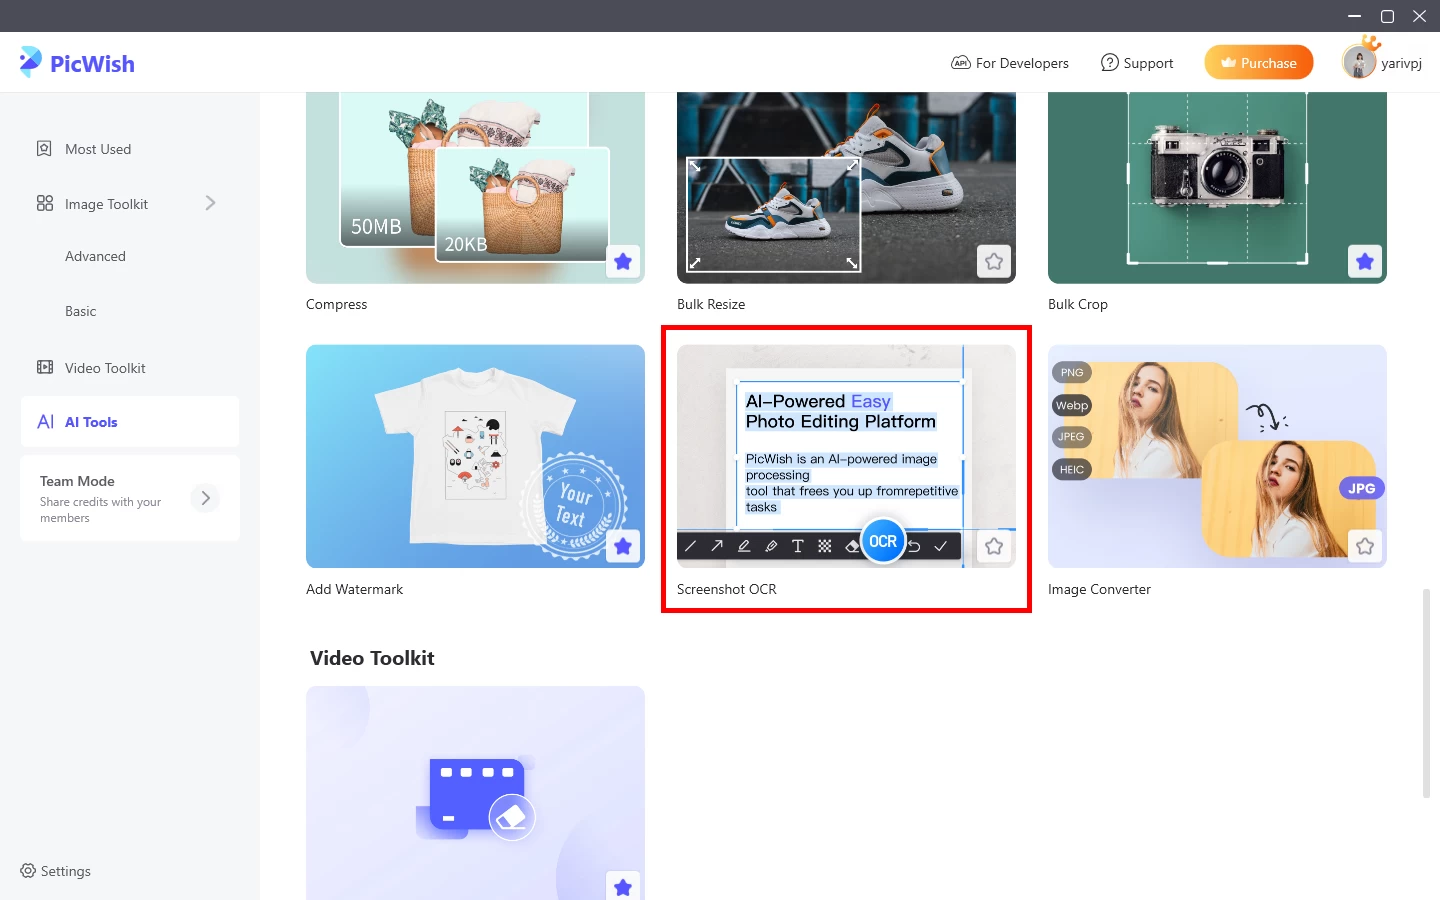
One-click screenshot, conveniently capture any area on the screen, and quickly and accurately extract the text in the picture.
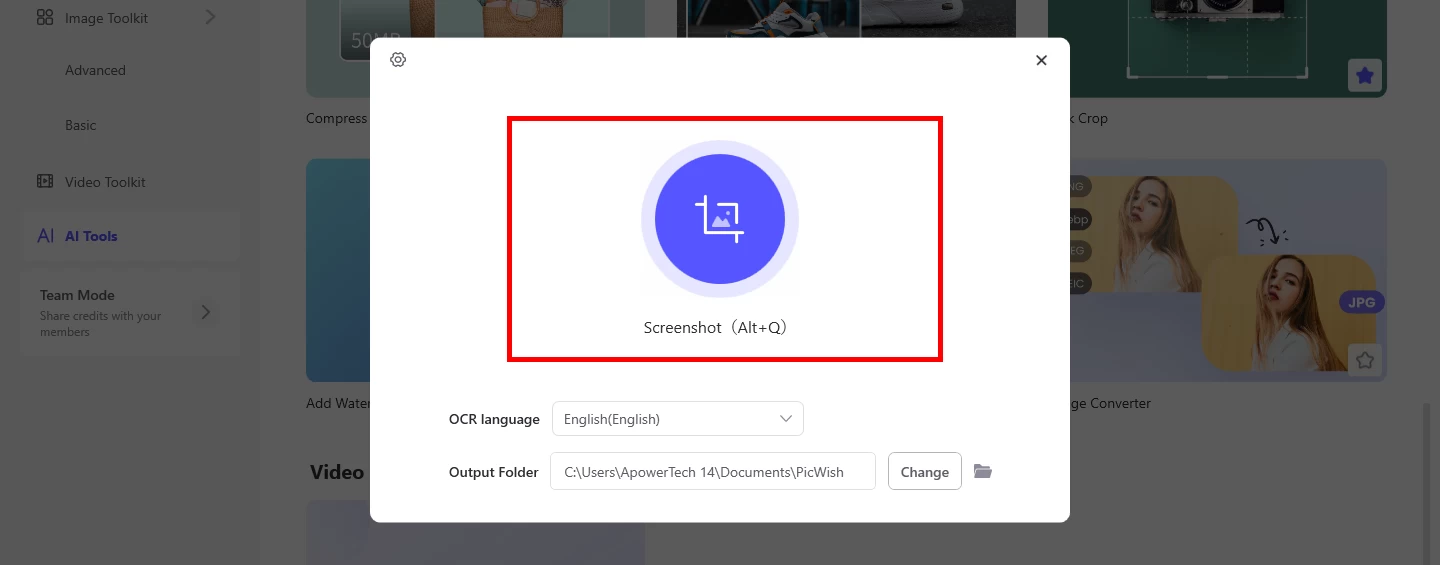
- Click Screenshot OCR from Toolkit and set the language and output folder.
![picwish ocr screenshot tool]()
- Click the screenshot button or use the shortcut key, and drag the box to select the area you need.
![picwish ocr screenshot button]()
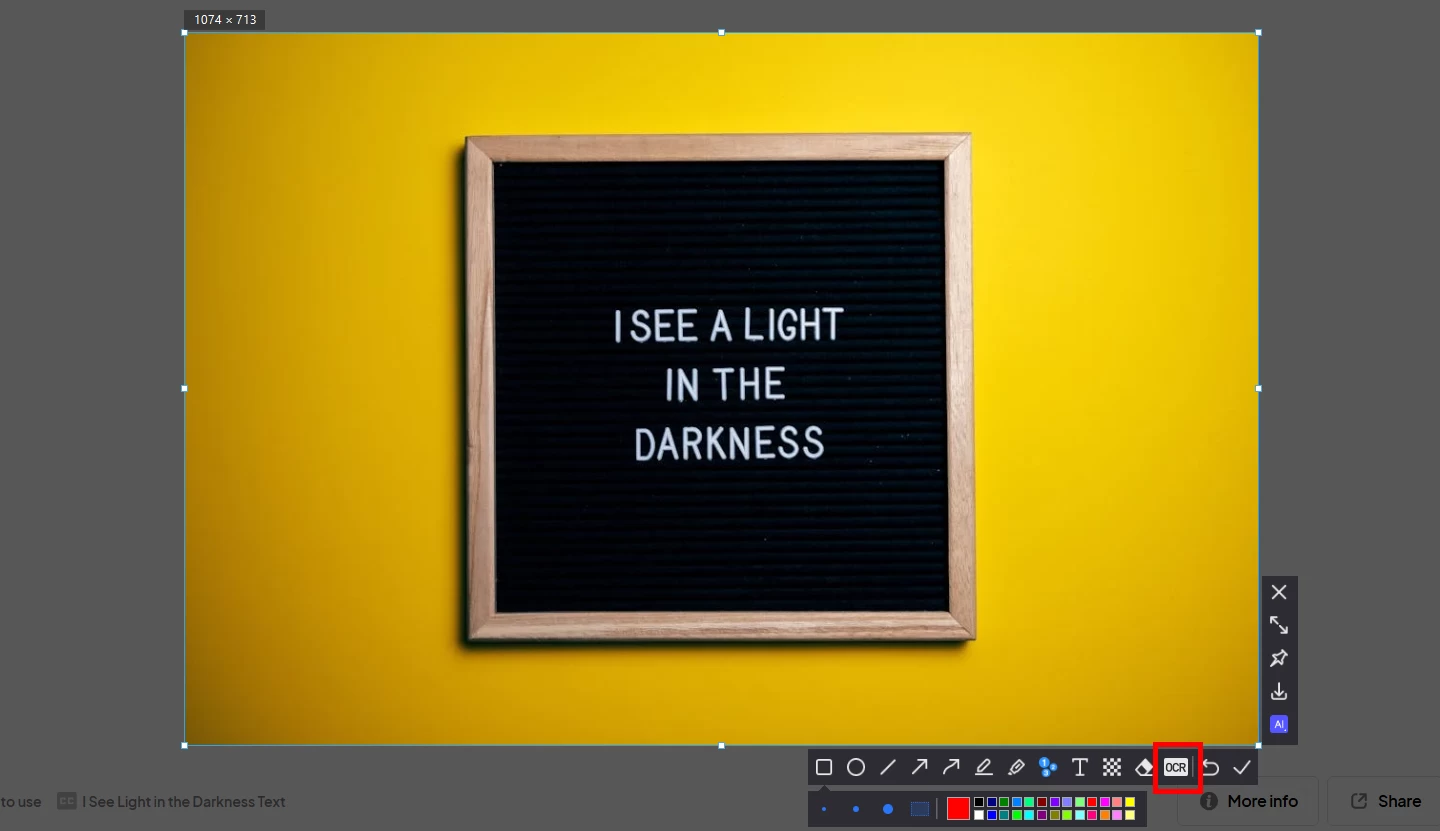
- Click OCR. It can scan the text and converts it into editable text.
![picwish ocr screenshot text]()
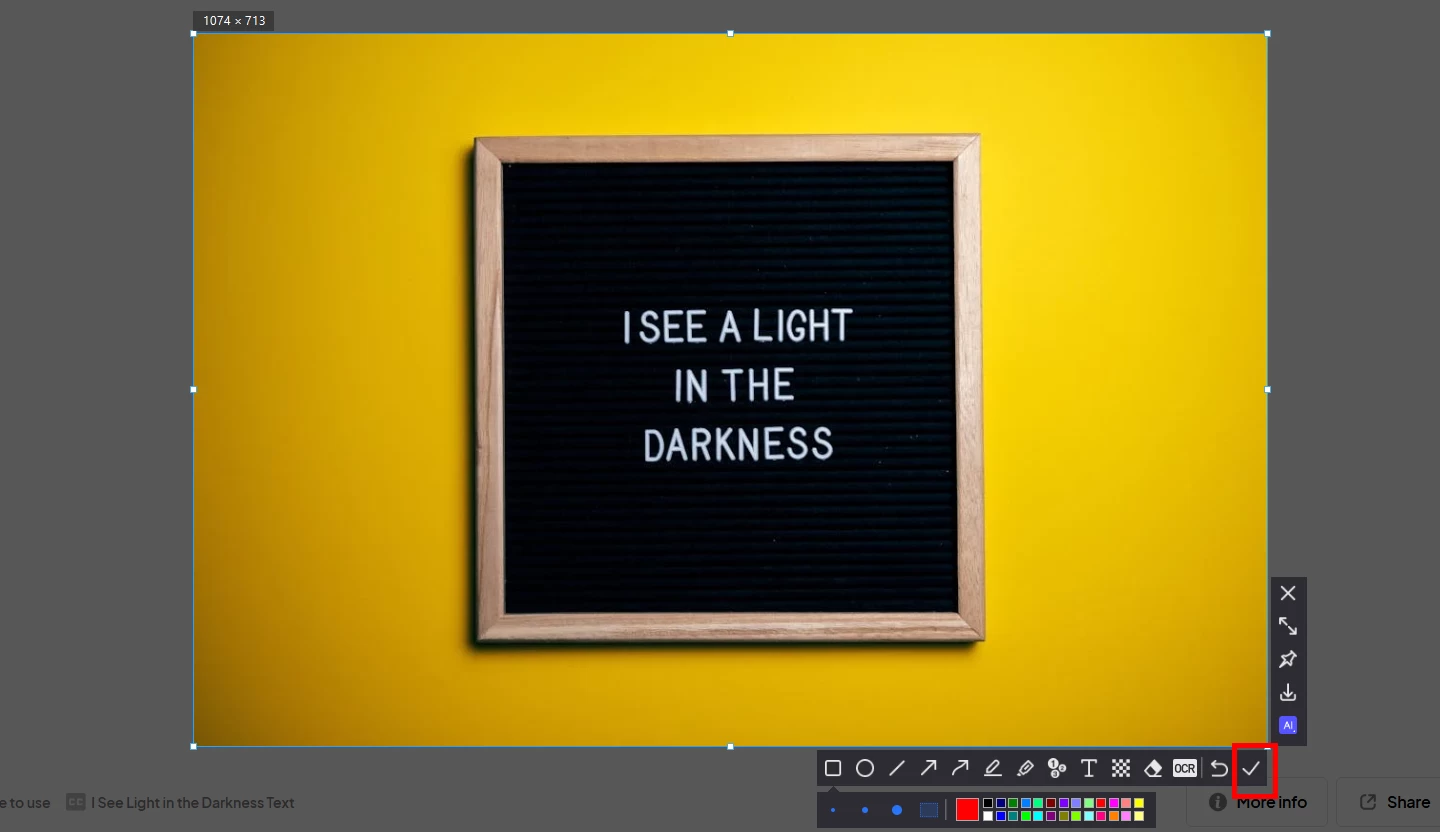
- You can start editing and click “√” to paste to clipboard or click the download button to save the image.
![picwish ocr screenshot done]()
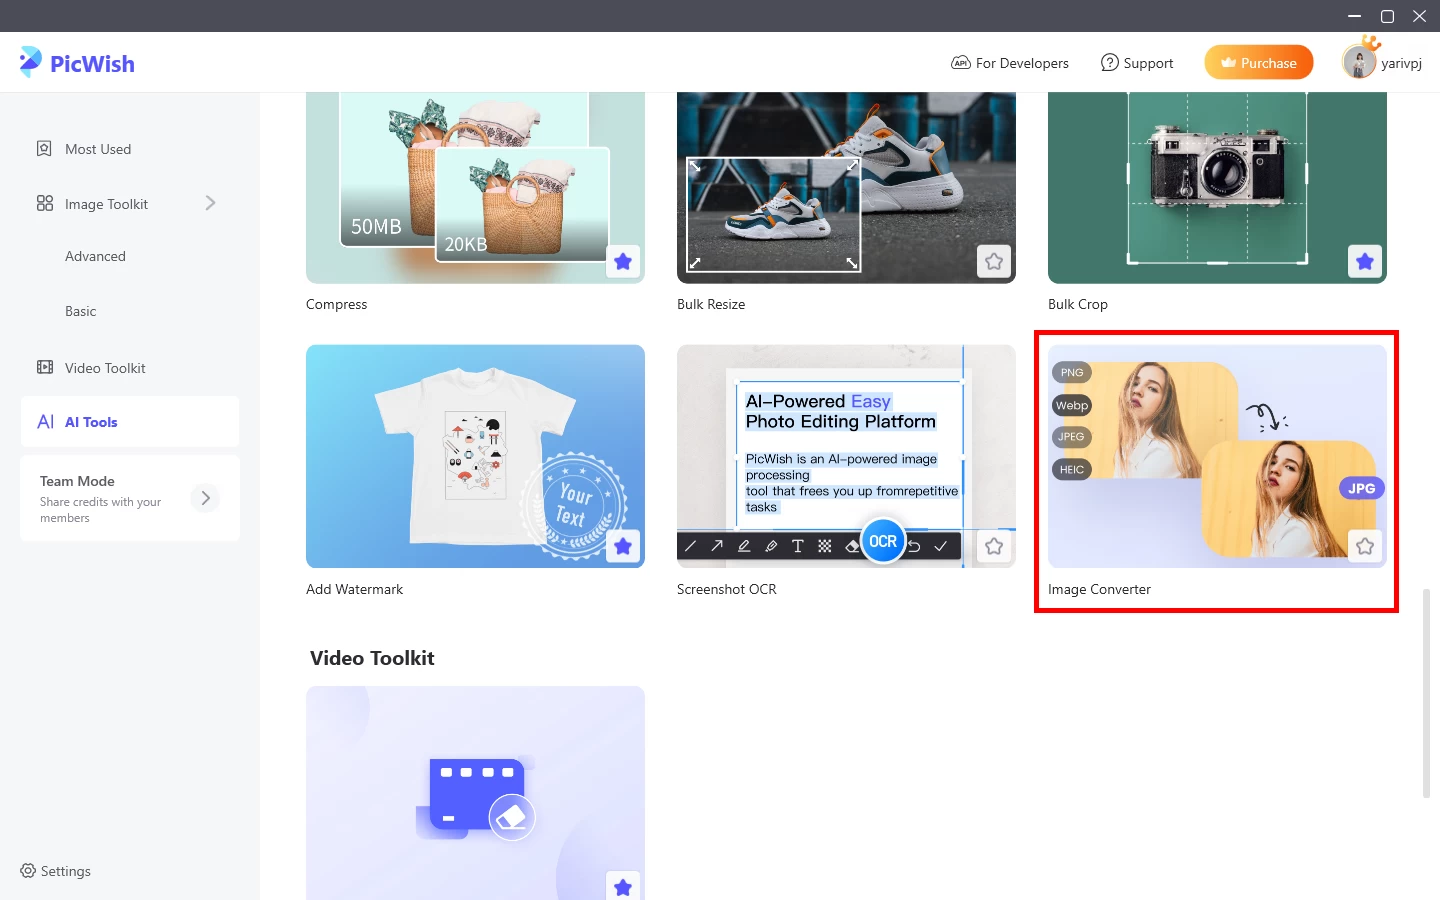
4.11. Image Converter
With PicWish, you can easily convert your Webp, PNG, JPEG, HEIC photos into JPG files.
- Click Image Converter from Toolkit. There is no limit on the number of imported files, but preview is not supported.
![picwish image converter tool]()
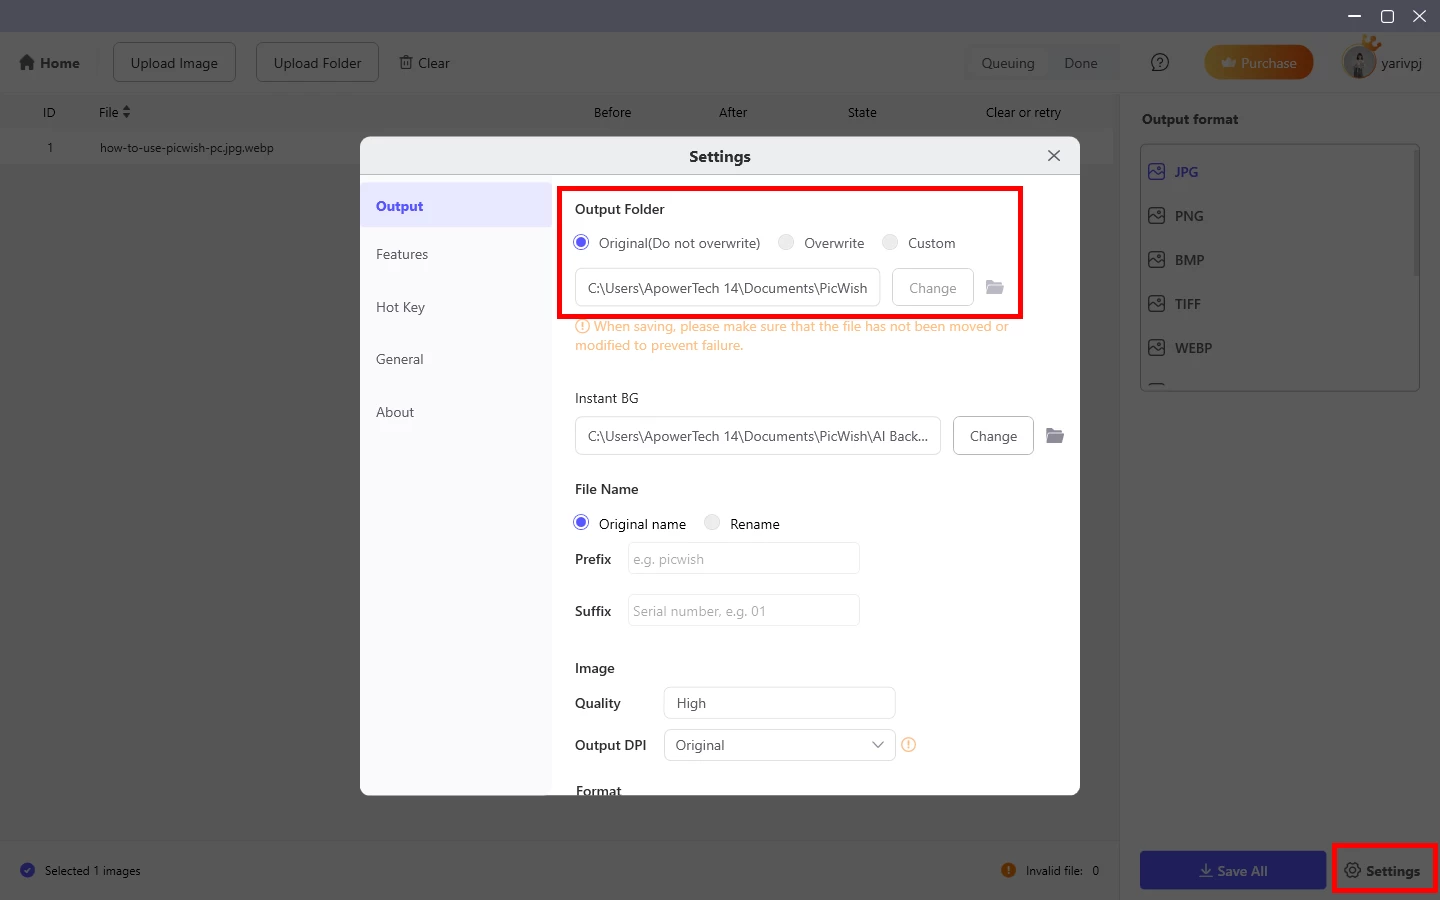
- Go to Settings to set the output folder.
![picwish image converter settings]()
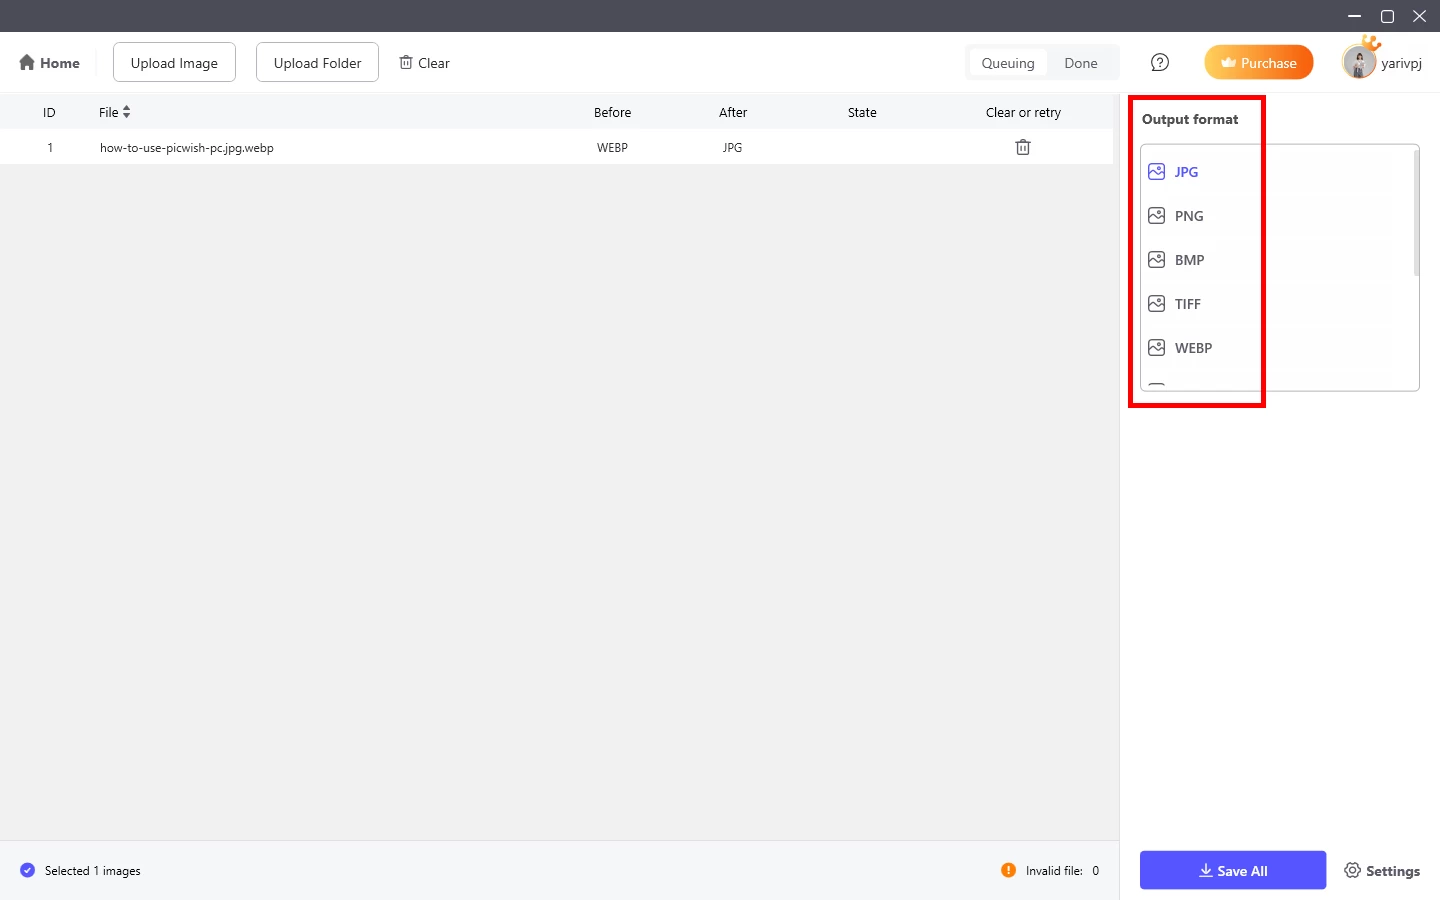
- Select the format from JPG, PNG, BMP, TIFF, WEBP and then Save All.
![]()
5. Contact Us
5.1. FAQ
Here are the frequently asked questions of PicWish.
5.2. Feedback
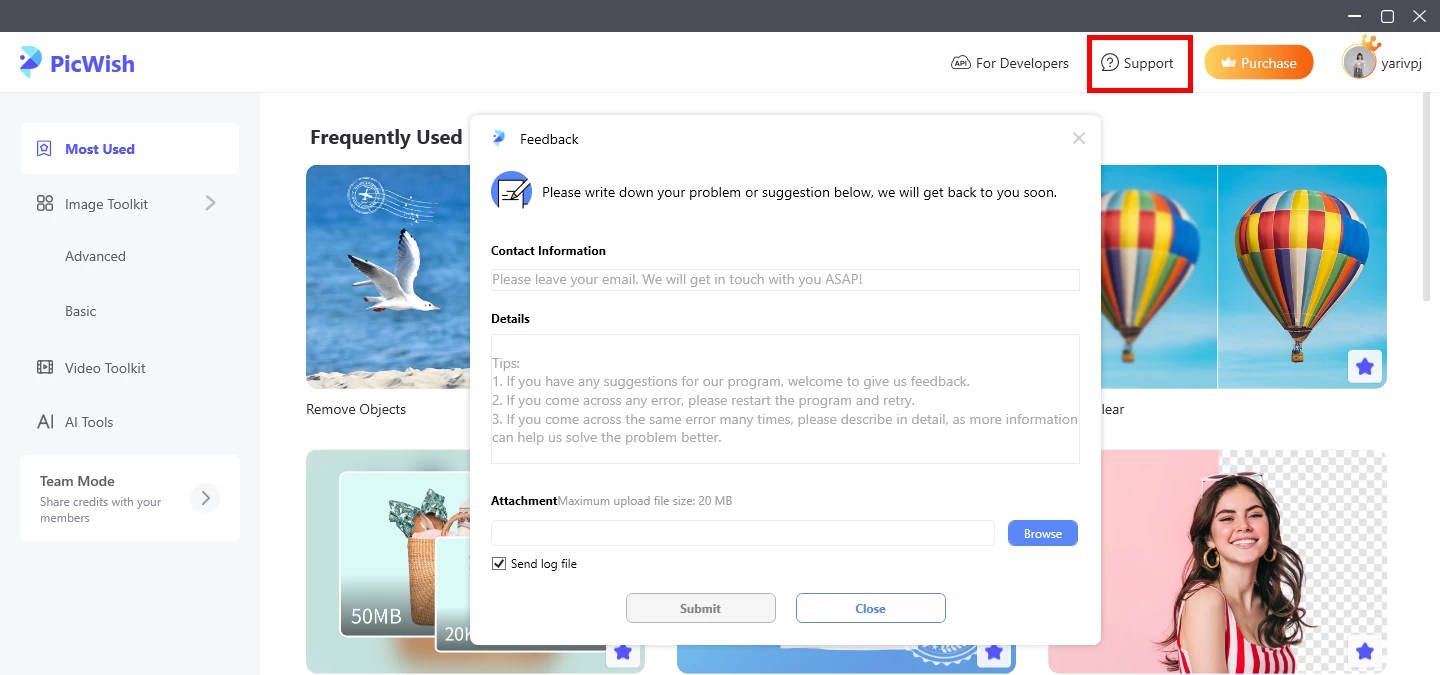
- Open PicWish on PC and click Support > Feedback in the upper right corner.
![picwish ui support feedback]()
- Any questions are appreciated.
5.3. Live chat
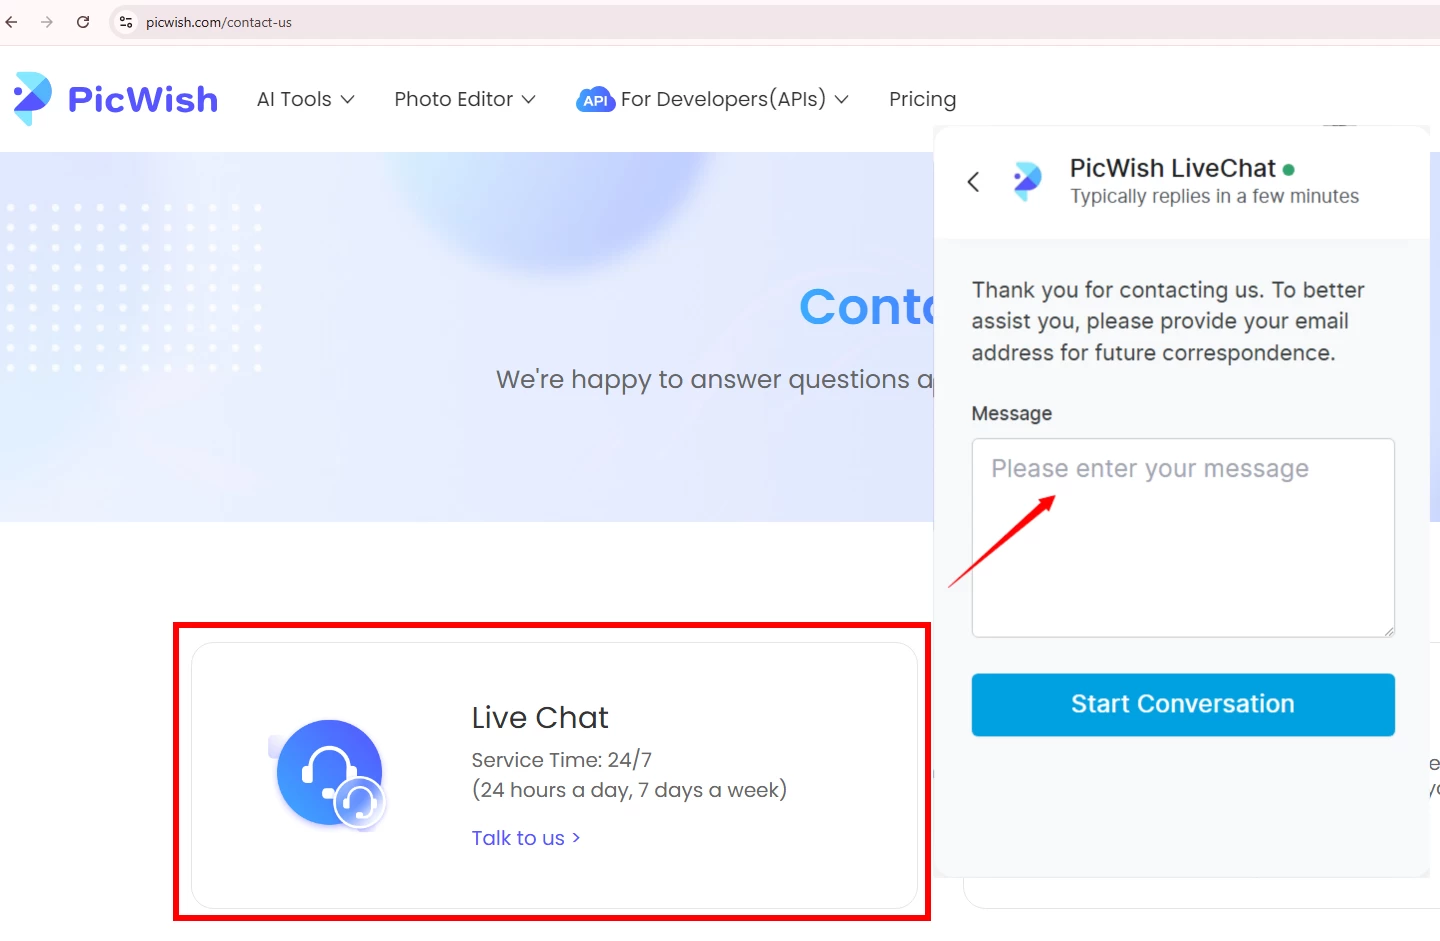
- You can also reach out to us from the live chat.
![picwish contact live chat]()

